I. Introduction
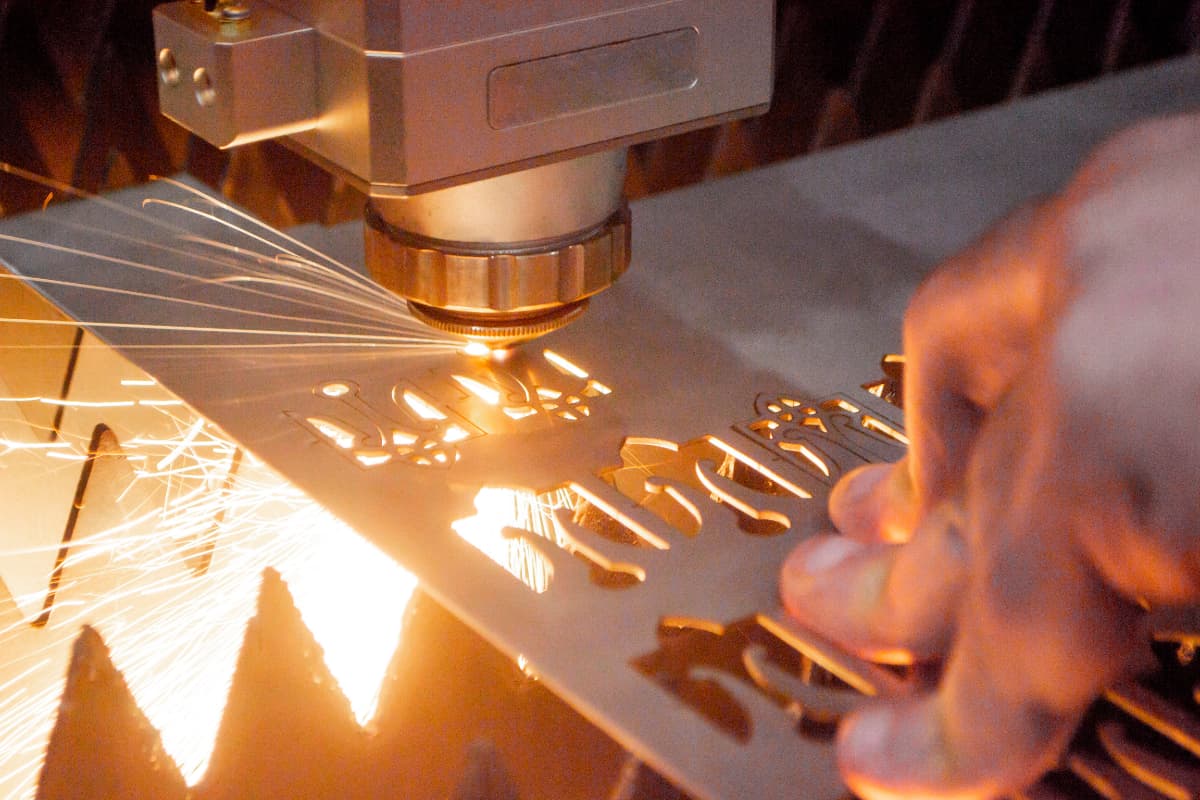
Laser cutting technology has revolutionized the manufacturing and metal processing industries with its precision, efficiency, and versatility. This advanced method uses a high-powered laser beam to cut or engrave materials with exceptional accuracy.
The laser beam is directed through optics and computer numerical control (CNC) to either melt, burn, vaporize, or blow away material, resulting in a high-quality surface finish. Unlike traditional mechanical cutting methods, laser cutting offers non-contact processing, which minimizes material deformation and tool wear, making it ideal for intricate designs and detailed work.
For readers new to this field, you can refer to CNC Laser Cutting Machines Explained to better understand how CNC systems integrate with laser technology to achieve such precision. Additionally, if you’re just starting out and want a hands-on introduction to laser cutting fundamentals, check out Laser Cutting Mastery: Beginner’s Guide for an approachable overview of the essential skills and techniques. Understanding how the X-axis contributes to linear precision and movement control is equally important — see The X-Axis in Laser Cutting Machines for a concise explanation of this critical component.
This laser cutting machine tutorial aims to provide a comprehensive guide for anyone interested in utilizing laser cutting technology, be it a seasoned professional or a curious beginner.
By delving into the detailed setup procedures, software and design preparation, material selection, and cutting processes, you will be equipped with the knowledge to effectively utilize laser cutting machines for various applications, enhancing their skills and productivity.
II. Preparing for Laser Cutting
Before operating a laser cutting machine, thorough preparation is essential to ensure optimal performance and safety.
Unboxing and Initial Setup
Unboxing:
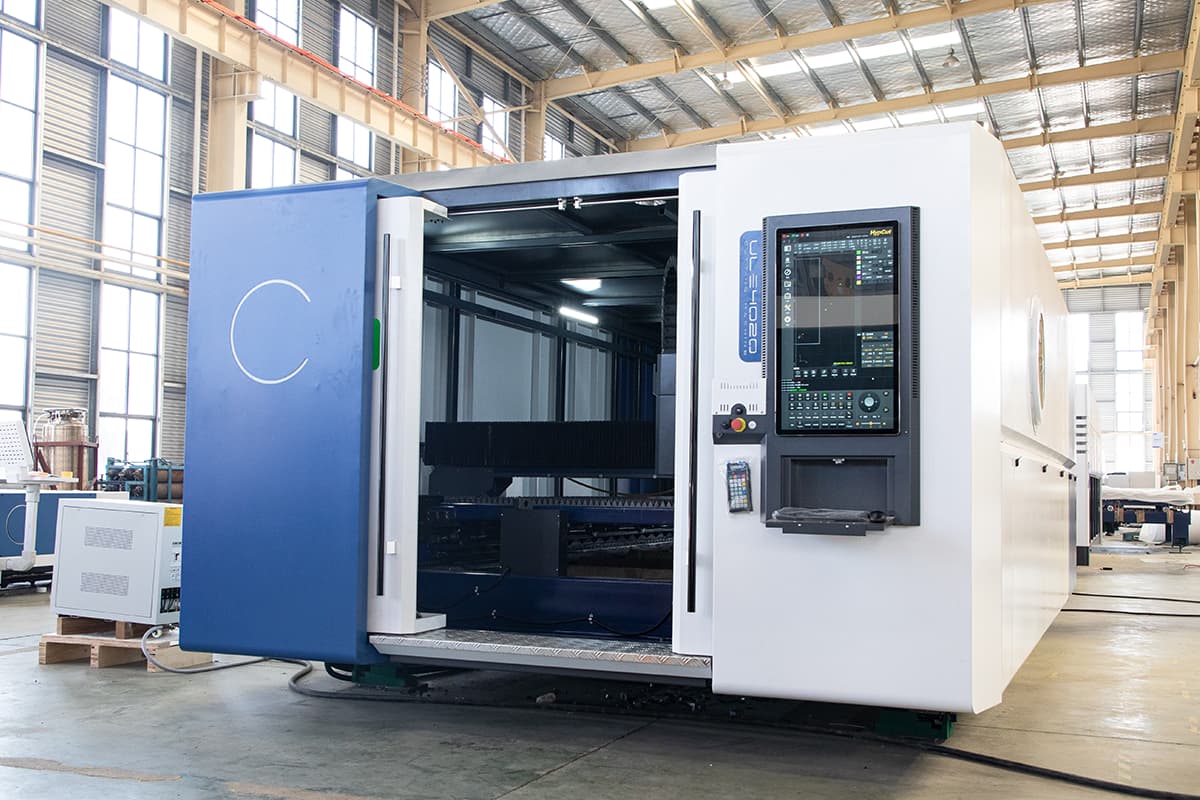
Carefully unbox your laser cutting machine, ensuring that all components are accounted for as per the manufacturer's checklist. Common components include the laser cutting machine, power supply, assist gas system, cooling system, CNC controller, and any additional accessories or tools. Inspect each component for any signs of damage that may have occurred during shipping. If you’re unsure about the structure and function of each component, reading CNC Laser Cutting Machines Explained provides a detailed breakdown of how each part contributes to the overall cutting process.
To further understand the system’s structure and perhaps even customize your model, refer to the detailed breakdown in How to Build a Laser Cutting Machine, which covers mechanical assembly and alignment principles.
Placement:
Choose a stable, level surface to place your laser cutting machine. Ensure that there is adequate space around the machine for ventilation and easy access to all sides for maintenance and operation.
Install the machine on a non-flammable, sturdy workbench that can support its weight and absorb vibrations during operation.
Scenario Example: In a small workshop, space can be limited, so consider a compact model or a mobile workbench that can be moved as needed. In an industrial setting, ensure there is sufficient space for larger models and additional equipment like a fume extractor.
Connecting Components:
Connect the power supply to the machine, ensuring that the voltage and power specifications match the requirements of your laser cutter. Attach the assist gas system and cooling system according to the manufacturer's instructions. Ensure all connections are secure and leak-free.
Cooling Systems: There are typically two types of cooling systems—water-cooled and air-cooled. Water-cooled systems require a chiller unit, which must be filled with distilled water and connected securely to the laser cutter. Air-cooled systems use fans and require proper ventilation.
Connect the CNC controller to the machine. Familiarize yourself with the control panel and interface.
Software Installation:
Install the provided software on your computer. This software typically includes the CNC control program and design software. Verify that your computer meets the software's system requirements and that all drivers are correctly installed.
For more insight into choosing and configuring professional software for your cutting needs, explore our Guide to Laser Cutting Software.
Overview of Popular Laser Cutting Software
- CorelDRAW: Known for its intuitive interface and powerful vector design capabilities, CorelDRAW is a popular choice for creating intricate designs suitable for laser cutting.
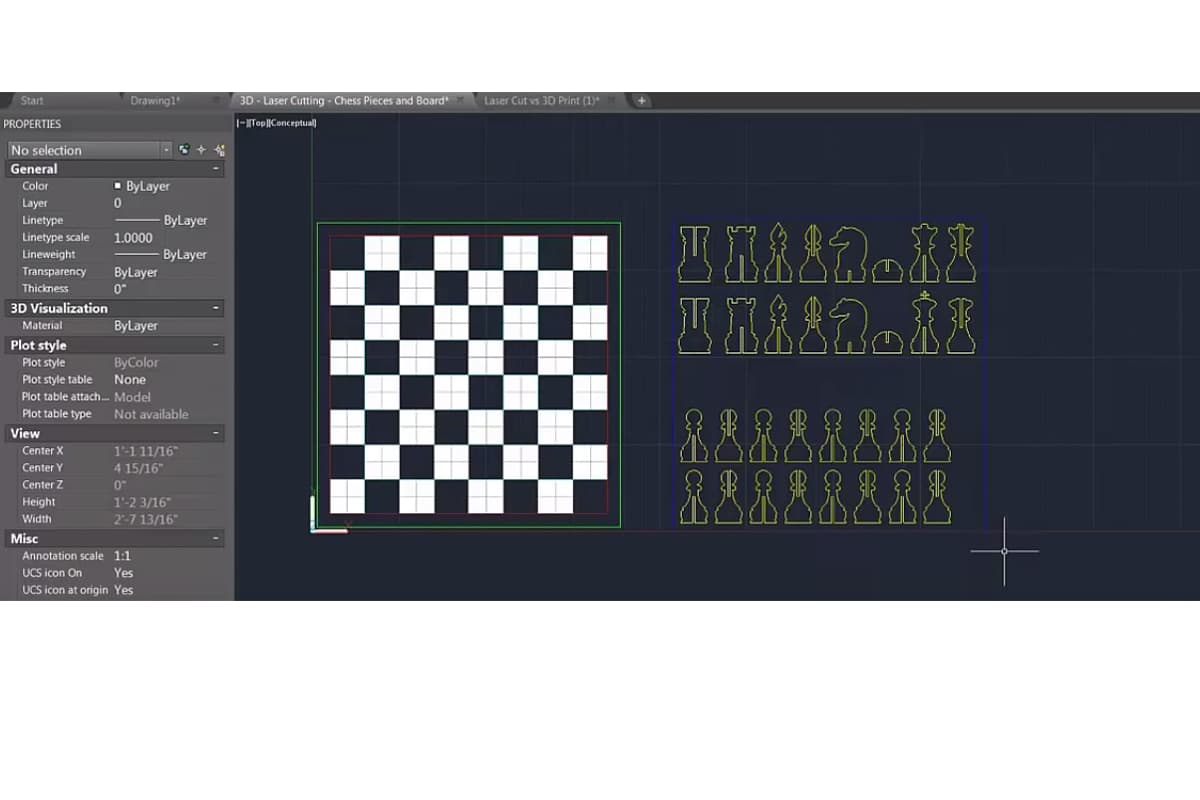
- AutoCAD: Widely used in industrial applications, AutoCAD provides robust tools for creating detailed and precise engineering drawings that can be seamlessly integrated with laser cutting machines.
- LightBurn: This all-in-one software offers design, layout, editing, and control functions tailored specifically for laser cutting. It is compatible with a wide range of machines and is known for its user-friendly features.
Basic Design Principles and File Formats
- Vector Graphics: Vector graphics are essential for laser cutting as the machine follows the paths defined by vector lines. Ensure designs are created using vector formats such as DXF, SVG, or AI.
- Design Parameters: Important design considerations include line thickness (for clarity), grouping elements logically, and ensuring there are no unnecessary overlaps or gaps that could affect the cutting process.
- File Formats: Ensure compatibility by saving and exporting files in the correct format for your machine. Commonly used formats include DXF for detailed engineering designs, and SVG for more artistic and decorative cuts.
Once your machine is securely placed and connected, the next step is to focus on safety precautions.
Safety Precautions
- Personal Protective Equipment (PPE): Operators must wear suitable PPE, including safety glasses designed to protect against laser radiation, heat-resistant gloves to handle materials post-cutting, and protective clothing to shield from potential burns or sparks.
- Regular Maintenance and Safety Checks: Perform routine maintenance on the laser cutting machine to ensure it is in proper working condition. Check components such as the laser tube, mirrors, and lenses for wear and alignment. Functional safety systems like emergency stop buttons, interlocks, and ventilation systems should be tested regularly to ensure they are operational.
- Proper Ventilation and Workspace Setup: Laser cutting produces fumes and particles that can be hazardous if inhaled. Install an efficient ventilation system to remove these contaminants from the workspace. The cutting area should be well-lit, free from obstructions, and have clearly marked emergency exits.
- Fire Safety: Keep a fire extinguisher rated for electrical and chemical fires nearby. Avoid cutting flammable materials and never leave the machine unattended while it is operating.
- Machine Safety Features: Familiarize yourself with the machine's safety features, such as emergency stop buttons, interlocks, and protective covers. Regularly test these features to ensure they are functioning correctly.
Calibrating the Machine for Precision
Calibration is essential to ensure that your laser cutting machine operates with the highest precision and accuracy.
- Laser Alignment:
- Check the alignment of the laser beam path. Misalignment can cause poor cut quality and damage to the machine. Use alignment tools provided by the manufacturer to adjust the mirrors or optical components.
- Perform a test cut on a scrap piece of material to verify the alignment.
- Focus Adjustment:
- Adjust the focal length of the laser to ensure it is accurately focused on the material's surface. The correct focal distance is crucial for clean cuts and engravings.
- Focus Gauge: This tool helps set the laser at the correct distance from the material. Some machines have an auto-focus feature to simplify this process.
- Bed Leveling:
- Ensure that the work table or bed is level. An uneven bed can result in inconsistent cut depths and quality.
- Use a leveling tool or the machine's built-in leveling system to adjust the bed.
- Speed and Power Settings:
- Calibrate the machine's speed and power settings based on the material being cut. These settings can vary widely depending on the material type and thickness.
- Example: Cutting through thick acrylic requires a slower speed and higher power setting than cutting through thin cardboard.
- Refer to the manufacturer's guidelines or perform test cuts to determine the optimal settings for your specific material. You can often find detailed specifications and parameter charts in our product Brochures.
- Software Calibration:
- Calibrate the machine's software settings, including the X, Y, and Z axis movements. Ensure that the CNC controller accurately interprets the design files and translates them into precise movements.
- Perform a test run with a simple design to verify the calibration.
Choosing Materials
Suitable Materials for Laser Cutting
Understanding how various materials respond to different laser sources can greatly improve your cutting outcomes. You can explore more material compatibility details through CNC Laser Cutting Machines Explained.
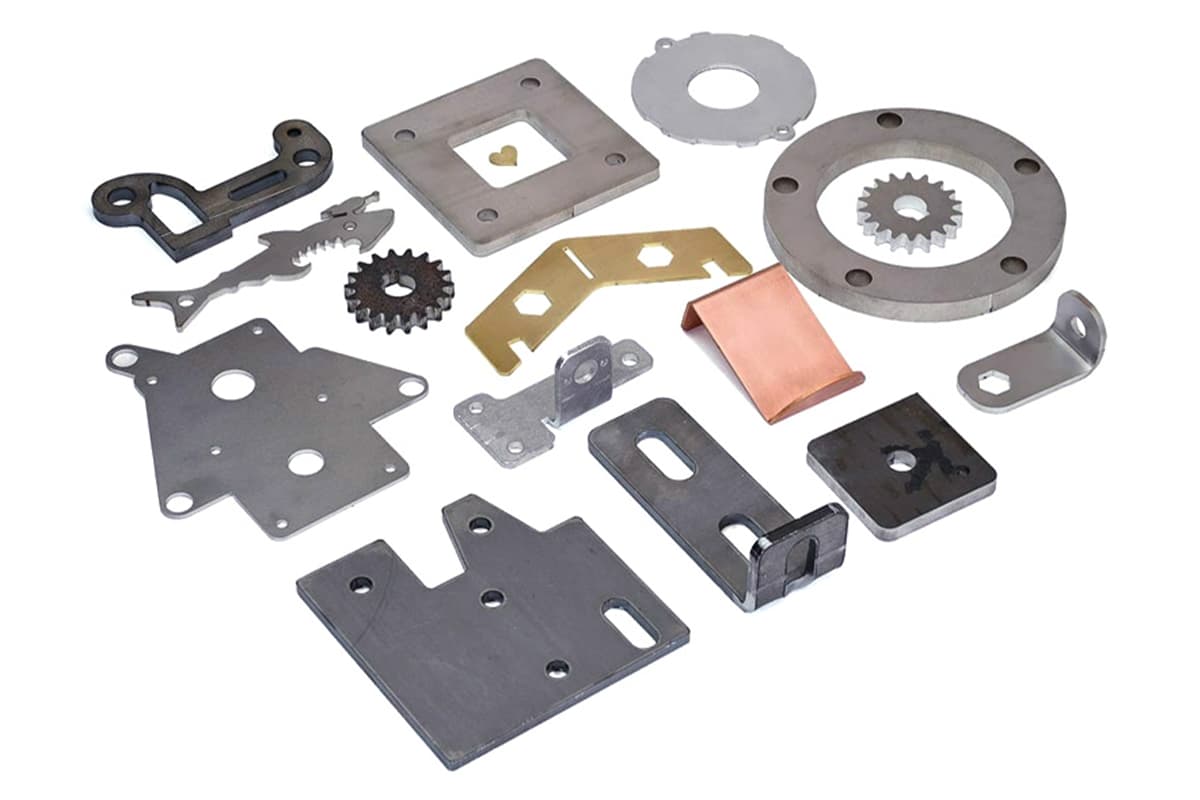
- Metals: Metal materials, particularly stainless steel, carbon steel, aluminum, brass, and copper, are commonly cut using fiber lasers due to their high-intensity beam. Metals generally require significant power to cut through, especially for thicker sections.
- Non-metals: CO2 lasers are best suited for cutting non-metal materials. This category includes plastics (acrylic, polycarbonate), wood (plywood, MDF), paper, fabric, and leather. These materials generally have lower melting points and thermal conductivity, making them ideal for the CO2 laser’s wavelength.
- Composite Materials: These materials, such as fiberglass and carbon fiber reinforced polymers, can also be laser cut. However, operators should be cautious of potential hazardous fumes released during the cutting process and ensure proper ventilation is in place.
Material Thickness and Laser Compatibility
- Thin Materials: Materials less than 5mm in thickness are generally easier to cut and produce finer details. The precision of the laser allows for intricate designs and accurate cuts without significant thermal distortion.
- Medium Thickness Materials: For materials ranging from 5mm to 10mm, moderate laser power and speed settings are typical. These materials include medium-gauge metals and thicker plastics or woods. Proper focus and beam alignment are essential to minimize edge imperfections.
- Thick Materials: Materials over 10mm thick pose greater challenges and require higher power settings and slower speeds. This includes heavy-gauge metals and thick wooden planks. Advanced cooling techniques and multiple-passes might be required to achieve clean cuts without substantial edge burning.
Effects of Material Properties
- Reflectivity: Highly reflective materials (like copper, aluminum) can reflect the laser beam away from the surface, reducing cutting efficiency and potentially damaging the laser. Specialized techniques, such as using anti-reflective coatings or adjusting laser parameters, help mitigate these effects.
- Thermal Conductivity: Materials with high thermal conductivity (like metals) disperse heat rapidly, requiring more focused and intense laser power to achieve clean cuts. Non-metals, with lower thermal conductivity, are less demanding on the laser’s power and allow for more controlled cuts.
- Melting Point and Vaporization: The melting and vaporization temperatures of materials influence how they interact with the laser. Materials that melt quickly under the laser beam produce smooth cuts, while those that vaporize may release gases or create rougher edges. Operators should adjust the laser’s speed and power to accommodate these reactions.
Specialized Material Considerations
- Engraving vs. Cutting: Some materials are better suited for engraving rather than cutting. For example, glass and ceramics can be precisely engraved with CO2 lasers but cutting might lead to cracks and fractures.
- Material Coatings: The presence of coatings (painted metals, anodized aluminum) can alter the cutting process. Adjustments in the laser settings often ensure the coating is cut or marked without damaging the base material.
- Safety and Environmental Impact: Certain materials can release hazardous fumes or particulates when laser cut. This includes PVC and some composite materials. Ensure that appropriate ventilation and filtration systems are in place and check material safety data sheets (MSDS) to understand potential hazards.
III. Operating a Laser Cutting Machine
Basic Operation Steps
Before diving into the laser cutting process, one must familiarize themselves with the primary operational steps. These steps serve as a guideline to ensure that the machine operates correctly and efficiently from start to finish.
Powering on the Machine
- Initialization: Begin by powering on the laser cutting machine. This generally involves turning on the main power switch, followed by activating any secondary power sources or control panels associated with the machine.
- System Check: Conduct an initial system check to ensure all components are functioning correctly. This includes verifying the status of the laser source, cooling systems, and safety features such as emergency stops and interlocks.
Uploading Design Files
- File Preparation: Prepare your design files using compatible software programs (such as CorelDRAW, AutoCAD) ensuring they are in the correct format for your specific machine (commonly DXF, SVG, or other vector file formats).
- Transfer Files: Upload the design files to the laser cutting machine’s control system. This can be done via USB, network connection, or directly from the design software if it supports machine integration.
- File Verification: Once the design is uploaded, verify the file on the machine's interface to ensure it has transferred correctly and is ready for processing. Adjust any machine-specific parameters if needed.
Aligning the Material on the Work Table
- Securing the Material: Place the material on the work table ensuring it is flat and properly aligned. Use fixtures or clamps to secure the material, preventing it from shifting during the cutting process.
- Alignment Tools: Utilize the machine's alignment tools, such as a laser pointer or mechanical guides, to accurately position the material according to the design specifications.
- Focus Adjustment: Adjust the focus of the laser head to the appropriate height for the material being used, ensuring optimal cutting precision.
Performing a Test Run
Before executing the final cut, it's advisable to perform a test run:
- Dry Run: Conduct a dry run with the laser off to ensure that the machine moves along the intended path without any obstructions or errors. This helps to verify the setup and avoid potential issues.
- Test Cut: Use a scrap piece of the same material for a test cut. This aids in fine-tuning the parameters and ensuring that the machine settings are correct.
- Adjustments: Based on the test run results, make any necessary adjustments to the speed, power, and focus settings. Fine-tuning these parameters ensures the final cut will be precise and clean.
Executing the Final Cut
Once all preparations and tests are complete, proceed with the final cutting:
Initiate Cut: Start the cutting process via the machine’s control interface. Keep a close eye on the operation to ensure everything runs smoothly.
Monitoring: Continuously monitor the machine during the cutting process. Be prepared to pause or stop the machine if any issues arise.
Post-Cut Handling:
- Removing Material:
- Unclamping: Remove any clamps or weights securing the material.
- Careful Removal: Gently lift the material from the work table to avoid damaging the cut edges.
- Cleaning the Workspace:
- Debris Removal: Remove all debris, offcuts, and residue from the work table to maintain a clean environment for future cuts.
- Lens and Mirrors: Inspect and clean the laser lens and mirrors again, as debris from the cutting process can accumulate and affect performance.
- Finished Product:
- Edge Quality: Assess the edges of the cut material. If necessary, use fine sandpaper or a deburring tool to smooth any rough edges.
- Assembly and Finishing: Assemble the cut pieces as required for your project. Apply any additional finishing touches, such as painting or coating, if needed.
- Machine Maintenance:
- Routine Checks: Perform routine maintenance checks, such as inspecting belts, checking for loose components, and ensuring the cooling system is functioning correctly.
- Software Updates: Regularly update the control software to the latest version to benefit from new features and improvements.
Cutting Techniques
Understanding and applying the right cutting techniques is essential to achieve high-quality cuts and optimized efficiency. Different techniques can be employed depending on the desired outcome, material, and complexity of the design.
Vector Cutting vs. Raster Engraving
- Vector Cutting:
- Application: Used for cutting through materials (cutting out shapes, patterns).
- Process: The laser follows the exact paths or outlines of the vector lines in the design file. Ideal for creating precise shapes and parts.
- Speed and Power: Typically requires higher power and varying speed settings based on material thickness.
- Raster Engraving:
- Application: Used for marking or etching the surface of the material rather than cutting through it.
- Process: The laser moves back and forth like an inkjet printer, engraving along the raster lines (pixels) of the design. Suitable for detailed images, text, and grayscale designs.
- Speed and Power: Generally employs lower power and higher speeds compared to vector cutting to achieve the desired depth of engraving.
Adjusting Speed, Power, and Frequency Settings
- Speed Settings: Determines how fast the laser head moves. Slower speeds generally allow for deeper, more precise cuts, while higher speeds are used for faster, lower-depth engraving.
- Power Settings: Controls the intensity of the laser beam. Higher power is necessary for cutting through thicker or denser materials, while lower power suffices for engraving or cutting thin materials.
- Frequency Settings: This parameter adjusts the pulse rate of the laser in pulses-per-second (Hz). Higher frequencies can produce smoother edges and finer details in certain materials, while lower frequencies may be suitable for thicker cuts.
IV. Troubleshooting and Maintenance
Common Issues
- Beam Misalignment: One of the most common issues is laser beam misalignment. Symptoms include uneven cuts and inconsistent edge quality. Regular alignment checks and adjustments are necessary to keep the beam on track.
- Lens and Mirror Contamination: Dust and residue can accumulate on the lens and mirrors, causing a reduction in beam quality and cutting efficiency. Cleaning these components regularly with appropriate solutions can prevent contamination.
- Inconsistent Cut Quality: This can be caused by various factors such as incorrect focus settings, improper calibration, or worn-out components. Regular monitoring and adjustments of machine settings can help maintain consistent cut quality. For a step-by-step diagnostic approach to identifying and solving these problems, refer to the Laser Cutting Machine Troubleshooting Guide.
- Insufficient Ventilation: Poor ventilation can lead to the accumulation of fumes and particulates, which can damage the machine and pose health hazards. Ensure that the ventilation system is functioning correctly and replace filters as needed.
- Power Fluctuations: Variations in power supply can cause instability in the laser output, leading to inconsistent cuts. Using a stable power source and installing uninterruptible power supplies (UPS) can mitigate this issue.
Regular Maintenance
A structured maintenance routine is vital for the smooth operation and longevity of a laser cutting machine. Here are the key maintenance tasks categorized by frequency:
Daily Maintenance
- Inspection: Conduct a visual inspection of the machine to check for any obvious signs of wear, damage, or misalignment.
- Cleaning: Clean the work surface, focal lens, and mirrors using non-abrasive materials and appropriate cleaning solutions.
- Lubrication: Apply lubrication to moving parts as specified in the machine's manual to reduce wear and tear.
- Ventilation Check: Ensure the ventilation system is operational, and there are no blockages obstructing airflow.
Weekly Maintenance
- System Diagnostics: Run system diagnostics to check the status of the laser tube, power supply, and other critical components.
- Alignment Check: Verify the alignment of the laser beam and adjust the mirrors and lens as necessary.
- Safety Systems Test: Test emergency stops, interlocks, and other safety mechanisms to ensure they are functioning correctly.
Monthly Maintenance
- Full Calibration: Perform a thorough calibration of the entire system, including the laser beam alignment and focus calibration.
- Filter Replacement: Replace filters in the ventilation system to maintain efficient airflow and prevent particles from contaminating the work area.
- Software Updates: Check for and install any software updates that may improve machine performance or add new features.
V. Safety Guidelines
1. The Ultimate Personal Protective Equipment (PPE) Guide
(1) The Science of Choosing Laser Safety Glasses
A deadly beginner’s misconception is thinking, “As long as I’m wearing safety glasses, I’m protected.” This assumption is dangerously wrong. Laser damage to the eyes is irreversible, and the most insidious aspect is that the harmful high-energy beams are often invisible to the naked eye.
The only scientifically sound criterion for selecting safety glasses is whether the lens filter can precisely block the specific wavelength of your laser.
1) CO₂ lasers: Operate at 10,600 nm (far infrared). You need glasses specifically engineered for this wavelength.
2) Fiber lasers: Typically operate around 1064 nm (near infrared).
3) Diode lasers: Commonly operate in the blue light range at 450–455 nm.
When buying laser glasses, you must check two critical specifications:
1) Protection wavelength range: Must explicitly cover your laser’s wavelength. For example, glasses designed for a diode laser will offer zero protection against CO₂ laser radiation.
2) Optical Density (OD): Indicates how much light at a specific wavelength is attenuated by the lens. The higher the OD, the greater the protection. For most consumer and studio-grade lasers, choose OD 5+ or higher.
The color of the glasses isn’t for style—it directly reflects the physics of light filtration. For example, lenses blocking 455 nm blue lasers are usually orange or red because they filter out that part of the spectrum. Never swap glasses between different laser types; doing so is akin to staring directly into the beam. Always purchase professionally certified eyewear (ANSI Z136.1 in the U.S. or CE EN207 in Europe). Think of this as a lifelong investment in your vision.
(2) Fire Safety and Ventilation
1) Ventilation is non-negotiable for your health:
Laser cutting fundamentally works by burning material at high temperatures, producing harmful fumes and particulates. These not only damage your respiratory system but can also corrode and contaminate precision components inside your machine, such as mirrors and rails, shortening its lifespan.
2) Forced fume extraction:
The optimal solution is to use a high-power centrifugal fan that channels fumes directly outdoors via sealed ducting.
3) Air filtration:
If venting outside isn’t possible, you must use a professional-grade air purification/filtration unit with HEPA filters and ample activated carbon. Remember: filters are consumables—once saturated, they stop working and must be replaced regularly based on usage.
(3) Fire Extinguishers – The Bedrock of Laser Safety
Open flames are one of the most common hazards in laser cutting, especially when cutting wood or acrylic.
Every workshop should have a fire extinguisher at hand—the only correct choice for laser safety is a CO₂ (carbon dioxide) unit.
While ABC dry chemical extinguishers can put out a fire, their powder is corrosive and extremely difficult to clean. Using one can cause catastrophic secondary damage by infiltrating your machine’s electronics, optics, and mechanics. CO₂ extinguishers, on the other hand, work by cooling and starving the fire of oxygen without leaving residues, making them the only safe choice for precision equipment.
Place the extinguisher right next to your machine and ensure you know how to operate it before turning the laser on. Most importantly—never leave the machine unattended while it’s running.
2. The “Do Not Cut” Materials Blacklist & Risk Alerts
Before you enthusiastically ask, “Can I cut this with my laser?”, cross-check against this blacklist. Cutting the following materials can at best ruin your machine and at worst be fatal.
(1) Chlorine-containing materials
Includes PVC (polyvinyl chloride), vinyl, synthetic leather, and similar. This is laser cutting’s number one prohibition. Heating PVC releases chlorine gas and hydrogen chloride: the former is a deadly chemical warfare agent causing severe lung damage upon inhalation; the latter is a highly corrosive gas that can permanently destroy all metal components, optical coatings, and mechanical systems of your laser in mere hours—effectively serving as a death sentence for your machine.
(2) Polycarbonate (PC)
A deceptively tricky material—many laser viewing windows are made of PC precisely because it strongly absorbs laser infrared rather than letting it pass. This means it can’t be effectively cut by laser; it will melt, discolor, ignite, and emit toxic smoke.
(3) Leather, ABS, and other hazardous materials
Some materials can technically be cut but pose significant risks and require top-tier ventilation and safety measures.
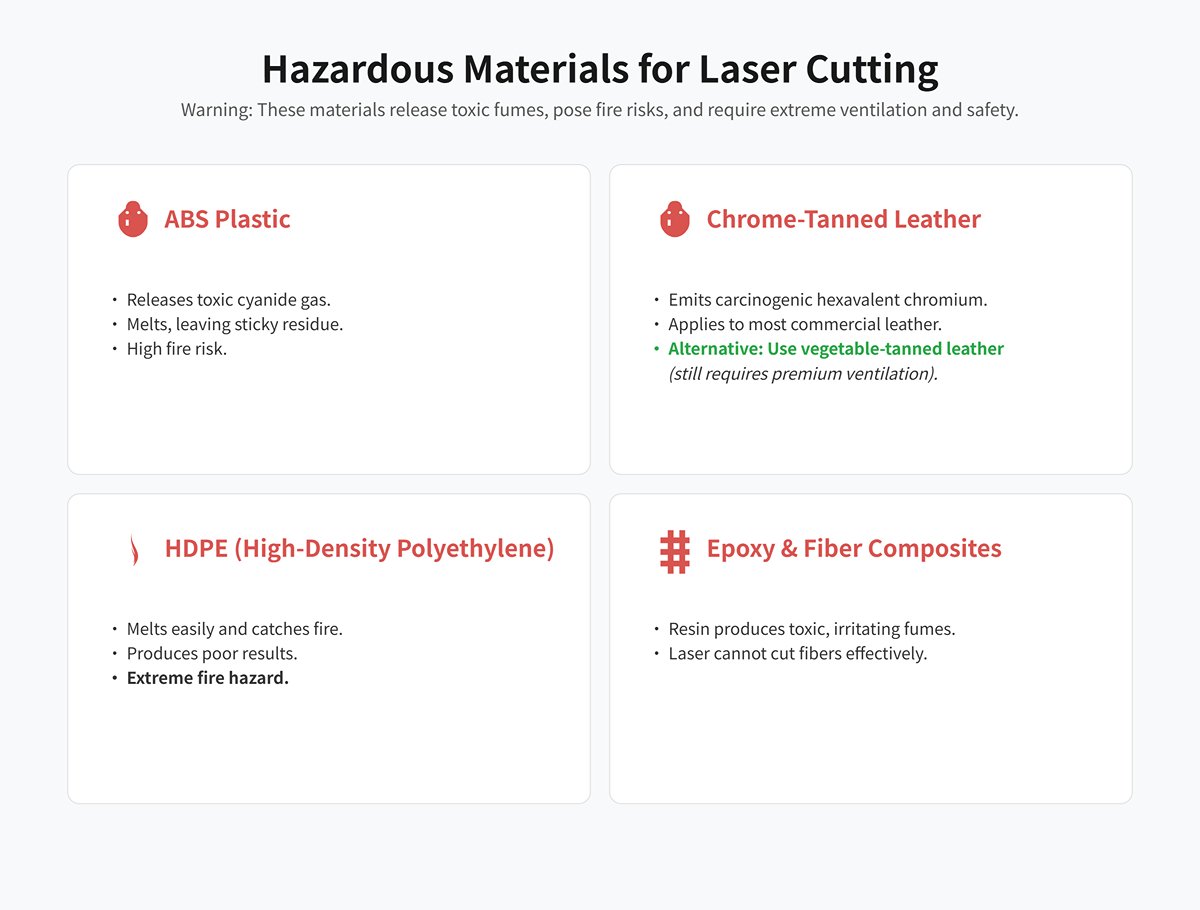
1) ABS plastic:
Releases highly toxic cyanide gas when cut. It also tends to melt rather than vaporize, leaving sticky residues, producing poor-edge quality, and posing a fire risk.
2) Chrome-tanned leather:
The majority of commercially sold leather falls into this category. Cutting it emits toxic hexavalent chromium fumes—a known carcinogen. If you must cut leather, use only vegetable-tanned leather and still employ premium-grade ventilation.
3) HDPE (High-Density Polyethylene):
Prone to melting and catching fire, producing poor results and posing extreme fire hazards.
4) Epoxy resins and fiber composites:
Such as fiberglass or carbon fiber sheets—lasers cannot cut the fibers effectively, while the resin base produces toxic, irritating fumes when burned.
If you’re not 100% certain of a material’s chemical composition, assume it’s unsafe to cut. Always request the Material Safety Data Sheet (MSDS/SDS) from your supplier to confirm its suitability for laser processing. There’s no room for guesswork when it comes to your health and equipment.
3. Pre-Operation Safety Checklist
To make safety second-nature, treat the following checklist as your pre-flight inspection before every session. We strongly recommend printing it out and keeping it next to your machine—let rigorous routine be your most trusted co-pilot.
Pre-Operation Safety Checklist
(1) Daily Essentials
| Inspection Item | Inspection Details |
|---|---|
| Optics | Check for dust or scorch marks on the focus and mirror lenses (contamination absorbs energy, causing overheating and cracking—one of the most common causes of performance loss and component failure). |
| Cooling System (CO₂ models) | Is the water chiller switched on? Is water flow smooth? Is the temperature within the safe range (usually below 30°C)? |
| Exhaust/Filtration System | Is the exhaust fan or air purifier on? Do you hear it running strongly and feel suction? |
| Work Area | Have you cleared all clutter, tools, and flammable materials (scraps, alcohol, tissues) from within one meter of your machine? |
(2) Golden Rules for the Work Area
| Inspection Item | Inspection Details |
|---|---|
| Dedicated Supervision | I commit to never leaving the machine unattended while in operation. |
| Known Material | I confirm that the material’s composition is fully known and it is not on the “Do Not Cut” list. |
| Emergency Readiness | I know exactly where the emergency stop button and fire extinguisher are, and their paths are unobstructed. |
| Proper PPE | I am wearing undamaged, professional safety glasses matched to my laser’s wavelength and power level. |
By respecting these non‑negotiable safety rules, you can truly harness the power of the laser—ensuring every creative journey is safe, enjoyable, and yields outstanding results.
Ⅵ. The Mindset Shift: From Machine Operator to Creative Artisan
1. Cutting a Broader Range of Materials
(1) The Acrylic Challenge
The magic of cutting acrylic lies in achieving edges so smooth and crystal clear, they appear as if flame‑polished. Yet many beginners end up with dull, cloudy, or wavy edges destined for the scrap bin.
The key to achieving that “flame‑polished” finish is precise thermal control—gently melting the cut edge so it flows and levels naturally under surface tension, rather than aggressively vaporizing it.
1) High power, slow speed:
This is the foundation for creating a molten state. Use relatively high power combined with a slower speed to keep sufficient heat in the cut long enough for a smooth melt.
2) Reduce or disable air assist:
Counter‑intuitive yet critical. Strong airflow cools the cut too quickly, causing the molten acrylic to set instantly and introduce micro‑stress cracks that appear cloudy and opaque. For acrylic, the main purpose of air assist is to prevent accidental ignition—not to blast the path clear—so reduce the air pressure to the lowest level necessary to suppress open flame.
3) Choose the right type:
The acrylic’s manufacturing method dictates its behavior. Cast acrylic engraves into a beautiful frosted white with high contrast, making it ideal for detailed engraving. Extruded acrylic has a lower melting point and produces clearer, glossier cut edges, but engraves almost transparently, with less visible effect.
(2) The Art of Leather
Leather—rich in texture and character—presents its own set of challenges and rewards in laser processing.
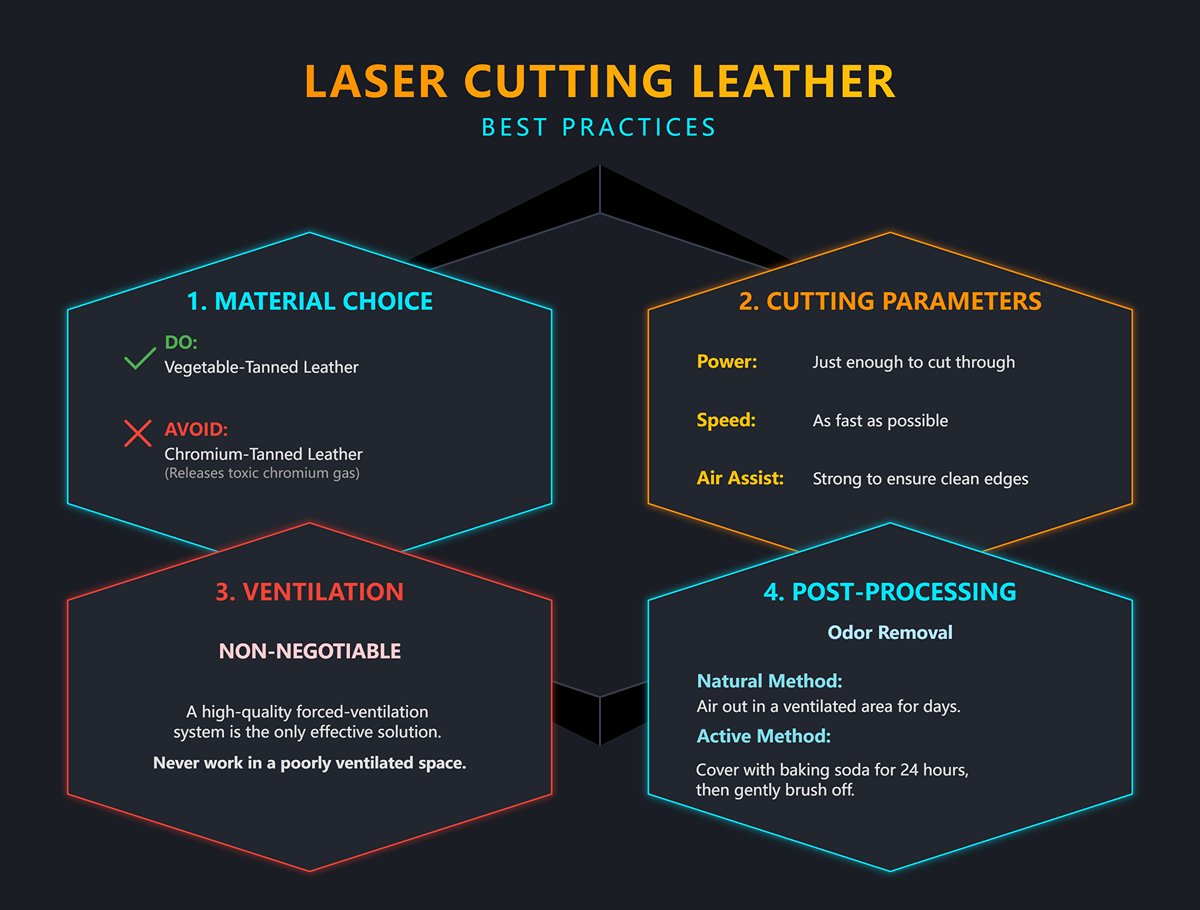
1) Odor management:
The pungent smell during leather cutting is caused by burning proteins. It’s unpleasant and can impact health.
2) Source control:
A high‑quality forced‑ventilation system is the only effective on‑site solution. Never process leather in poorly ventilated spaces.
3) Post‑processing:
Once cutting is complete, leave the piece in a well‑ventilated area for a few days to let the odor dissipate naturally. A more efficient method is to lightly cover the non‑suede surface with baking soda, leave for 24 hours, then gently brush it off—this will significantly absorb residual smells.
4) Balancing parameters:
Leather burns easily. Find the sweet spot where power is just enough to cut through, and speed is as fast as possible to minimize heat dwell time. Here, strong air assist is essential—it clears tar buildup, reduces scorching, and ensures cleaner edges.
Always choose vegetable‑tanned leather. Chromium‑tanned leather, common on the market, releases toxic hexavalent chromium when heated—harmful to both health and your equipment.
(3) The Paper Precision Test
Creating intricate cutwork on paper as thin as a cicada’s wing is an art of extreme delicacy—and an ultimate test of both machine control and operator vigilance.
1) Fire prevention comes first:
Paper ignites at very low temperatures, so any mistake can cause a fire. Ultra‑low power and ultra‑high speed are your only viable options. Typically, use the lowest available power (around 10–15%) with very high speeds (300mm/s or more) to ensure the laser energy just ‘touches and leaves’ instantly.
2) Never leave the machine unattended:
When cutting paper, your eyes and hand must stay on the machine and near the emergency stop button at all times—this is an unbreakable rule.
3) For clean cuts:
A honeycomb bed is essential. It allows smoke and heat to dissipate quickly from beneath the paper, preventing yellowing on the reverse side.
4) Strong air assist:
This serves a dual purpose—suppressing sparks and immediately blowing away tiny cut‑out scraps so they can’t be reignited or stain the work.
(4) Recommended Parameters for Common Non‑Metallic Materials
The following is merely a starting point based on a typical 60W CO₂ laser—not a universal rulebook. Variations in your machine’s power, tube condition, lens cleanliness, or even the batch and moisture content of your material can produce hugely different outcomes. Always run a ‘material test grid’ on a scrap from the same batch before working on your final piece to find the optimal settings for your current conditions.
| Material | Thickness | Cutting (Power/Speed) | Engraving (Power/Speed) | Scoring (Power/Speed) | Notes |
|---|---|---|---|---|---|
| Basswood plywood | 3mm | 60% / 15mm/s | 25% / 200mm/s | 15% / 100mm/s | Easy to cut, stable, ideal for beginners. |
| Cast acrylic | 3mm | 70% / 10mm/s | 20% / 250mm/s | 12% / 120mm/s | Lower air assist for flame‑polished edges. |
| Veg‑tanned leather | 2mm | 45% / 25mm/s | 18% / 300mm/s | 10% / 150mm/s | Top‑tier ventilation essential; prefer veg‑tanned. |
| Cardstock | 300gsm | 15% / 350mm/s | 10% / 500mm/s | 8% / 600mm/s | Highly flammable—requires constant manual monitoring. |
2. Introduction to Advanced Techniques
(1) Getting Started with the Rotary Axis
A rotary attachment instantly elevates your laser cutter from a flat‑plane machine to a quasi‑3D tool capable of engraving cylindrical objects such as glasses, thermos bottles, and baseball bats.
It temporarily replaces the Y‑axis motion. As the laser head moves along the X‑axis, the rotary axis precisely rotates your workpiece, effectively “wrapping” a flat design around a curved surface.
1) Physical leveling: This is both the most important and the most overlooked step. You must ensure the engraving surface of your object is perfectly level. Given the razor‑thin focal range of the laser (often less than 1mm), any tilt will cause parts of the job to drift out of focus.
2) Software settings: In LightBurn, enable ‘Rotary Axis’ mode and enter the exact diameter or circumference of your object. The software will then calculate how many stepper pulses are needed for one complete rotation.
3) Rotating your design: Because the object is positioned sideways, you'll usually need to rotate your design file 90 degrees in the software to ensure the engraving orientation is correct.
(2) Understanding Dithering Algorithms and Grayscale Processing
Bringing a cherished photo to life on wood or stone is one of the most technically demanding—and rewarding—skills you can master. It requires understanding how software translates continuous‑tone images into a binary ‘on/off’ language that the laser can interpret.
1) Grayscale:
In this “analog‑style” mode, the software adjusts the laser’s power output in real‑time according to the brightness of each pixel. Dark pixels get higher power; light pixels get lower power.
- Pros: In theory, it can produce the smoothest, most natural tonal transitions—similar to pencil shading.
- Cons: Extremely demanding on materials. Only surfaces with a highly linear and uniform response to varying power—such as ABS dual‑color plates or anodized aluminum—can render good results. On wood, natural inconsistencies like growth rings and knots often cause high power to burn clean through, while low power leaves no mark, producing an uneven, blotchy effect.
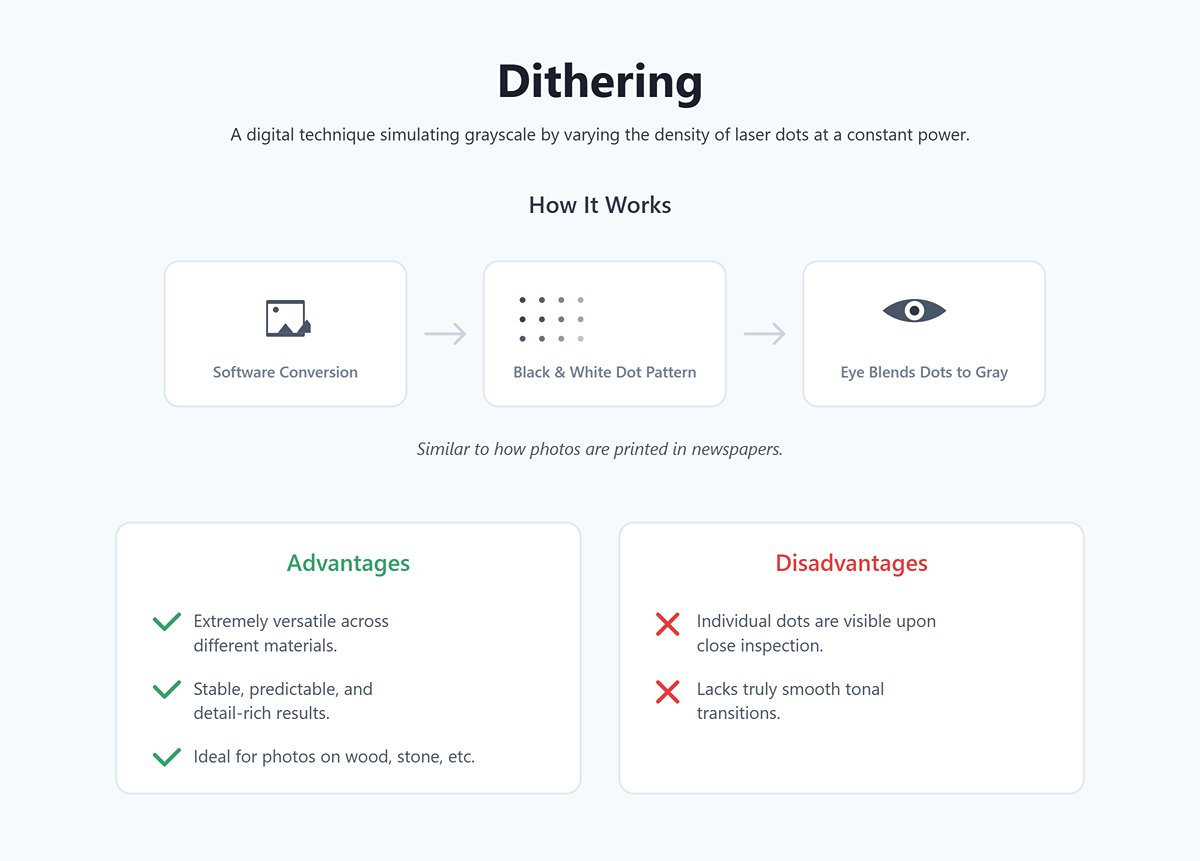
2) Dithering:
This is a clever “digital” technique. The laser power stays constant, while the software simulates grayscale by varying the density of laser dots. It converts the original image into a finely patterned black-and-white halftone matrix (using algorithms such as Stucki, Jarvis, Atkinson, and others). From a certain viewing distance, your eyes naturally blend these dots into varying shades of gray—just like the printed photos you see in newspapers.
- Advantages: Extremely versatile across different materials, delivering stable, predictable, and detail-rich results on nearly any surface. It’s the go-to method for engraving photos on natural materials like wood, stone, and leather.
- Disadvantages: Up close, you can clearly see the individual dots, and it lacks truly smooth tonal transitions.
(3) The key step from simply “operating” to truly “creating”
1) Kerf Compensation
Kerf refers to the width of the laser beam itself—the material removed or vaporized during cutting. For a basic decorative outline, you can usually ignore it. But when designing two pieces that must fit together with precision—like mortise-and-tenon joints or puzzle pieces—it shifts from being a negligible detail to a critical factor that determines success or failure.
Beginners often try to repeatedly tweak slot dimensions in their design software—say, drawing a 3 mm slot as 2.85 mm. This is a time-consuming and hard-to-standardize approach.
A professional approach is to always design with exact theoretical dimensions from the start (for example, a 3 mm-thick board should have a slot exactly 3 mm wide). Then, in LightBurn’s cutting settings, there’s a dedicated “Kerf Offset” function.
If your assembled pieces are too loose, simply apply a negative Kerf Offset to the slot’s cutting layer—say, −0.075 mm. The laser path will automatically contract by that amount, making the cut slightly smaller. Conversely, if it’s too tight, use a positive offset. This parameter-based fine-tuning is far more efficient, precise, and repeatable than constantly editing your design file.
2) Flexible Cutting
This is an almost magical design technique. By cutting a specific pattern of interlocking slits into rigid materials such as wood or acrylic, you can transform a previously stiff section into something that bends smoothly like fabric. This is widely used for making book covers, seamless lamp shades, or boxes with curved lids.
The principle is that the dense series of cuts distributes bending stress across countless tiny beam-like segments, allowing the material to flex significantly without breaking. You don’t need to draw these intricate patterns by hand—search “living hinge generator” online and you’ll find plenty of tools that can automatically create cutting paths to match your dimensions.
Once you master these techniques, your laser cutter ceases to be just a tool for executing commands. It becomes an extension of your imagination—a precise, powerful magic wand for exploring the physical world and transforming intangible ideas into tangible reality.
Ⅶ. FAQs
1. How do I choose the right laser cutting machine for my needs?
Selecting the right laser cutting machine depends on several factors:
- Material Type: Identify the materials you will frequently cut. CO2 lasers are effective for non-metals, while fiber lasers are better suited for metals.
- Thickness: Consider the maximum thickness of the materials you intend to cut. Higher power lasers can handle thicker materials.
- Precision: Evaluate the precision requirements of your projects. High-precision needs may necessitate advanced features like auto-focus and fine beam control.
- Budget: Determine your budget, accounting for both the initial investment and ongoing maintenance costs.
- Software Compatibility: Ensure the machine is compatible with the design and control software you plan to use. For a deeper dive into selecting the perfect machine, our comprehensive 2025 Laser Cutting Machine Buying Guide provides detailed comparisons and expert recommendations.
2. Can I use a laser cutting machine for both cutting and engraving?
Yes, laser cutting machines can be used for both cutting and engraving. Cutting involves slicing through the material, while engraving removes surface material to create designs, text, or patterns. Adjusting the laser power and speed settings allows you to switch between cutting and engraving operations effectively.


