I. Introduction
Laser cutting technology has revolutionized the manufacturing and metal processing industries by offering precision, efficiency, and versatility. This method utilizes a high-powered laser beam to cut, engrave, or etch materials with unprecedented accuracy.
The laser beam is focused onto the material, causing it to melt, burn, vaporize, or be blown away by a jet of gas, leaving an edge with a high-quality surface finish.
Temperature control is a critical aspect of laser cutting operations. The performance and efficiency of a laser cutting machine are highly dependent on maintaining the correct operating temperature.
My article will delve into the basics of laser cutting machine temperature, ranging from fundamentals of laser cutting temperature to techniques for managing laser cutting machine temperature.
II. Fundamentals of Laser Cutting Machine Temperature
Setting and maintaining each core component of a laser cutting machine within its optimal temperature range is fundamental to both performance and longevity. This range isn’t a fixed value; instead, it’s a “thermal sweet spot” that adjusts dynamically based on the characteristics of each component and the surrounding environmental conditions.
1. Quick Reference: Core Component Temperature Standards
| Component | Recommended Temperature Range | Key Insights |
|---|---|---|
| Workshop | 15°C – 30°C (Ideal: 22°C ± 2°C) | Ambient temperature forms the foundation for all thermal regulation. Excess heat increases cooling system load; too cold (<10°C) requires preheating to protect optical elements from thermal shock. |
| Chiller Water | Low-temp circuit (Laser): 20°C – 22°C High-temp circuit (Cutting head/Fiber): 28°C – 30°C | This is the most critical control parameter. Dual-temperature, dual-circuit systems are standard in modern fiber lasers. Laser water temperature ensures efficiency, while cutting head water temperature must stay above the ambient dew point to prevent condensation. |
| Laser Source | Indirectly controlled by chiller water temperature for stability. | The laser’s internal semiconductors and electronics are highly heat-sensitive. Stability is more crucial than the exact temperature—fluctuations should remain within ±0.5°C. |
| Cutting Head & Optics | Managed via the high-temp circuit, typically set around 30°C. | Keeping temperature slightly above ambient is a proactive measure to prevent internal lenses from fogging due to condensation. |
| Control Cabinet & Drivers | Internal temperature should stay below 40°C | At room temperature of 35°C, a sealed cabinet can quickly exceed 50°C inside. Ensure cabinet cooling or fans are functioning; otherwise, driver overheat protection will trigger a shutdown. |
2. Key Insight: Why “the colder, the better” is a deadly myth—Understanding condensation risks and prevention
A widespread yet dangerous misconception is that lowering cooling water temperature always improves performance. In reality, when cooling water is significantly colder than the ambient environment—especially during humid summer months or rainy seasons—moisture from the air can form harmful condensation on cold water pipes, inside the laser housing, and on optical surfaces in the cutting head. Condensation is a laser system’s worst enemy, leading to:
(1) Electrical short circuits: Potentially damaging costly and delicate electronics inside the laser.
(2) Optical contamination or destruction: Polluting and even burning key optics such as focusing and protective lenses.
(3) Sudden performance drop: Causing unstable laser output or complete operational failure.
(4) Prevention Strategy: Set water temperature scientifically, following the golden rule, cooling water must remain above the ambient dew point. In high-humidity conditions, it’s safer to raise water temperature rather than risk condensation damage. Housing the laser in a dedicated climate-controlled room with stable temperature and humidity is the most effective way to eliminate condensation risk at its source.

3. Laser Types and Their Temperature Requirements
(1) CO2 Lasers
CO2 lasers generate significant heat during operation and require efficient cooling systems. They are sensitive to temperature fluctuations and may need more robust temperature control measures compared to other laser types.
(2) Fiber Lasers
Fiber lasers generally have better thermal management due to their design. They distribute heat more efficiently along the fiber, making them less susceptible to temperature-related issues.
(3) Solid-State Lasers
Solid-state lasers, such as those using YAG (Yttrium Aluminum Garnet) crystals, have specific thermal conductivity requirements. The thermal conductivity of the gain media plays a crucial role in the overall performance of these lasers.
Ⅲ. Deep Dive – Tracing the Origins of Heat and Mastering Control Logic
Once we understand why temperature acts as the hidden force that can make or break a system, the next step is to think like a seasoned engineer: dissect the complete picture of heat—where it originates, how it flows, and the precise methods to keep it in check. Effective thermal management begins with flawless identification of every heat source, coupled with a thorough grasp of the governing control logic.
1. Heat Source Tracking – Pinpointing the Three Major Heat Producers Inside and Around Your Machine
The heat within a laser cutting machine doesn’t come from a single point—it’s generated by an intricate thermodynamic system comprising primary, secondary, and process-related sources. Mapping out these major contributors is the logical starting point for crafting a sound control strategy.
(1) Primary Heat Source: Energy Conversion Losses in the Laser (Resonator/Modules)
This is the most intense, concentrated source of heat within the entire machine, stemming directly from the inherent inefficiencies dictated by the laws of physics.
1)For CO₂ lasers: The typical electro-optical conversion efficiency is only 10–15%. That means an astonishing 85–90% of the input electrical energy is transformed into waste heat, which must be forcibly removed via a high-performance cooling system. This massive heat build-up occurs primarily within the gas-discharge resonator.
2)For fiber lasers: Even with electro-optical efficiencies of 30–40%—well above CO₂ lasers—their pump sources (semiconductor laser diodes) and gain fibers still dissipate significant amounts of energy as heat. A 12 kW fiber laser can generate over 20 kW of waste heat, enough to boil a large bucket of water in minutes. This thermal load directly threatens both the output stability and the service life of the laser.

(2) Secondary Heat Sources: Electrical Power Systems, Drive Assemblies, and Motors
These are the “logistics teams” that sustain fast, precise machine operation, but they also serve as continuous, noteworthy generators of heat.
1)Laser power supply and control cabinet: The power modules feeding the laser and the integrated control circuits within the cabinet produce heat through electrical resistance. In summer, the temperature inside a sealed cabinet can easily exceed ambient temperature by 15 °C or more—posing serious risks to sensitive electronics.
2)Servo motors and drives: These components power the X, Y, and Z axes at remarkable acceleration rates, making them significant heat sources during high-dynamic cutting tasks. Motor temperatures can reach 60–80 °C, and excessive heat not only reduces performance but can spread through mechanical linkages—affecting precision gears and racks and causing micrometer-level accuracy loss.
(3) Process Heat Sources: Cumulative Heat Transfer During Cutting
This subtle yet persistent source is often overlooked. Like the proverbial “boiling frog,” it steadily undermines long-term machine stability.
Thermal conduction and radiation: When the laser melts or vaporizes metal, it produces localized temperatures of several thousand degrees Celsius. This heat conducts through the workpiece and its support bed (e.g., slats) into the machine frame, while also radiating outward from the cutting point—warming the cutting head, nozzle, and internal components. In long, continuous thick-plate operations, this cumulative heating can be enough to cause subtle but real thermal deformation in even heavy-duty cast iron beds.

2. The Cooling Lifeline – A Full Breakdown of the Chiller System
If the laser serves as the heart of the equipment, then the chiller is its tireless “artificial kidney,” tasked with efficiently extracting heat from all sources and maintaining dynamic thermal equilibrium across the system.
(1) Operating Principle Overview: From Refrigeration Cycle to Heat Exchange
At the core of a chiller lies the classic vapor-compression refrigeration cycle, functioning like a highly efficient “heat transporter”:
1)Compression: Refrigerant gas is compressed by the compressor into a high-temperature, high-pressure state.
2)Condensation: The hot, high-pressure gas passes through the condenser (air-cooled via forced fans), releasing heat to the environment and condensing into a high-pressure liquid.
3)Expansion: The high-pressure liquid flows through an expansion valve, experiencing a rapid drop in pressure and temperature, becoming a low-temperature, low-pressure mixture of liquid and gas.
4)Evaporation & Heat Exchange: In the evaporator, the low-temperature refrigerant absorbs heat from the cooling water loop, vaporizing in the process. This cools the water, which is then pumped to the laser and cutting head to carry away their heat. The vaporized refrigerant re-enters the compressor to start the cycle again.
(2) Water Cooling vs. Air Cooling – Scenarios, Pros & Cons, and Selection Criteria
For industrial-grade laser cutters, this isn’t merely a preference—it’s a conclusion dictated by physics.
| Comparison Dimension | Water Cooling System | Air Cooling System |
|---|---|---|
| Cooling Efficiency | Extremely high. Water’s specific heat capacity is more than four times that of air, enabling efficient, stable removal of large amounts of heat. | Limited. Performance is heavily restricted by ambient temperature and airflow, unable to cool below ambient. |
| Applicable Power Range | The only and essential solution for medium- to high-power lasers (>100 W). | Suitable only for very low-power use (e.g., small laser engravers, craft machines). |
| Temperature Stability | Excellent. Can maintain core component temperatures within ±0.1 °C regardless of environmental changes. | Poor. Cooling effectiveness fluctuates sharply with ambient temperature, making it unsuitable for precision work. |
| Cost & Complexity | Higher initial investment and maintenance costs; more intricate system design. | Simple structure, low-cost, nearly maintenance-free. |
Key Insight: For anyone aiming to achieve top cutting quality and equipment stability, a high-performance water cooling system is standard, not optional. Air cooling offers no viable solution in industrial cutting contexts.
(3) Critical Parameter Breakdown: Why Water Quality, Flow Rate, and Pressure Matter Equally
Many operators focus purely on chiller temperature settings, overlooking three other parameters that can be just as critical.
1)Water Quality: This is where mistakes are most common. Tap water, mineral water, or standard purified water must never be used. Minerals such as calcium and magnesium will precipitate at high temperatures, creating scale deposits—like “clots” within the laser’s fine cooling channels. These blockages drastically reduce heat exchange efficiency, potentially causing localized overheating and destroying the laser. Always use deionized or double-distilled water, with replacement every 3–6 months.

2)Flow Rate: Flow rate dictates how much heat can be removed per unit time. Insufficient flow can allow heat to accumulate within the laser—even if the chiller’s displayed water temperature appears normal, critical internal regions might already be overheating. Regularly inspect and clean water filters to ensure flow consistently meets the machine’s specified requirements.
3)Pressure: Maintaining the right water pressure is essential to ensure the cooling water can overcome pipe resistance, reach every part that needs cooling, and sustain a stable flow rate. Too little pressure results in inadequate flow, while excessive pressure can cause leaks at pipe connections. Any leakage into the laser unit or electrical cabinet could have disastrous consequences.
3. Environmental Variables: How Your Workshop Quietly Influences Equipment Performance
A laser cutting machine doesn’t operate in isolation. Its workshop environment is a dynamic, complex, and highly influential factor within the overall temperature control system, constantly exchanging heat and moisture with the equipment.
(1) Ambient Temperature: Seasonal fluctuations and their direct impact on cooling system load
The ambient temperature directly affects the cooling unit’s heat dissipation efficiency. Essentially, the chiller works by transferring heat from inside the equipment to the surrounding workshop air. In a hot summer, when the workshop temperature reaches 35°C, the reduced temperature difference between the chiller’s condenser and the air makes heat dissipation much harder, significantly lowering cooling capacity.
The compressor may then run under high or full load for prolonged periods, driving up energy consumption and failure rates. In contrast, in freezing winter conditions (below 5°C), cooling water can freeze, and the resulting expansion force can crack the laser unit, cutting head, and piping, causing catastrophic damage. Keeping the workshop temperature consistently within the 15°C–30°C range is a fundamental requirement for professional production.
(2) Humidity: The "Invisible Killer" of Condensation and How to Calculate Its Threshold
High humidity can be even more insidious than high heat. When the surface temperature of cooled components drops below the surrounding air’s dew point, water vapor condenses into fine droplets — condensation. Dew point is determined by the current ambient temperature and relative humidity.
Critical scenario example: In a humid rainy season, the workshop might be at 28°C with 80% relative humidity. Reference tables or calculations would reveal a dew point of about 24.1°C. If an operator sets the cooling water temperature of the laser to 22°C in pursuit of “better cooling,” condensation will inevitably form on the cold water pipes, laser housing, and even optical lens mounts inside the cutting head. These droplets can cause electrical short circuits, optical contamination, and corrosion of metal parts.

Core rule: Always set the cooling water temperature above the current dew point. Installing an air-conditioned room with independent temperature and humidity control for critical equipment is the ultimate solution for eliminating condensation risk and achieving top-tier manufacturing quality.
(3) Air Quality: How Dust and Oil Build-up Can Choke the Cooling System, Causing Overheating
Metal dust, oil mist, and other pollutants floating in the cutting workshop air are drawn in by cooling fans, accumulating on the filter screens and fins of the chiller and electrical cabinet radiators. Over time, these contaminants form a thick “blanket” that severely impedes airflow, drastically reducing heat dissipation efficiency. It’s like making the equipment run a marathon in summer while wearing a heavy coat — internal temperatures will spike, triggering frequent overheating alarms and shutdowns.
Regular cleaning of dust filters and fan screens on both the chiller and the electrical cabinet with compressed air (weekly or biweekly) is one of the highest-return maintenance actions, yet it’s also among the easiest to overlook.
III. How Temperature Affects Laser Cutting Performance
Temperature variations can dramatically affect the quality of the cut and the overall efficiency of the laser cutting process. If the machine overheats, it can lead to several issues, including:
1. Consequences of Overheating
(1) Thermal Expansion: Excessive heat can cause components of the machine and the material being cut to expand, leading to dimensional inaccuracies and poor fitment of parts.
(2) Beam Quality Degradation: Overheating can affect the quality of the laser beam, resulting in a less focused beam and a reduction in cutting precision.
(3) Material Damage: High temperatures can cause burning, melting, or warping of the material, leading to inferior cut quality and potentially rendering the material unusable.
(4) Safety Hazards: Overheating can pose significant safety risks, including the potential for fires or damage to the machine's components.
Conversely, underheating can also be problematic. If the material and machine are not within the optimal temperature range, it can lead to:
2. Effects of Underheating
(1) Incomplete Cuts: Insufficient heat may prevent the laser from fully penetrating the material, resulting in incomplete cuts and the need for additional processing.
(2) Poor Cut Quality: Lower temperatures can lead to rough, jagged edges and an overall decline in cut quality.
(3) Increased Wear and Tear: Operating the machine at suboptimal temperatures can increase the wear on components, leading to more frequent maintenance and a shorter lifespan for the equipment.
3. Temperature Effects on Cut Quality and Precision
(1) Kerf Width Variations: Temperature fluctuations can cause variations in kerf width, which is crucial for material utilization efficiency. Typical kerf widths range from 0.1mm to 1mm, depending on material properties, laser type, and cutting parameters. High-power fiber lasers can achieve narrower kerfs (0.1-0.3mm) in thin metals, while CO2 lasers may produce wider kerfs (0.2-0.5mm) in thicker materials.
(2) Edge Quality: Temperature affects the edge quality of laser-cut materials. Excessive heat can lead to edge melting, burrs, or dross formation, while insufficient heat may result in rough or incomplete cuts. Maintaining optimal temperature is crucial for achieving clean, smooth edges.
(3) Dimensional Accuracy: Temperature variations can significantly impact dimensional accuracy. A study published in the International Journal of Advanced Manufacturing Technology found that temperature fluctuations of just a few degrees could lead to significant deviations in cut quality. Modern laser cutters can achieve tolerances as tight as ±0.1 mm, but this level of precision requires meticulous temperature control and environmental management.
IV. Factors Affecting Laser Cutting Machine Temperature
Maintaining optimal temperature in laser cutting machines is crucial for achieving high-quality cuts and extending the lifespan of equipment. Several factors influence the temperature of a laser cutting machine, and understanding these can help operators take proactive measures to control and optimize the cutting process.
1. Power Settings and Their Impact on Temperature
The power settings of a laser cutting machine are one of the primary factors affecting its temperature. Higher power settings generate more heat, which can lead to overheating if not properly managed. Conversely, lower power settings may not produce enough heat, leading to suboptimal cuts.
Key Considerations:
- Laser Power Output: Adjusting the laser power output to match the material type and thickness is essential. Overpowering can cause burning or melting, while underpowering may result in incomplete cuts. For example, using too high a power setting on thin acrylic can cause it to warp or burn.
- Duty Cycle: The duty cycle, meaning how often the laser is active, also influences temperature. A high duty cycle can lead to heat accumulation, while a lower duty cycle allows for cooling periods. For instance, cutting intricate designs with a high duty cycle on wood can cause scorching.
2. Material Type and Thickness Considerations
Different materials have varying thermal properties, which influence how they absorb and dissipate heat during the cutting process. The thickness of the material also plays a significant role in temperature management.
(1) Material-Specific Factors:
1)Metals: Metals such as steel and aluminum have high thermal conductivity, meaning they can quickly absorb and dissipate heat. However, thicker metal sheets require higher power settings and longer exposure times, increasing the risk of overheating. When cutting thick steel, it is crucial to adjust the cooling system to prevent overheating.
2)Plastics: Plastics like acrylic and polycarbonate have lower thermal conductivity and can easily melt or warp under high temperatures. Adjusting the laser parameters to prevent excessive heat buildup is crucial. For instance, cutting 5mm acrylic might require a power setting of 60W and a speed of 20mm/s to avoid burning.
3)Wood and Organic Materials: These materials are prone to burning and charring. Controlling the laser power and speed can help manage the temperature and avoid damaging the material. For example, cutting 3mm birch plywood might be optimal at 40W power and 15mm/s speed.
4)Composites and Specialized Materials: These materials may have varying thermal properties depending on their composition. Understanding the specific thermal behavior of each composite is essential for effective temperature control. For example, carbon fiber composites may require specialized cooling techniques to prevent delamination.
2. Ambient Temperature and Environmental Factors
The temperature of the environment in which the laser cutting machine operates can significantly impact its internal temperature. External factors such as ambient temperature, humidity, and airflow can influence the machine's cooling efficiency.
(1) Environmental Considerations
1)Ambient Temperature
High ambient temperatures can reduce the efficiency of cooling systems, leading to increased internal temperatures. Conversely, low ambient temperatures can aid in cooling but may require adjustments to prevent underheating. Consider how changing the ambient temperature in your workspace might affect your laser cutting results.
2)Humidity
High humidity levels can affect the performance of cooling systems and lead to condensation within the machine, potentially causing electrical issues or corrosion. The ideal relative humidity range for laser cutting machines is typically between 40% and 70%. This range helps maintain optimal performance while minimizing moisture-related issues.
3)Airflow
Proper ventilation and airflow around the machine are essential for dissipating heat. Ensuring the laser cutting machine is placed in a well-ventilated area with fans can significantly improve heat dissipation. For instance, setting up exhaust fans or air conditioning units can help maintain a stable operating temperature.
V. Optimal Temperature Settings for Different Materials
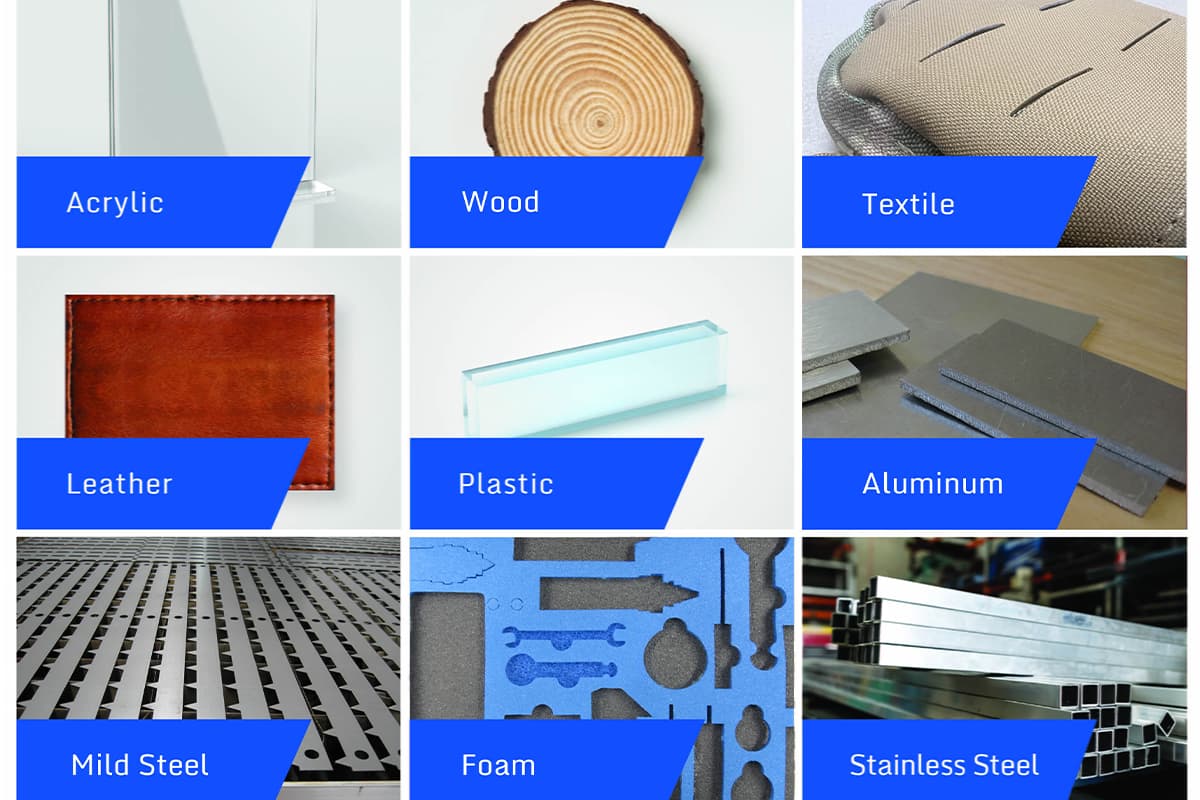
1. Metals
(1) Steel
Steel, particularly carbon steel and stainless steel, are primary materials in industrial applications due to their strength and durability. Each type requires specific laser cutting considerations.
1)Carbon Steel:
- Thin Carbon Steel (up to 6mm): Power: 1.5 kW - 2 kW, Speed: 15mm/s.
- Thick Carbon Steel (above 6mm): Power: 2 kW - 3 kW, Speed: 10mm/s.
- Safety Precautions: Use protective eyewear and proper ventilation to avoid inhaling metal fumes.
2)Stainless Steel:
- Thin Stainless Steel (up to 3mm): Power: 1 kW - 1.5 kW, Speed: 20mm/s.
- Thick Stainless Steel (above 3mm): Power: 1.5 kW - 3 kW, Speed: 12mm/s.
- Safety Precautions: Ensure adequate ventilation and use appropriate PPE (Personal Protective Equipment).
(2) Aluminum
Aluminum's high reflectivity and thermal conductivity present unique challenges.
- Thin Aluminum (up to 3mm): Power: 1 kW - 2 kW, Speed: 25mm/s.
- Thick Aluminum (above 3mm): Power: 2 kW - 4 kW, Speed: 15mm/s.
- Safety Precautions: Use laser systems designed for reflective materials and wear protective eyewear.
2. Plastics
(1) Acrylic
Acrylic is popular for laser cutting because its clarity allows for precise engravings, and its ease of cutting reduces processing time and material waste.
- Thin Acrylic (up to 5mm): Power: 30W - 60W, Speed: 20mm/s.
- Thick Acrylic (above 5mm): Power: 60W - 100W, Speed: 10mm/s.
- Safety Precautions: Ensure proper ventilation to avoid inhaling fumes and use flame-retardant materials around the cutting area.
(2) Polycarbonate
Polycarbonate is more challenging to cut due to its tendency to discolor and release toxic fumes when overheated.
- Thin Polycarbonate (up to 3mm): Power: 20W - 40W, Speed: 25mm/s.
- Thick Polycarbonate (above 3mm): Power: 40W - 60W, Speed: 15mm/s.
- Safety Precautions: Use adequate ventilation and a fume extraction system.

3. Wood and Organic Materials
Wood and organic materials like plywood and MDF are used in laser cutting for artistic and construction purposes. These materials can burn or char easily, necessitating precise control over cutting parameters.
(1) Plywood
- Thin Plywood (up to 3mm): Power: 40W - 60W, Speed: 15mm/s.
- Thick Plywood (above 3mm): Power: 60W - 100W, Speed: 10mm/s.
- Safety Precautions: Ensure proper ventilation and use flame-retardant materials around the cutting area.
(2) MDF (Medium-Density Fiberboard)
- Thin MDF (up to 3mm): Power: 50W - 70W, Speed: 12mm/s.
- Thick MDF (above 3mm): Power: 70W - 100W, Speed: 8mm/s.
- Safety Precautions: Use adequate ventilation to manage the release of formaldehyde and other fumes.
4. Composites and Specialized Materials
Composites and specialized materials require customized temperature settings for effective cutting.
(1) Carbon Fiber Composites
Carbon fiber composites are used in high-performance applications but require careful cutting to avoid delamination.
- Thin Composites (up to 3mm): Power: 1 kW - 2 kW, Speed: 20mm/s.
- Thick Composites (above 3mm): Power: 2 kW - 3 kW, Speed: 15mm/s.
- Safety Precautions: Use proper ventilation and wear protective eyewear.
(2) Kevlar
Kevlar's high tensile strength and heat resistance make it difficult to cut cleanly. Specific laser settings are necessary to avoid fraying, which can compromise the material's structural integrity.
- Thin Kevlar (up to 3mm): Power: 1 kW - 1.5 kW, Speed: 25mm/s.
- Thick Kevlar (above 3mm): Power: 1.5 kW - 2 kW, Speed: 15mm/s.
- Safety Precautions: Ensure proper ventilation and wear protective clothing to avoid contact with frayed fibers.
VI. Techniques for Managing Laser Cutting Machine Temperature
1. Cooling Systems
(1) Water Cooling
Water cooling is one of the most effective methods for managing the temperature of laser cutting machines. Water cooling systems in laser cutting machines use a closed-loop circulation of coolant (typically distilled water) to remove heat from critical components.
The coolant absorbs heat from the laser tube and other heat-generating parts, then passes through a heat exchanger to dissipate the heat before recirculating.
Advantages:
- High Efficiency: Water has a high thermal capacity, making it excellent for absorbing large amounts of heat.
- Consistency: Provides stable and consistent cooling, essential for high-power laser operations.
- Scalability: Suitable for various laser types and power levels.
Implementation:
- Water Chillers: These units circulate chilled water through the laser machine, maintaining a constant temperature

Maintenance:
- Regular inspection of coolant levels and quality
- Periodic replacement of coolant (distilled water) to prevent contamination
- Checking for leaks in the cooling system
- Cleaning or replacing filters in the cooling loop
- Monitoring and maintaining proper flow rates and pressure
(2) Air Cooling
Air cooling systems use fans and heat exchangers to dissipate heat. While not as efficient as water cooling, air cooling is simpler and more cost-effective for lower-power laser systems. Suitable for lower-power laser systems (up to 60 watts).
Advantages:
- Simplicity: Easier to install and maintain compared to water cooling systems.
- Cost-Effective: Lower initial setup and maintenance costs.
Limitations:
- Limited Cooling Capacity: Ineffective for high-power lasers, leading to potential overheating.
- Ambient Temperature Limitation: Unable to cool below the surrounding room temperature.
- Inefficiency for Continuous Operation: Less efficient for sustained high-power use.
- Size Requirements: May need larger cooling units to ensure sufficient heat dissipation.
Implementation:
- Fans and Blowers: Install high-capacity fans to enhance airflow around the laser source and cutting area.
- Heat Exchangers: Use heat exchangers to improve the efficiency of air cooling systems. A heat exchanger transfers heat from the laser machine to the surrounding air, improving cooling efficiency.
2. Thermal Sensors and Monitoring Systems
(1) Thermal Sensors
Thermal sensors are installed at key points within the laser cutting machine to monitor temperatures continuously.
Types:
- Thermocouples: Measure temperature at specific points, providing accurate and reliable data.
- Infrared Sensors: Non-contact sensors that measure surface temperatures, ideal for monitoring moving parts.
Implementation:
- Placement: Install sensors on the laser source, cutting head, and other critical components. For example, a major manufacturer reduced downtime by 30% by strategically placing thermal sensors.
- Integration: Connect sensors to the machine's control system for real-time monitoring and alerts.
(2) Monitoring Systems
Advanced monitoring systems analyze data from thermal sensors and provide actionable insights to maintain optimal temperatures.
Features:
- Real-Time Alerts: Notify operators of temperature deviations, allowing for immediate corrective action. In a case study, Factory Z prevented a major breakdown by receiving timely alerts from their monitoring system.
- Data Logging: Record temperature data for analysis and preventive maintenance planning.
- Automated Controls: Adjust cooling systems and laser parameters automatically based on sensor data.
3. Adjusting Laser Beam Parameters
(1) Frequency
The frequency of the laser beam affects how energy is delivered to the material. Adjusting the frequency can help manage the heat input and prevent overheating.
- High Frequency: Suitable for thinner materials, providing smooth cuts with minimal heat buildup.
- Low Frequency: Better for thicker materials, allowing more time for heat dissipation between pulses.
(2) Speed
Cutting speed directly influences the amount of heat generated during the process. Optimizing the speed ensures that the material does not accumulate excessive heat.
- Higher Speed: Reduces the exposure time of the laser beam, minimizing heat buildup and preventing material damage.
- Lower Speed: Increases heat input, necessary for cutting thicker materials but requires efficient cooling.
(3) Power
Laser power settings must be carefully calibrated to match the material's thermal properties and thickness.
- High Power: Necessary for cutting thick or high-density materials but requires robust cooling systems to manage the increased heat.
- Low Power: Suitable for thin or heat-sensitive materials, reducing the risk of overheating and material damage.
Ⅶ. Field Playbook: The Ultimate SOP from Daily Checks to Seasonal Strategies
Knowing the theory is only the starting line—the decisive edge comes from turning that knowledge into daily muscle memory and uncompromising execution. This chapter breaks down complex temperature control strategies into measurable, actionable Standard Operating Procedures (SOPs), providing you with a complete action plan to keep your equipment performing at peak capacity regardless of fierce summer heat or bitter winter cold.
1. Daily “Thermal Health” Morning Check: The 5-Minute Gold Routine That Prevents 80% of Failures
Spending five minutes on a standardized pre-start check each morning is the most efficient investment you can make to avoid over 80% of temperature-related issues. This is not a box-ticking routine—it’s a vital daily “health conversation” between you and your equipment.
(1) Printable Checklist: Pre-start Visual Inspection
Print the following checklist and place it beside the machine until it becomes a mandatory pre-start habit hardwired into your workflow:
| Inspection Item | What to Check | Normal Standard | Action if Abnormal |
|---|---|---|---|
| Chiller Water Level | Check the chiller’s water tank gauge | Pointer is in the green safe zone | If below standard, immediately top up with deionized or distilled water |
| Water Circuit Integrity | Visually inspect all cooling water pipes, especially joints | No kinks, crushing, leaks, or “sweating” (condensation) | If leaking, shut down immediately; if sweating, raise water temp or improve ambient humidity |
| Chiller Status | Review actual water temperature and alarms on the control panel | Actual water temperature within ±1°C of set point, no flashing alarm lights | If deviation is large or alarm is active, check chiller’s cooling performance |
| Pressure Gauge Reading | Check cooling circuit pressure gauge (if present) | Pressure stable within machine’s required range (typically 3.5–5 bar) | If too low/high, inspect pump, filter, or piping for clogs |
| Electrical Cabinet Cooling | Inspect cabinet seals, listen for fan noise | Seals intact, fans running smoothly with no unusual sounds | Clean clogged filters immediately; report abnormal fan noise promptly |
(2) Standard Warm-up Procedure: Bringing Core Components to Stable Operating Temperature
“Cold starts” are stealth killers for optical elements and precision mechanics. A proper warm-up routine helps prevent thermal shock damage from sudden temperature changes, significantly extending component life.
1)Step One: Power on the chiller first. After switching on the main power supply, start the chiller and let it run independently for at least 15–20 minutes.
2)Step Two: Wait for water temperature stabilization. Be patient until the actual water temperature displayed on the chiller panel matches your set working temperature (e.g., 22°C) before proceeding.
3)Step Three: Power on the machine tool and laser last. This simple sequence ensures the laser and optics are in a stable, stress-free thermal environment before being exposed to high-energy laser operation.

(3) Logging Key Data: Recommended Practices for Temperature, Pressure, and Flow Records Maintaining an operating log is the bridge from reactive repairs to proactive preventive maintenance. Daily record-keeping of critical parameters allows you to detect subtle anomalies before they escalate into major failures.
1)What to Record: At minimum, log the start-up ambient temperature/humidity, set vs. actual cooling water temperature, and water circuit pressure.
2)Trend Analysis: For example, a gradual pressure drop of 0.5 bar over several weeks may indicate a slowly clogging filter or a minor leak. Similarly, if it’s taking longer for the chiller to reach set temperature under similar ambient conditions, that’s a strong sign of declining cooling efficiency. Such records are invaluable for advanced fault diagnostics.
2. Mastering All Seasons: Year-round Temperature Control SOP
Temperature control strategies for laser cutters must adapt dynamically to seasonal changes. Using fixed settings year-round is a recipe for disaster in extreme weather.
(1) Winter “Anti-freeze Campaign”
From Prevention to Safe Start-up When ambient temperatures drop below 5°C, anti-freeze measures become the overriding priority. Ice in the cooling circuit expands with tremendous force, enough to crack expensive lasers, QBH fiber connectors, and chiller internals, causing catastrophic damage.
(2) Authoritative Guide to Anti-freeze Selection and Mixing
1)Preferred Brands and Composition
Always use reputable, laser-equipment-specific anti-freeze products such as DOWFROST™ or Glysantin® by BASF. Choose propylene glycol-based formulas—they are far less corrosive than ethylene glycol. Never use ethanol (alcohol) or standard automotive anti-freeze as substitutes, as they will irreversibly corrode rubber seals and metal parts inside the equipment.
2)Mixing Rule of Thumb
Follow the product’s instructions precisely, diluting only with deionized or distilled water. A common ratio is 3:7 (anti-freeze:water), adjusted according to historic local low temperatures to ensure the mixture’s freezing point is 5–10°C lower than the lowest expected temperature, providing a safety margin.
(3) Complete Drain-down Procedure for Long Downtime (e.g., Holidays)
If you cannot guarantee 24/7 power or have no anti-freeze added, the safest option is to fully drain the cooling water.
Ensure the equipment is fully powered off.
Open the drain valve at the bottom of the chiller and completely empty the tank.
Using compressed air (pressure no more than 0.3 MPa), blow air slowly into the water outlet to purge residual water from the laser, cutting head, and all piping until no more water exits the drain.
(4) Ambient Warm-up: Before starting, bring the workshop temperature up to at least 10°C if possible.
1)Check Lubrication System: Cold temperatures can make rail grease unusually viscous, affecting smooth movement. If necessary, manually move each axis or use the machine’s own preheat function.
2)Follow Warm-up Procedure Strictly: Execute the standard warm-up routine from Section 3.1 with extra patience, ensuring components reach operating temperature slowly and evenly to minimize thermal shock risk.
(5) Safe Start-up in Low Temperatures:
1)Summer “Cooling Storm”: Active Intervention and Passive Optimization High heat and humidity in summer push cooling systems to their limits.
The twin objectives: maintain efficient heat dissipation and eliminate dangerous condensation.
(6) Optimizing Chiller Settings for High Ambient Temperatures:
1)Adjust Water Temperature Upwards Scientifically:
To prevent condensation when ambient humidity exceeds 70%, slightly raise the laser’s cooling water temperature (low-temperature loop) to around 26–28°C, making sure it always stays above the current ambient dew point temperature. This counterintuitive adjustment is the most effective way to prevent condensation.
2)Monitor compressor load:
Keep an eye on whether the chiller’s compressor is cycling on and off too frequently or running at sustained high loads. This is a clear indication of poor heat dissipation or inadequate cooling capacity and should be investigated immediately.
(7) Low-cost workshop ventilation, insulation, and auxiliary cooling upgrades:
1)Enhance air circulation: Install high-powered industrial exhaust fans to create effective air movement throughout the workshop, quickly removing heat released by groups of machines.
2)Create a "micro-environment": Setting up a dedicated air-conditioned room for the laser machine is the ultimate solution, permanently resolving high-temperature and high-humidity issues.
3)Physical insulation: Add insulation layers to the workshop roof and sun-facing walls or install sunshades to reduce heat load from solar radiation at its source.
(8) Identify and prevent chiller overload:
1)Frequent cleaning: At least once a week, inspect and thoroughly clean the chiller’s dust screens and condenser fins using compressed air. Dust buildup is the most common—and most easily overlooked—cause of poor cooling and compressor overload.
2)Ensure breathing space: Maintain at least 1 meter of unobstructed clearance around the chiller to ensure sufficient fresh, cool air for efficient heat exchange. Never place it flush against walls or tightly packed with other equipment.

3. The Chiller Masterclass: Keeping the Cooling Heart Young Forever
The chiller is the undisputed core of the entire temperature control system—its condition directly determines the survival of your laser unit. Meticulous maintenance is the most efficient way to protect your most valuable asset.
(1) Routine Maintenance Schedule
| Interval | Maintenance Task | Purpose & Method | Key Point |
|---|---|---|---|
| Daily | Status check | Follow the morning inspection checklist from Section 3.1 | Make it a habit |
| Weekly | Clean dust screens | Use compressed air to blow away dust from the inside out, ensuring optimal cooling efficiency | Keep airflow unobstructed |
| Monthly | Inspect water quality & piping | Visually check for any flocculent material or algae in the tank; inspect hoses for signs of hardening or aging | Prevent contamination & leaks |
| Every 3–6 months | Change cooling water | Drain old water, flush lines with clean water, then refill with fresh deionized or distilled water | Never use tap water |
| Annually | Replace water filter cartridge | Remove and replace the cartridge in the filter to stop particles from entering the laser’s cooling circuit | Safeguard laser water lines |
(2) Core parameter calibration
Delta-T and precise temperature sensor settings Modern smart chillers often feature two distinct temperature control modes—understanding and correctly selecting them is critical.
(3) Constant water temperature mode
Keeps the water temperature fixed at a set value (e.g., 22°C). While simple and straightforward, it carries a high risk of condensation when the ambient temperature and humidity fluctuate significantly.
(4) Smart Delta-T mode
The chiller automatically tracks ambient temperature and maintains a consistent difference (e.g., always 2°C below ambient). We strongly recommend this mode, as it dynamically adapts to environmental changes and intelligently eliminates condensation risk at the source.
(5) Sensor calibration
If the temperature reading on the chiller consistently deviates from that of a high-precision handheld thermometer by more than 1°C, contact the manufacturer to calibrate the sensors to ensure absolute control accuracy.
(6) Cooling water quality management
TDS pen testing and usage standards Water quality is the most invisible yet potentially most destructive detail in chiller maintenance.
(7) The critical role of a TDS pen: A TDS (Total Dissolved Solids) pen is a handheld tool that quickly measures the concentration of conductive ions in water. It provides the most objective, scientific means of determining whether water quality meets standards or needs changing.
(8) The water quality rule: Cooling water must be deionized or distilled. Its TDS reading should be below 50 ppm (or conductivity < 100 μS/cm). Tap water or standard bottled drinking water far exceed this threshold, and prolonged use will form insulating scale inside the laser’s fine cooling channels—akin to “clots” in blood vessels—which eventually cause local overheating and catastrophic damage.
(9) Regular testing: Test water quality monthly with a TDS pen. A significant rise in readings—or exceeding 100 ppm—means contamination has occurred, and the cooling water should be replaced immediately.
Ⅷ. Troubleshooting: Think and Solve Problems Like an Expert
When alarms sound and cutting quality suddenly drops, an average operator sees chaos and malfunction, while an expert sees clues and underlying logic. True troubleshooting is not blind trial and error—it’s a precise reasoning process based on knowledge. This chapter will equip you with a professional diagnostic framework so you can calmly trace the root of any temperature-related problem.
1. Visual Fault Diagnosis Flowchart (Decision Tree)
In the face of complex fault symptoms, a clear diagnostic pathway is your most powerful tool. The following decision tree guides you from surface phenomena through logical steps to identify the true root cause.
Starting point: The equipment triggers a temperature-related alarm (e.g., “Chiller Overheat Alarm,” “Abnormal Water Flow”) or cutting quality suddenly deteriorates
(1) First-level check: Has there been an “external environment” change or is it an “internal system” issue?
1)Checklist:
Ambient temperature: Has the workshop temperature shifted sharply? (Ideal range: 15°C – 30°C)
Air quality: Are the chiller’s filters clogged with dust, oil, or debris like seed fluff? (Visual transparency should be > 90%)
Spatial layout: Is clutter restricting the chiller’s “breathing”? (Maintain at least 1 meter of clearance around the unit)

2)Guidance:
If yes: Take immediate steps to improve the external environment—turn on workshop air conditioning, clean filters, remove obstructions. If the issue resolves, stop here. This addresses the most common but often overlooked external triggers.
If no: The external environment is fine—move to the second-tier check.
(2) Second-level check: Is the problem with the “cooling system (chiller)” itself or the “laser unit” core?
1)Checklist (for the chiller):
Status and parameters: Does the chiller’s control panel show any alarm codes? Is the water tank level normal? Is the set water temperature deviating from actual by more than ±1°C?
Water circulation: Are there kinks or flattened sections in hoses impeding flow? Is the pressure gauge reading within the normal range (typically 3.5 – 5 bar)?
Water quality: Test using a TDS pen—do readings significantly exceed standard limits (TDS > 50 ppm)? Poor water quality is a hidden cause of false sensor alarms or internal blockages.
2)Guidance:
If Yes: Refer to the chiller’s error code manual for specific troubleshooting steps (e.g., replenish deionized water, clean or replace filters, calibrate system parameters). Once resolved, the process is complete.
If No: All chiller parameters appear normal, yet the main unit continues to issue alarms. This likely indicates a fault within the machine’s sensing or execution components, prompting a move to the third diagnostic stage.
(3) Third-Level Assessment: Is it genuine overheating of the laser’s core components, or a false signal from sensors/circuits?
1)Inspection points:
Cutting Head Temperature: Some high-end machines have lens temperature sensors. Check whether readings exceed limits (e.g., above 55°C). Common causes include contamination of the protective lens, leading to excessive heat absorption, or insufficient cooling from auxiliary gases.
Laser Power Stability: Use a power meter to measure laser output and monitor whether power steadily declines over time. Such patterns often signal cooling deficiencies reducing laser efficiency.
Sensor Wiring: Visually inspect the connectors for temperature and water-flow sensors linking the laser to the cutting head. Look for loosened terminals, oxidation, or contamination from oils.
2)Final Diagnosis:
Cutting Head Truly Overheated: Halt operations immediately, maintain air blow for 5 minutes to cool the lens, then inspect, clean, or replace the protective lens.
Laser Power Decline: The underlying issue still points to insufficient cooling efficiency. Conduct an in-depth inspection of the chiller’s cooling capacity, including refrigerant checks.
Sensor Signal Fault: Clean and secure the related sensor wiring. If the problem persists, replacing the sensor may be necessary.
2. Cutting Defect “Decoder”: Tracing Temperature Issues from Finished Workpieces
Every defective workpiece is essentially a health report of your equipment. Learning to interpret these “reports” enables you to trace causes from outcomes, elevating diagnosis to an art form.
| Defect Appearance | Potential Temperature-Related Causes | Expert Solutions & In-Depth Analysis |
|---|---|---|
| Rough cut surfaces with heavy slag | 1. Chiller temperature too high or unstable, causing fluctuating laser output and insufficient energy to fully melt and expel material. 2. Minor contamination on optical lenses creates a thermal lens effect, slightly shifting the focal point upward, reducing energy density. | Solution: Check and stabilize chiller temperature: Ensure actual water temperature remains within ±0.5°C of the set value. Inspect and clean optical components, especially the protective lens, the most consumable and contamination-prone element. Analysis: Slag buildup reflects a mismatch between energy and cutting speed. Temperature-induced reductions in laser power are a root cause often mistaken for mysterious parameter issues. |
| Unstable power, inconsistent cutting depth | 1. Drastic fluctuations in cooling water temperature directly disrupt the laser’s photoelectric conversion efficiency, creating output graphs with erratic swings. 2. Condensation inside the laser (caused by overly low water temperature settings), with moisture adhering to optical or electronic parts, leading to energy loss or short circuits. | Solution: Switch the chiller to intelligent temperature-difference mode: Allow the water |
Ⅸ. Action Resource Library: Tools and Templates to Turn Knowledge into Productivity
Theoretical depth must ultimately serve the heights of practical application. By now, we’ve built a robust knowledge framework—it's time to forge it into the sharpest tool in your workshop arsenal. This chapter isn’t a mere summary; it’s a meticulously tested action plan complete with ready-to-use resources. The sole objective is to seamlessly translate everything you’ve learned into measurable, sustainable productivity. Print, distribute, and implement these tools so that exceptional temperature management becomes second nature—your team’s muscle memory and core competitive edge.
1. One-Page “Temperature Management” Quick Reference Cheat Sheet
Print and laminate this condensed cheat sheet of core rules, then post it in the most visible spot on every laser cutting machine. It’s not mere decoration—it’s your most reliable “co-pilot” on the production floor and your final safeguard against costly errors.
(1) Golden Ranges for Key Parameters
| Parameter | Safe Zone (Green) | Caution Zone (Yellow) | Danger – Immediate Stop (Red) |
|---|---|---|---|
| Workshop Ambient Temperature | 20°C – 25°C | 15°C–19°C or 26°C–30°C | < 5°C (risk of freezing) or > 35°C (risk of overheating) |
| Workshop Ambient Humidity | 40% – 60% RH | > 60% RH (monitor dew point) | > 75% RH (high condensation risk) |
| Laser Cooler Water Temp (Low Temp Circuit) | 21°C – 25°C (fluctuation < ±0.5°C) | < 20°C or > 28°C | < 15°C or > 32°C |
| Cutting Head/Optical Component Water Temp (High Temp Circuit) | 28°C – 32°C (or 3–5°C above dew point) | ±2°C deviation from set value | ±5°C deviation from set value |
| Cooling Water Quality (TDS) | < 50 ppm | 50–100 ppm (schedule replacement) | > 100 ppm (replace immediately) |
(2) Common Alarm Code Translator (Example: General Purpose Chiller)
| Code | Plain-English Meaning | First Action |
|---|---|---|
| E1 | Workshop too hot – I’m “overheating” | Check workshop air conditioning/ventilation. Use compressed air to clean chiller’s cooling filters. |
| E2 | Water temperature too high – I have a “fever” | Verify chiller cooling capacity matches the laser system. Check for refrigerant leaks. |
| E3 | Water temperature too low – I’m “frozen stiff” | Inspect heating function. Confirm ambient temperature isn’t too low (< 5°C). |
| E4 / E5 | My “nervous system” (sensors) is malfunctioning | Visually check sensor wiring for looseness, moisture intrusion, or damage. |
| E6 | “Circulatory system” (water flow) sluggish or insufficient | 1. Check water tank level. 2. Inspect hoses for kinks. 3. Clean or replace water filter. |
(3) Seasonal Maintenance Key Action Points
1)Summer Prep:
Frequent Cleaning: Increase chiller radiator cleaning to once per week.
Prevent Condensation: Ensure water temperature is always above the current ambient dew point.
Water Quality Checks: High heat accelerates microbial growth—use a TDS meter monthly to monitor.
2)Winter Prep:
Add Antifreeze: If workshop temperature drops below 5°C at night, add laser-specific antifreeze in the correct ratio.
Drain Safely: For extended shutdowns (e.g., holidays) without antifreeze, drain all cooling water completely.
Preheat Patiently: Before powering up, run the chiller alone for 15–20 minutes to stabilize water temperature before starting the laser.

2. Downloadable Toolkits: Templates and Checklists
Integrate these templates into your daily management system to transform individual ad-hoc practices into standardized team processes.
(1) [Template] Daily Temperature Health Checklist
| Date: | Operator: | Equipment ID: |
|---|---|---|
| Check Item | Standard | Actual Reading |
| 1. Ambient Temperature | 20–25°C | |
| 2. Ambient Humidity | 40–60% | |
| 3. Chiller Water Tank Level | Green Zone | |
| 4. Low Temp Circuit Actual Temp | Set value ±0.5°C | |
| 5. High Temp Circuit Actual Temp | Set value ±1°C | |
| 6. Chiller Alarms | None | |
| 7. Hoses – Leaks/Condensation | None | |
| 8. Electrical Cabinet Cooling Fans | Functioning normally |
(2) [Template] Seasonal Maintenance SOP Card (Example: Winter Mode Switch)
| Step | Action | Responsible | Completion Date |
|---|---|---|---|
| 1. Assess | Based on local historical lows, determine required antifreeze freeze point and mix ratio. | ||
| 2. Drain | Completely remove deionized water used during summer. | ||
| 3. Flush | Circulate a small amount of deionized water through system and drain again. | ||
| 4. Mix | In a clean container, accurately mix laser-grade antifreeze with deionized water per specs. | ||
| 5. Fill | Add mixed antifreeze to chiller until reaching standard level. | ||
| 6. Circulate and Vent | Run chiller 15 minutes to purge air, top up to normal level. | ||
| 7. Record | Log antifreeze brand, ratio, and replacement date in maintenance records. |
3. Continuous Learning Path: From Operator to Temperature Control Specialist
A true expert is always on the journey of learning.
(1) Recommended Reading & Industry Communities
1)Authoritative Publications: Industrial Laser Solutions, The Fabricator – Stay informed on cutting-edge technologies and best practices in the industry.
2)Professional Forums: Practical Machinist Forum – Exchange real-world experience with seasoned engineers from around the globe.
3)Primary Knowledge Sources: Official technical documentation and knowledge base from your equipment manufacturer – This is the most targeted and authoritative first-hand resource. Read it thoroughly.
(2) Next Step: Create your workshop’s first customized temperature management SOP
1)Copy and adapt: Use the template provided in this chapter, making fine adjustments based on your specific equipment models and workshop environment.
2)Assign responsibility: Clearly allocate daily, weekly, and monthly inspection and maintenance tasks to specific roles.
3)Train everyone: Hold a short 15-minute meeting to explain the importance, steps, and standards for executing the SOP to all relevant staff.
4)Post and enforce: Display the SOP prominently in a common area and begin implementing it without compromise.
5)Continuous improvement: Conduct a quarterly review meeting to refine and update the SOP based on issues encountered during execution.
VII. FAQs
1. What are the Signs of Overheating in a Laser Cutting Machine?
Signs of overheating in a laser cutting machine include reduced cutting precision, increased error rates, unexpected shutdowns, and warning signals from temperature monitoring systems. Physical signs may include unusual noises from the cooling system or visible warping and discoloration of machine components.
2. What are the common methods for cooling laser cutting machines?
Common cooling methods for laser cutting machines include water cooling and air cooling systems. Water cooling systems are often preferred for high-power laser cutters as they effectively dissipate heat through a closed-loop system.
Air cooling is suitable for lower-power systems and typically involves fans or radiators to maintain acceptable temperature ranges. Both methods help ensure consistent operational performance and prevent overheating-related malfunctions.
For detailed specifications of machines featuring these different cooling solutions, you can explore our product Brochures.
3. Can Ambient Temperature Affect the Performance of Laser Cutting?
Yes, ambient temperature has a significant impact on the performance of laser cutting machines. Too high or too low ambient temperatures can upset the thermal balance of the machine, causing issues like condensation, electrical shorts, or thermal expansion. It is advisable to operate the machine in a temperature-controlled environment to avoid these problems.
4. Can temperature control affect the power consumption of laser cutting machines?
Yes, effective temperature control can impact the overall power consumption of laser cutting machines. Efficient cooling systems and managed temperatures allow the machine to operate within optimal conditions, potentially reducing the energy required to maintain those conditions.
By preventing overheating, less energy is wasted on correcting errors or compensating for temperature-related issues, thus resulting in better energy efficiency.
If you have further questions about optimizing your machine’s performance or need expert advice on your specific setup, please feel free to contact us.


