I. Introduction
1. Overview of Laser Cutting Technology
Laser cutting technology has revolutionized the field of precision metal processing and manufacturing. By using a focused laser beam to cut, melt, or vaporize materials, laser cutting offers unparalleled precision, speed, and versatility, making it an indispensable tool in various industries such as aerospace, automotive, electronics, and medical device manufacturing.
The efficiency of laser cutting stems from its non-contact process, which minimizes material deformation and ensures high-quality edges. Modern laser cutting machines are equipped with sophisticated control systems that allow for complex shapes and intricate designs.
These machines can cut through a range of materials including metals, plastics, glass, and composites, accommodating diverse manufacturing needs.
2. Importance of Proper Laser Cutting Machine Training
Despite the advanced capabilities of laser cutting machines, the mastery of this technology requires comprehensive training. Proper training ensures that operators understand both the technical and safety aspects of laser cutting, which is crucial for maximizing productivity and maintaining a safe working environment.
Operators must be familiar with the setup, calibration, and maintenance of the machines, as well as the specific software and control systems used to operate them. Additionally, knowledge of material properties and preparation methods is essential for achieving optimal cutting results.
Through systematic training, operators can develop the skills needed to troubleshoot issues and achieve consistent, high-quality output. Moreover, proper training mitigates the risks associated with operating high-powered lasers.
Safety protocols and emergency procedures are critical components of all training programs, aiming to protect operators from potential hazards such as laser radiation, electrical shocks, and fire hazards.
In essence, well-trained personnel not only enhance operational efficiency but also contribute to a culture of safety and continuous improvement within the organization.
As laser cutting technology continues to evolve, ongoing education and training become vital for keeping up with the latest advancements and maintaining a competitive edge in the industry.
II. Pre-Training Preparation
Effective pre-training preparation is paramount to ensure a successful learning experience for laser cutting machine operators. This preparatory phase encompasses several key elements designed to set a solid foundation for the comprehensive training that follows.
1. Prerequisites for Training
(1) Required Knowledge and Skills
Aspiring laser cutting machine operators should have a basic understanding of mechanical engineering principles and familiarity with computer-aided design (CAD) software. Knowledge of different materials and their properties, especially metals, will be advantageous. Basic mathematical and technical comprehension is also important for grasping the operational logic of laser cutting machines.
(2) Necessary Safety Equipment
Safety is a priority when working with laser cutting machines. Prior to beginning training, operators must be equipped with personal protective equipment (PPE), such as laser safety goggles to protect against harmful laser radiation, heat-resistant gloves, and protective barriers for potential fire hazards. Additionally, understanding the placement of emergency stops and ventilation requirements is crucial for maintaining a safe training environment.

2. Choosing the Right Laser Cutting Machine
The selection of an appropriate laser cutting machine is critical and should align with the specific training needs of the organization or individual.
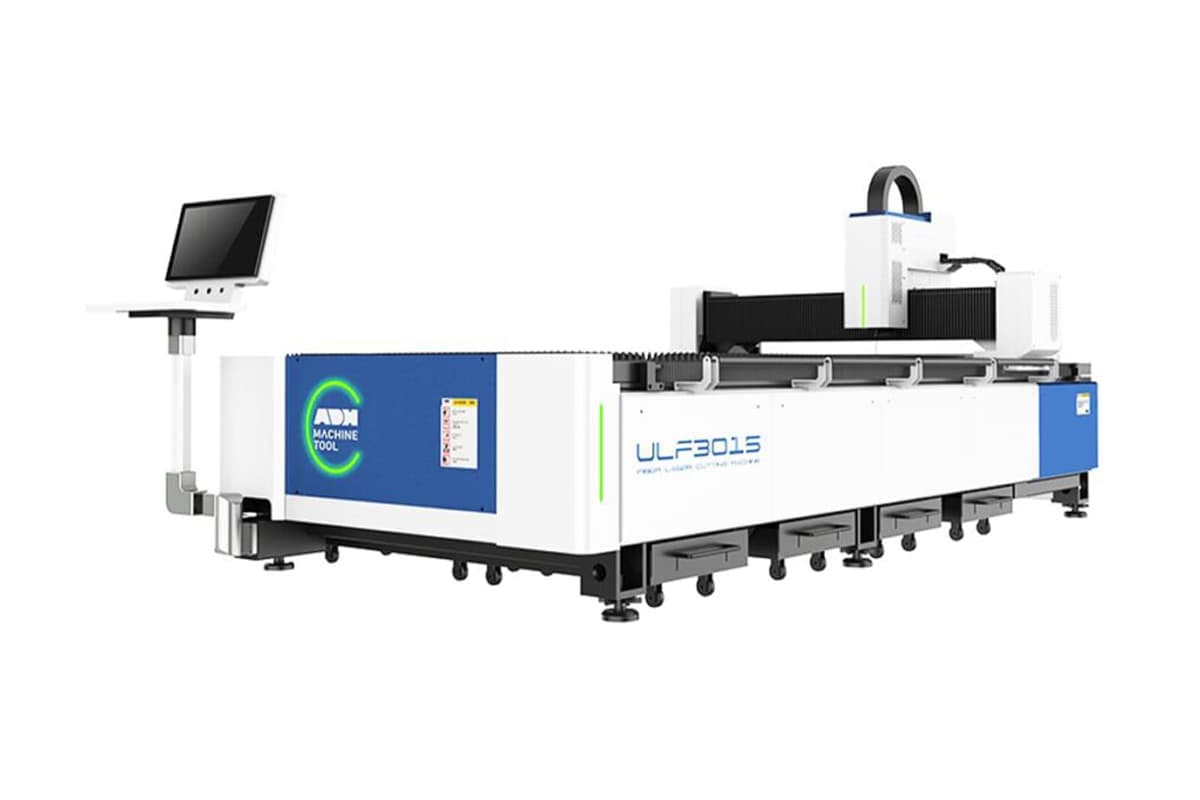
(1) Evaluating Different Models and Brands
Prospective trainees or organizations should evaluate different laser cutting machine models and brands, considering factors such as power output, precision, speed, and the types of materials they are capable of processing. The choice between CO2 lasers, fiber lasers, or other types is dictated by the intended applications and budgetary constraints.
(2) Determining the Appropriate Machine for Specific Tasks
The machine chosen should correspond with the specific tasks it will perform. For example, fiber lasers are often preferred for cutting metals due to their efficiency and precise cutting capabilities, whereas CO2 lasers may be more suitable for non-metal materials like plastics or wood. It is also worth considering machines with user-friendly interfaces for beginners or advanced features for experienced operators requiring complex operations.
II. Foundation: Non-Negotiable Safety Protocols and a Standardized Work Environment
Under the immense power of a laser cutter, even the slightest negligence can lead to catastrophic outcomes. Safety is not a checklist of bureaucratic tasks—it must be a deeply ingrained professional instinct. This chapter establishes an unshakable foundation of safety, from in-depth risk identification to systematic behavioral frameworks and clear emergency procedures, ensuring every operation remains fully under control.
1. In-Depth Risk Matrix Analysis: Recognizing the Four Core Hazards—Laser Radiation, Toxic Fumes, Fire, and Electrical Risks
Effective risk management begins with precise identification. In a laser cutting environment, operators must remain acutely aware of four major risk categories.
| Risk Category | Hidden Details and Description | Potential Consequences | Key Control Measures |
|---|---|---|---|
| Laser Radiation | Industrial laser cutters typically employ Class 4 lasers—the highest hazard level. The danger lies not only in direct exposure but also in diffuse and specular reflections. Even a seemingly matte surface can reflect invisible laser beams toward unexpected directions. The human blink reflex (around 0.25 seconds) is far too slow to prevent injury. The severity depends on wavelength, output power, and exposure time. | Permanent eye injury (retinal burns, blindness) and skin burns. | Engineering Controls: Fully enclosed machine housing and safety interlock doors that automatically halt laser emission when opened. Personal Protection: Wear professional laser safety goggles rated for the specific wavelength and Optical Density (OD) level of the laser. |
| Toxic Fumes | Cutting various materials generates hazardous gas and particulates. For instance, PVC releases hydrogen chloride (HCl), which reacts with moisture to form hydrochloric acid—harmful to both respiratory systems and equipment. Fluorinated polymers (e.g., Teflon) emit highly toxic fluoride gases. Even common materials such as wood and acrylic release formaldehyde, benzene, and other carcinogens. Fine particulates can penetrate deep into the lungs, causing long-term health effects. | Acute poisoning, respiratory burns, chronic lung disease, and cancer risk. | Ventilation: A high-efficiency Local Exhaust Ventilation (LEV) system must extract fumes directly from the cutting zone. In poorly ventilated environments, operators must wear proper respiratory protection (e.g., masks with appropriate filter cartridges). |
| Fire and Explosion | Fire is the most frequent hazard in laser cutting. Fine dust and cutting residues ignite more easily than solid blocks, sometimes resulting in dust explosions. When cutting carbon steel with oxygen as an assist gas, oxygen enrichment dramatically raises fire risk. Some materials can form smoldering embers that reignite later in the scrap bin even after the laser stops. | Equipment loss, facility fires, and burn injuries. | Workspace Management: Keep the laser system and its surroundings spotlessly clean; regularly clear debris and dust. Fire Equipment: A CO₂ or dry powder extinguisher (suitable for electrical and multi-material fires) must be available beside the machine, and the operator must be trained to use it. Never leave the machine unattended while operating. |
| Electrical Risk | Laser cutters operate on high-voltage systems. Inside their power supplies and laser sources exist potentially lethal voltages. Unauthorized maintenance of the electrical cabinet poses extreme danger. Ignoring proper Lockout/Tagout (LOTO) procedures is a primary cause of electrical accidents. | Electric shock, burns, or death. | Authorization & Training: Only qualified and authorized personnel may perform electrical maintenance. Safety Procedures: Strictly follow LOTO protocols; disconnect and lock all power sources before service. Regularly inspect cables and grounding integrity. |
2. The L.A.S.E.R. Safety Framework: A Five-Step Method for Building Unbreakable Pre-Operation Habits
To transform safety awareness into instinctive action, we developed the five-step L.A.S.E.R. safety framework. Before each startup, an operator should perform these checks as rigorously as a pilot’s pre-flight inspection.
(1) Locate: Identify All Emergency and Safety Devices
Before pressing any control button, visually and physically verify the position and condition of all critical life-saving devices.
1)Emergency Stop Buttons:
Know the location of every red emergency stop button; ensure they are easily accessible and unobstructed.
2)Safety Interlocks:
Inspect the machine’s protective doors by gently pushing or pulling to confirm they close securely and that the system displays a “door closed” status. Never bypass or short-circuit any interlock for convenience.
3)Fire Extinguisher:
Check that the CO₂ extinguisher beside the machine is within the green pressure range, safety pin intact, and that you know how to use it (Pull, Aim, Squeeze, Sweep).
(2) Assess: Inspect the Workspace, Ventilation, and Material Condition
Conduct a thorough inspection of the work area before beginning operations.
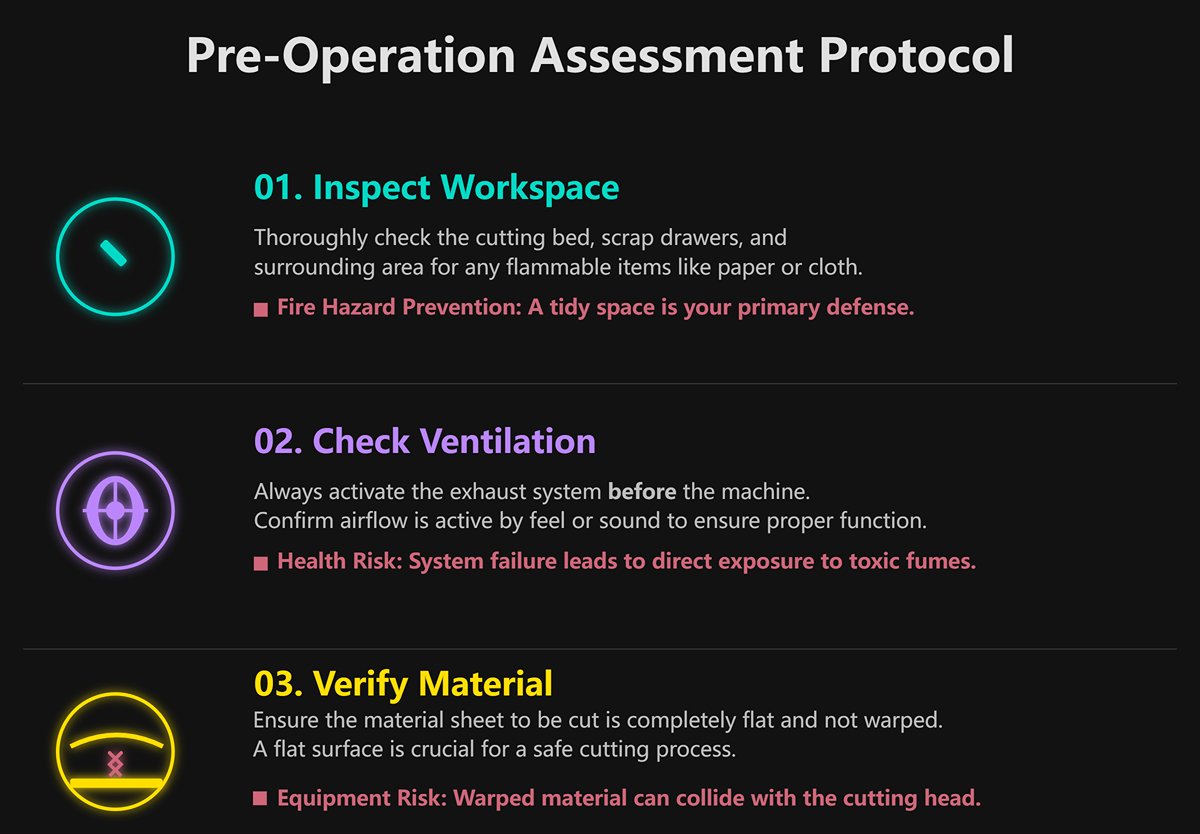
- Workspace: Check the cutting bed, scrap drawers, and surrounding area for flammable items such as paper, cloth, or leftover material pieces. A tidy workspace is the first line of defense against fire.
- Ventilation System: Always start the exhaust system before powering up the machine. Confirm airflow by feel or sound. A failed ventilation system means direct exposure to toxic fumes.
- Material Condition: Ensure the sheet to be cut lies flat and is not warped. Warped materials may collide with the cutting head, causing potential equipment damage.
(3) Suit Up: Wear and Check All Required PPE (Laser Safety Goggles, etc.)
Personal Protective Equipment (PPE) is your final line of defense against injury and must never be neglected.
1)Laser Safety Goggles: These are the most critical PPE. Ensure the goggles are rated for the exact wavelength of your laser (e.g., 10,600 nm for CO₂ lasers, 1,060–1,080 nm for fiber lasers) and have sufficient Optical Density (OD)—typically OD 5+ or higher. Lens color corresponds to the protection wavelength; using the wrong goggles is equivalent to wearing none.
2)Respiratory Protection: If ventilation is inadequate or cutting smoke-heavy materials (like MDF), wear a mask equipped with appropriate filter cartridges.
3)Gloves: Use two types. Cut-resistant gloves for handling sharp-edged sheets, and heat-resistant gloves when picking up freshly cut, still-warm parts. However, do not wear gloves while the machine is running, to prevent entanglement in moving components.
(4) Ensure: Verify Material Safety and Secure Proper Fixation
Before cutting, make sure the material is both safe and properly secured for the process.
1)Material Safety Verification:
Never cut unknown materials. Always confirm the material composition and strictly avoid cutting plastics containing chlorine (such as PVC or vinyl), fluoropolymers, or any substances that may release toxic gases. When in doubt, consult the Material Safety Data Sheet (MSDS) or contact your supplier.
2)Secure Fastening:
Lightweight or uneven materials should be firmly clamped or weighted down on the cutting bed to prevent movement caused by air currents or minor impacts. Movement during cutting can lead to failed cuts or nozzle collisions.
Always treat the power of the laser with respect.
(5) Respect: Never leave the machine operating unattended
1)Continuous Oversight:
During laser cutting, the operator must remain present and alert at all times. Fires can ignite unexpectedly, particularly when working with wood, cardboard, or acrylic. Your swift response can extinguish a small flame within seconds before it escalates into a serious incident.
2)Authorized Operation:
Only personnel who have received complete training and authorization may operate the laser cutter. Do not allow curious colleagues or visitors to handle the equipment.

3. Emergency Plan and Response Drills: Proper Handling for Fire, Injury, and Equipment Failure
In the event of an accident, calm and correct action is key to minimizing damage. All operators must memorize and regularly practice the following procedures.
(1) Scenario 1: Material Ignition
1)Press the emergency stop button immediately to cut power to the laser.
2)Keep the protective cover closed to limit oxygen supply. Observe if the flames extinguish on their own.
3)If the fire continues, use a CO₂ fire extinguisher and direct the short bursts toward the base of the flame. Never use water-based extinguishers, as they can cause electrical damage and pose conduction hazards.
4)After the fire is out, do not open the protective cover immediately. Wait several minutes for the smoke to be fully extracted and the material to cool.
5)Thoroughly inspect and clean the machine. Identify and correct the cause of the fire (e.g., incorrect parameters, focus error, poor ventilation) before restarting the system.
(2) Scenario 2: Personal Injury (Eye or Skin Burns)
1)Press the emergency stop button immediately.
2)Eye exposure: Escort the injured person to an eyewash station and flush the affected eyes with copious amounts of water for at least 15 minutes. Keep the eyes open and let water flow over the entire surface. Do not rub the eyes.
3)Skin burns: Rinse the burned area with cool water to relieve pain and reduce tissue damage.
4)Call emergency medical services immediately and inform responders of a laser-related injury, specifying the laser type and wavelength.
(3) Scenario 3: Equipment Malfunction (Abnormal noises, collision, alarms)
1)Press the emergency stop button immediately.
2)Record any error codes or messages displayed on the control panel.
3)Do not attempt to restart or repair the machine unless the issue is clearly identified and within your authorized scope (such as replacing a nozzle).
4)According to the pre-operation safety inspection contact list, promptly notify the equipment supervisor or maintenance engineer and describe the malfunction in detail.
Ⅲ. Core: The Five-Step Standard Operating Procedure (SOP) — From Digital Design to Physical Product
Mastery of laser cutting is not just about understanding its principles—it’s about following a repeatable, standardized workflow. This chapter outlines a five-step SOP that will serve as your “flight checklist” from design to finished product, ensuring precision at every stage and systematically improving cutting quality, production efficiency, and operational safety.
1. Step One: Design and File Preparation — Excellence Starts at the Source
A laser cutter is a faithful executor—it reproduces exactly what you draw in your digital file, including any hidden errors. Therefore, having a clean, optimized design file is the first and most critical step to achieving high-quality results.
(1) Choosing Between Vector and Raster Images: Cutting, Engraving, and Marking
Laser cutting software primarily works with two types of image files, and understanding their fundamental differences is essential:
Vector Graphics:
Composed of mathematically defined points, lines, and curves, they can be scaled infinitely without distortion. The laser head moves along the vector path, much like a pen tracing lines.
1)Applications:
- Cutting: When you want to completely separate a shape from the material, you must use vector paths.
- Vector Engraving/Scoring: The laser follows the same path at lower power, marking the surface with clear lines rather than cutting through it. This process is much faster than raster engraving and is ideal for outlines or fold lines.
2)Common Formats: DXF, AI, SVG, EPS, PDF (with vector data).

Raster or Bitmap Graphics: Composed of grids of pixels, similar to a photograph.
When enlarged, pixelation becomes visible. The laser scans line by line from left to right, modulating its power and firing frequency to reproduce the image’s light and dark areas.
1)Applications:
Raster Engraving: Used to create textured or recessed areas on the material’s surface, such as photo engraving, logos, or large text blocks.
Marking: Refers to shallow engravings on metal surfaces achieved through laser-induced color changes.
2)Common Formats: JPG, PNG, BMP, TIFF.
3)Advanced Detail:
In certain high-end applications, grayscale data can be leveraged—software maps varying shades of gray to different laser power levels, enabling a single raster pass to produce a dynamic “3D relief” effect with varying depth.
(2) Best Practices for Clean Files: Closed Paths, Removing Duplicates, and Optimizing Nodes
A flawed design file is often the main culprit behind failed cuts, wasted materials, and lost time. Before importing your file into the software, follow these essential “file hygiene” principles:
1)Ensure All Paths Are Closed:
For any shape to be cut, its vector path must be continuous and fully closed. Even a tiny gap can prevent the laser from completing the cut.
2)Remove Duplicate Lines:
In CAD software, lines are easily duplicated and layered unintentionally. Laser software will treat these as separate paths and cut them multiple times, causing overburning and deformation—especially on thin materials.
3)Convert Text to Outlines:
Transform all editable text into vector paths (Convert to Curves/Create Outlines). Otherwise, if the cutting computer lacks the font file, your text may display incorrectly or fail to cut properly.
4)Join and Combine Segments:
Merge fragmented contour lines (Join/Combine) into smooth, continuous paths. This creates a cleaner laser motion, avoiding pauses and burn marks at connection points.
5)Optimize Node Count:
Overly intricate curves can contain hundreds or even thousands of unnecessary nodes, overloading the controller and causing jitter or uneven motion during cutting. Using the software’s “Simplify Curve” feature can greatly reduce node density while keeping the original shape virtually unchanged.
6)Inspect for “Islands”
When cutting out hollow letters or patterns, be aware that fully enclosed inner sections (such as the centers of letters like “O” or “B”) may fall out. If you need to preserve them, design bridges manually or use a specialized stencil font.
(3) Navigating Interfaces and Importing Files in Popular Software (LightBurn, RDWorks, etc.)
Although different laser cutter brands come with distinct software, their core layouts and logic are quite similar. Using the popular LightBurn as an example, its interface can be divided into five main areas:
Creation Toolbar (Left Panel): Used to create basic vector shapes—such as text, circles, or rectangles—directly within the software.
1)Workspace (Center Panel): Simulates the laser cutter’s bed, where you can import, arrange, and edit your designs.
2)Layers/Cutting Parameters Panel (Right Panel): This is the main control area. The software uses colors to differentiate work layers. For each color (layer), you can set parameters such as mode (cut, engrave, fill), speed, power, and number of passes.
3)Laser Control Panel (Right Panel): Used for real-time interaction with the laser machine—setting the origin, moving the laser head, starting/pausing/stopping tasks, or running a frame test.
4)Top Menu Bar: Provides access to advanced functions such as file import/export, editing options, and device setup.
After importing your file, the typical workflow is: select a graphic, assign it a color (layer), and then set detailed cutting or engraving parameters for that layer in the Layer panel.
2. Step Two: Equipment Preparation and Calibration — Precision Comes from Fine-Tuning
Before you press “Start,” ensure the machine itself is in optimal physical condition—this is essential for achieving precision results.
(1) Standard Startup Sequence and System Self-Check
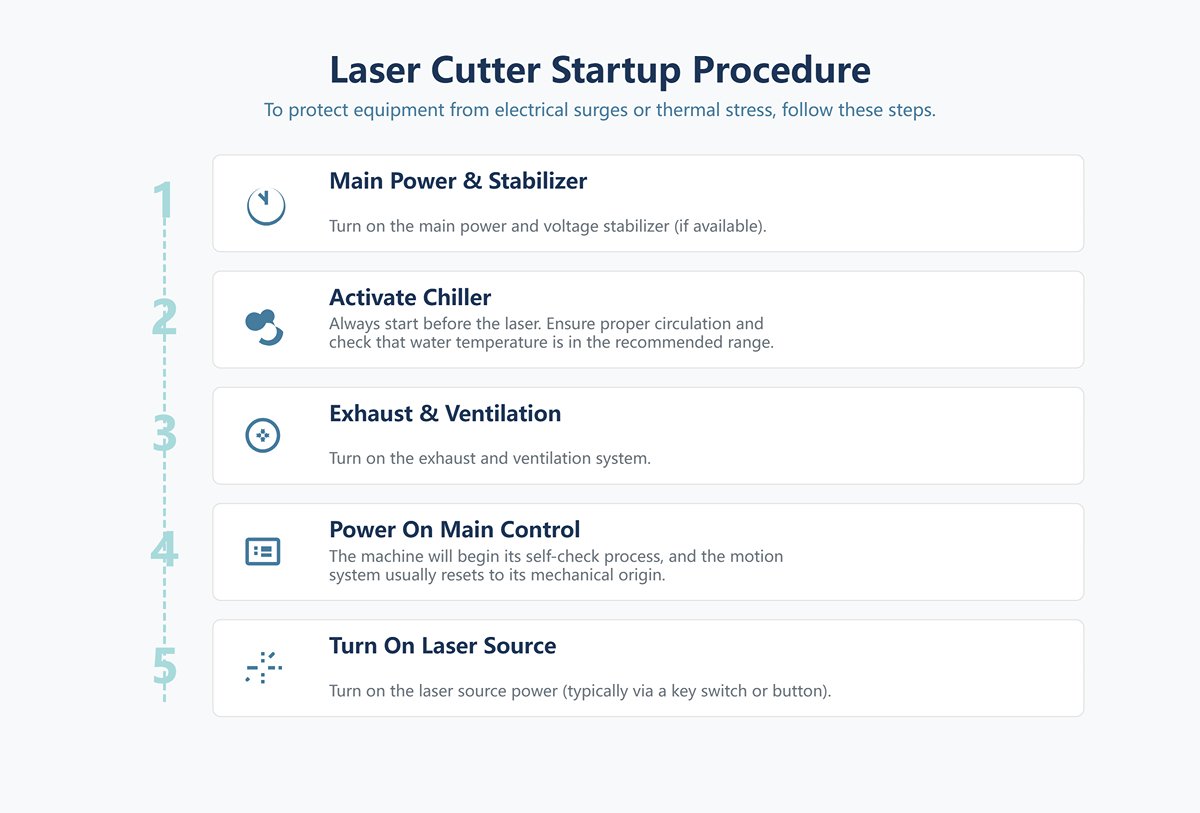
Following the correct startup procedure helps protect the equipment from electrical surges or thermal stress.
1)Turn on the main power and voltage stabilizer (if available).
2)Activate the chiller: Always start the cooling system before powering up the laser source to ensure proper circulation. Check that water temperature is within the recommended range.
3)Turn on the exhaust and ventilation system.
4)Power on the laser cutter’s main control: The machine will begin its self-check process, and the motion system usually resets to its mechanical origin.
5)Turn on the laser source power (typically via a key switch or dedicated button).
(2) Essential Calibration Techniques: Beam Alignment, Bed Leveling, and Focus Adjustment
These calibration steps aren’t required daily, but should be performed after replacing lenses, moving the machine, or noticing a decline in cutting performance.
1)Beam Alignment: Ensures that the laser beam, after reflecting through several mirrors, consistently hits the center of the cutting head vertically and precisely. Misalignment causes uneven energy distribution across the bed, leading to inconsistent cutting depth or failure to penetrate the material.
2)Bed Leveling: Makes sure every point on the working platform maintains the same distance to the laser head. An uneven bed changes focal distance across the workspace, resulting in varied cutting depth.
3)Focus Calibration: Determines the point where the laser’s energy is most concentrated and sets it precisely at the surface or designated depth within the material. This adjustment has the greatest impact on cutting efficiency and edge quality.
4)Ramp Test Method: A simple yet effective way to find the optimal focal distance.
- Place a piece of scrap material on the bed at a slight incline (one end higher than the other).
- Run a straight line along the slope using very low power.
- Observe the line: the thinnest, darkest, and deepest segment marks the optimal focus point.
- Measure and record the vertical distance from the nozzle tip to this point using a focus gauge or auto-focus tool—this is your standard focal length.
3. Step Three: Parameter Setup and Job Configuration — Giving the Machine Intelligence
Properly configuring the job in software is the key to translating your design intent into machine commands.
(1) Importing, Positioning, and Layering Strategies: Planning the Cutting Path
1)Import and Position: Bring your clean design file into the workspace and move it to the location where you want it cut on the material.
2)Layering Strategy: Use color layers to plan the processing sequence. A common and effective principle is “engrave first, then cut—inner before outer.” This means you perform all raster engraving first, then cut inner contours, and finish with the outer perimeter. This prevents parts from shifting after they’re severed, which could misalign subsequent engraving or internal cuts.
(2) The Golden Triangle of Parameters: Balancing Power, Speed, and Frequency
Power, Speed, and Frequency are interdependent core parameters. There is no single “correct” setting—only an optimal balance for a given material and thickness.
1)Power (%): Determines beam intensity. Higher power increases cutting capability but may cause excessive burning, melting, or a wider heat-affected zone (HAZ).
2)Speed (mm/s): Controls how fast the beam moves across the material. Faster speeds reduce energy per area. Thin materials work better with high speed and low power; thick materials need slower speed to cut through completely.
3)Frequency (Hz) (for pulsed lasers): Refers to the number of pulses emitted per second.
4)High Frequency: Produces greater overlap between pulses, creating smoother, more continuous energy output—ideal for high-speed metal cutting with clean edges.
5)Low Frequency: Delivers stronger individual pulses—better for thick materials or precision cutting with sharp corners, reducing heat buildup.
6)The Art of Dynamic Balance: Together, these parameters determine the line energy applied to the material. For a finer, cooler-cut result, try combining lower power, slower speed, and adjusted frequency, rather than simply increasing speed.
(3) Simulation Run and Frame Check: The Final Safeguard Before Cutting
Before initiating the actual cut, always perform these checks:
1)Simulation Run: Use the software’s simulation feature to preview the full motion path of the laser head and estimate the total processing time.
2)Frame or Trace Check: The laser head traces the outer boundary of your selected design without emitting light. This quick preview confirms that your design fits entirely within the material area, preventing accidental runs off the edge or onto the worktable.

4. Step Four: Task Execution and Process Monitoring — Guarding the Moment of Creation
This is the thrilling stage where digital instructions are transformed into tangible reality—but it’s also the time to stay alert.
(1) Starting the Task and Real-Time Monitoring: Learn to See and Listen
Once the job begins, the operator’s duty is not to walk away but to remain present and observe throughout the entire process.
1)Watch with your eyes:
Observe the cutting flame. A normal cutting flame should be steady, bright, and directed downward. If it becomes too large, turns yellow, or flickers upward, it’s usually a sign of excessive power, slow speed, or poor ventilation—all early warnings of a potential fire. Also check that the cut path is clean and smooth.
2)Listen with your ears:
Get familiar with the machine’s normal operating sounds—typically a stable “hissing” combined with the steady hum of the motors. If you hear irregular “popping,” harsh scraping, or clanging noises, immediately hit the pause or emergency stop button and inspect the situation.
3)Little-known detail:
Modern industrial laser cutters increasingly integrate IoT (Internet of Things) sensors that monitor parameters such as cutting head temperature, gas pressure, and laser power in real time. Once the system detects any abnormal deviation from preset values, it can automatically alert the operator or halt the machine—marking the evolution from “manual supervision” to “intelligent safeguarding.”
(2) In-Process Quality Checkpoints and Fine-Tuning Techniques
For lengthy cutting tasks, you can pause after completing a section to inspect cut depth and edge quality. If the material isn’t fully cut through, keep it stationary and, within the software, reselect only the incomplete portion—then slightly increase power or reduce cutting speed for another pass. Some advanced controllers even allow on-the-fly adjustments to power and speed during operation.
5. Step Five: Post-Processing and Shutdown — The Perfect Finishing Touch
A professional finishing routine is just as crucial as the initial startup preparation.
(1) Safe Part Removal and Edge Quality Inspection
1)Wait for ventilation:
After cutting is complete, do not open the protective door immediately. Wait at least 3–5 minutes for the exhaust system to completely remove residual fumes and dust from the enclosure.
2)Safe removal:
Open the protective door and carefully extract the finished components. Be cautious—both parts and waste edges can be very sharp and may retain heat.
3)Quality inspection:
Check whether the final dimensions are within tolerance, verify that the edges are smooth, and ensure there are no residual dross or melt marks on the back.
(2) Standard Shutdown Sequence and End-of-Day Cleaning Routine
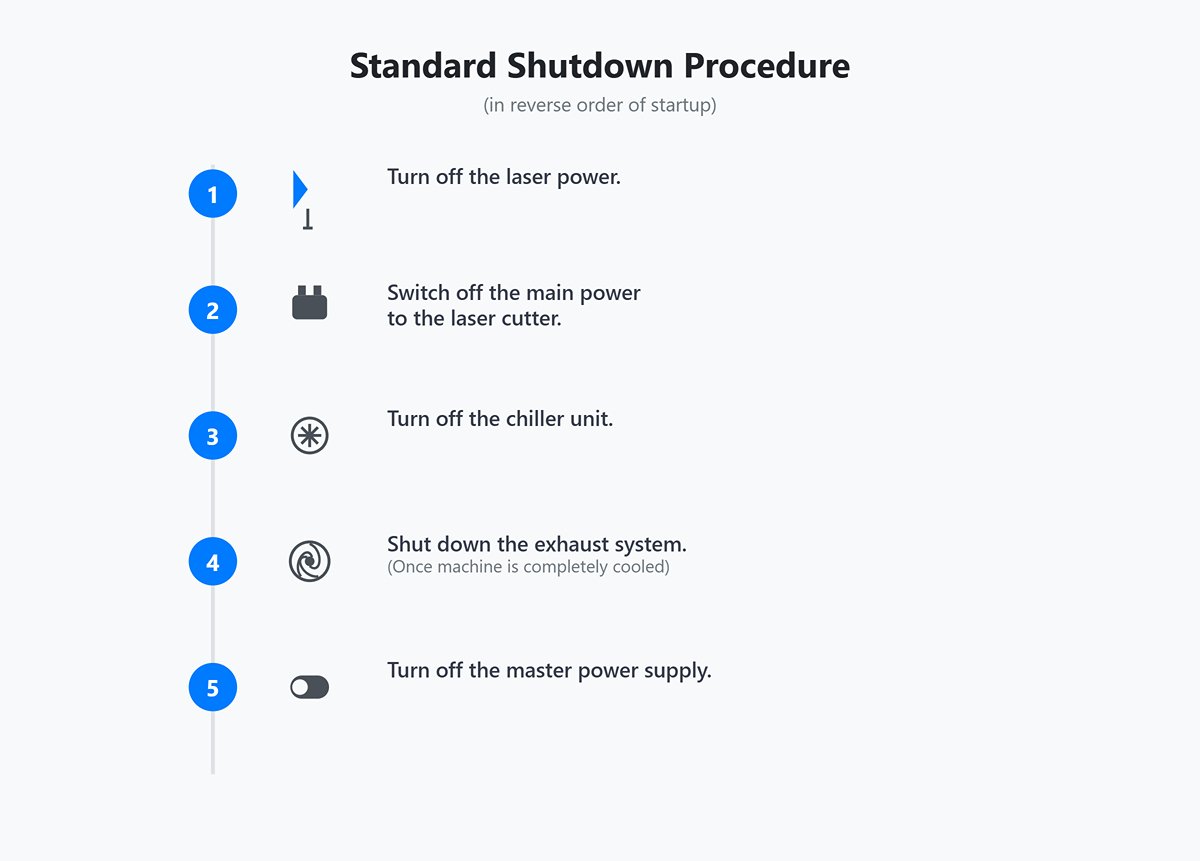
1)Standard shutdown procedure (in reverse order of startup):
- Turn off the laser power.
- Switch off the main power to the laser cutter.
- Turn off the chiller unit.
- Once the machine is completely cooled, shut down the exhaust system.
- Finally, turn off the master power supply.
2)End-of-day cleaning routine:
- Thoroughly clean the worktable: Remove all leftover materials, waste, and debris. A worktable covered in scraps is a serious fire hazard.
- Empty the waste collection drawer.
- Clean the gaps between the honeycomb platform or knife bar bed using a vacuum or soft brush.
- Wipe the machine casing gently with a lint-free cloth and specialized cleaning fluid.
Ⅳ. Mastery: The Art and Science of Controlling Materials and Parameters
If the Standard Operating Procedure (SOP) forms the skeleton of laser cutting, then a deep understanding of material properties and skillful control of parameters constitute its flesh and soul. A true expert never relies blindly on preset data tables but perceives the underlying logic of how different materials interact with the laser beam. Through systematic testing and optimization, they unlock the machine’s full potential. This chapter will guide you through this advanced domain—an exploration of perfect cutting from both artistic and scientific perspectives.
1. Understanding Material Properties: How Different Materials Interact with Lasers
The essence of laser cutting lies in laser–material interaction. The energy from the laser beam is absorbed by the material, causing an abrupt rise in local temperature that leads to melting, vaporization, or chemical reactions. Each material differs greatly in absorption rate, thermal conductivity, and chemical characteristics at a given wavelength—factors that dictate distinct processing strategies.
(1) Metals (Stainless Steel, Aluminum): How Auxiliary Gas Selection Determines Cut Quality
In metal cutting—particularly with fiber lasers—the choice of assist gas does much more than simply “blow away molten residue.” It directly influences the physical and chemical processes at play, fundamentally shaping the cut surface’s quality, color, and the ease of post-processing.
| Assist Gas | Mechanism and Hidden Details | Cutting Result | Typical Applications |
|---|---|---|---|
| Oxygen (O₂) | Exothermic oxidation: Oxygen reacts violently with hot metal, releasing large amounts of heat. This additional energy, combined with the laser’s power, dramatically boosts penetration through thick carbon steel—a process known as “reactive melting.” However, it also forms a thin oxide layer along the cut. | Darkened, slightly rough surface with oxidation. Cutting speed relatively slower. | Thick carbon steel plates: prioritized for cost-effectiveness and cutting strength where surface color and weld quality are not critical. The oxide layer may offer minor rust protection but can interfere with welding. |
| Nitrogen (N₂) | Physical melting and protection: Nitrogen is inert and does not react with the metal. Its sole function is to expel molten material at very high pressure (up to 30 Bar) while shielding the cut from air to prevent oxidation. This enables a purely “melting” cut. | Bright, mirror-smooth surface with no oxide layer; preserves the metal’s natural color. Cutting speed extremely fast, particularly on thin sheets. | Stainless steel, aluminum, brass: ideal when high surface quality is required for direct welding or aesthetic applications. Parts cut with nitrogen typically require no grinding before subsequent processes, greatly improving efficiency. |
| Compressed Air | Cost-effective hybrid cutting: Air contains ~21% oxygen and ~78% nitrogen, offering partial exothermic benefits and moderate clearing capability—an intermediate option between oxygen and nitrogen. However, moisture and oil in compressed air can damage optics, so efficient drying and filtration are essential. | Acceptable surface quality, with minor oxidation and dross; edges tend to appear yellowish or gray. | Thin metal sheets where cost is the priority: best suited for parts without appearance or direct welding requirements. |
(2) Organic Materials (Acrylic, Wood): Techniques for Flame-Polished Edges and Burn Prevention
The CO₂ laser is the workhorse for processing organic materials. Unlike metal cutting, the focus here is precise heat control to achieve desired edge finishes.
1)Acrylic:
Achieving a “Flame-Polished Edge”: To produce edges that are smooth and glass-like, the key is to drastically reduce or even turn off the air assist. Strong airflow cools the molten acrylic too quickly, leaving a frosted or matte-looking edge. A gentle air assist allows the melted edge to level out naturally under surface tension and then solidify into a polished, glossy finish. This requires higher power and a relatively slower cutting speed—the process works by melting and allowing the material to reflow before it solidifies.
2)Wood/Plywood:
Minimizing Charring: A certain degree of edge darkening is unavoidable when cutting wood, but it can be kept to a minimum. The rule of thumb is “in fast, out fast.” Use the highest possible speed with just enough power to cut through the material, so the laser completes the cut before combustion starts.
3)Lesser-Known Techniques:
Masking Tape: Applying a layer of paper or masking tape to the surface dramatically reduces smoke staining and discoloration caused by vaporized resin during cutting.
Multiple Passes: For thicker boards, instead of a single slow pass at high power—which causes heavy charring—make two or three passes at moderate power and high speed. Each pass removes a layer with less accumulated heat, resulting in a cleaner edge.
Air Assist: Unlike acrylic, cutting wood requires strong air assist. It not only clears debris but also quickly extinguishes flames along the cut, effectively reducing charring.
(3) Special Materials (Leather, Fabric, Coated Boards): Processing Strategies and Considerations
1)Leather:
Natural leathers—such as vegetable-tanned varieties—respond very well to CO₂ lasers, yielding clean cuts and crisp engravings. The crucial part is controlling fumes and residues. A robust ventilation system is essential. For engraving, use low power and high speed to create a branded or embossed look. Caution: Never cut synthetic leathers containing PVC, as they release toxic chlorine compounds.
2)Fabrics:
One major advantage of laser cutting textiles is heat-sealed edges. The laser’s heat fuses the edges of synthetic fibers such as nylon or polyester, preventing fraying and eliminating the need for hemming. For natural fibers like cotton or linen, while melting doesn’t occur, the cuts can still be extremely precise. Use a honeycomb bed and secure the fabric flat to prevent curling or shifting.
3)Coated/Anodized Metals:
CO₂ lasers cannot cut metal, but they can precisely ablate surface coatings, exposing the raw metal beneath. This is commonly used for making anodized aluminum business cards or coated stainless-steel nameplates with logos. It’s essentially a raster engraving process where you just need enough power to remove the coating.
(4) Materials You Must Never Cut and the Reasons Why
Never cut materials of unknown composition. The following substances can release deadly gases or permanently damage your equipment when exposed to laser energy and must be strictly avoided.
| Prohibited Material | Hazard Description |
|---|---|
| Chlorine-containing plastics (PVC, vinyl, etc.) | Releases chlorine and hydrogen chloride gases. Chlorine is highly toxic and damages the respiratory system; hydrogen chloride reacts with water vapor to form hydrochloric acid, which rapidly corrodes metal components and optical lenses, causing irreversible equipment damage. |
| ABS plastic | Emits hydrogen cyanide (highly toxic) and styrene fumes, producing dense smoke and molten deposits that contaminate the machine. |
| Polycarbonate (PC, Lexan) | Ineffective cutting—melts and burns, generating heavy smoke and soot. Ironically, PC is used for laser safety windows because it absorbs CO₂ laser radiation. |
| Epoxy resin/fiberglass | Releases toxic fumes, and fine dust poses a respiratory hazard. |
| Polystyrene foam (Styrofoam) | Extremely flammable; melts into sticky residue that’s difficult to remove. |
| HDPE (High-Density Polyethylene) | Melts easily, produces poor cuts, and is prone to ignition. |
2. Beyond Parameter Tables: Developing a Custom Material Test Matrix
Manufacturer-provided parameter charts are only a starting point. Skilled operators build a precise, customized parameter database for every material they regularly use. The Material Test Matrix offers a structured, scientific method for establishing these optimal settings.
(1) Designing an Efficient Parameter Test Grid
Most laser software (e.g., LightBurn) includes a Material Test Generator. It creates a grid of small squares where the X-axis represents one variable (e.g., speed) and the Y-axis represents another (e.g., power).
Design Steps:
1)Select Mode: Decide whether you’re testing cutting (Line mode) or engraving (Fill mode).
2)Define Variables: The most common pair is speed vs. power.
3)Set Ranges: Determine a reasonable range based on material thickness and experience. For example, when testing 3 mm plywood cuts:
4)Speed range: 10 mm/s to 30 mm/s, divided into five steps.
5)Power range: 40% to 80%, also divided into five steps.
6)Generate the Grid: The software will create a 5×5 matrix of squares, each representing a unique (speed, power) pair, with labels automatically added.
7)Run the Test: Execute the job on a small piece of scrap material.
(2) Systematic Interpretation: Finding the Optimal Parameter Combination
After the test run, you’ll have a grid of 25 results. Here’s how to interpret them:
1)For Cutting Tests:
- Pick up the test board and gently press each square.
- Eliminate cells that didn’t cut all the way through.
- Among those that fully cut through, find the fastest speed—this usually marks the most efficient combination.
- If multiple settings succeed, compare edge quality: choose the one with the least charring and the thinnest kerf.
2)For Engraving Tests:
- Examine each square’s color and depth.
- Select based on your desired outcome: darker, higher-contrast marks use higher power and slower speed; lighter, faster marks use lower power and higher speed.
- Run your fingers over the surface to feel for smoothness—choose settings with minimal rough residue.
Record the final chosen settings—you’ve now established the perfect parameters tailored to your machine and your batch of material.
3. Advanced Parameter Optimization: Achieving Millimeter-Level Precision and Impeccable Detail
When basic cutting no longer meets your standards—especially for precision assembly or flawless aesthetics—these advanced techniques become essential.
(1) Kerf Compensation: The Key to Perfect Fit Assembly
The laser beam itself has a finite width—typically between 0.1 and 0.3 mm. The material removed during cutting is known as the kerf. Without compensation, a design specified as a perfect 100 mm square might actually come out at 99.8 mm. Such deviations can be fatal for precision joints like mortise-and-tenon fits or shaft-hole assemblies where tight tolerances are essential.
(2) Compensation Method
1)Measure the kerf width:
- Accurately cut a shape with a known size, such as a 20 mm × 20 mm square.
- Use a high-precision caliper to measure the actual dimensions of the cut piece (for instance, 19.85 mm).
- Kerf value = Design dimension − Actual dimension (20 mm − 19.85 mm = 0.15 mm).
2)Apply the compensation:
In your laser cutting software, the compensation input is generally half of the kerf value (0.15 mm / 2 = 0.075 mm).
- For outer contours, the software offsets the cutting path outward by 0.075 mm.
- For inner contours (such as holes), it offsets the path inward by 0.075 mm.
- This ensures that while the laser beam’s center follows the offset path, its edge precisely traces your original design lines, maintaining accurate final dimensions.
(3) Corner Power Control and Lead-In Settings: Eliminating Start/End Defects
1)Corner/Minimum Power Control:
When the laser head slows down at sharp corners, maintaining full power can cause excessive heat input, leading to burnt edges or rounded corners. Advanced controllers allow you to set a “minimum power” or “corner power” threshold—when speed drops below a set value, the power automatically decreases to preserve crisp, clean corners.

2)Lead-In (and Lead-Out) Settings:
During piercing, the laser must linger briefly at a fixed spot, which can leave an unsightly burn mark on the contour of the part. The lead-in technique avoids this by starting the piercing outside the part’s actual outline on a short approach line. The laser pierces in the scrap area, transitions smoothly into the part’s contour, and exits along a lead-out line—ensuring flawless, blemish-free edges on the final piece.
(3) Multi-Layer and Multi-Pass Cutting Strategies: Extending Material and Thickness Capabilities
In the following situations, a single-pass cut is usually not ideal:
1)Cutting thick materials:
A single high-power pass on thick stock can trap heat, causing warping, charring, and excessive taper in the cut. Using two to three passes at moderate power while gradually lowering the focal point layer by layer yields straighter, cleaner edges.
2)Cutting flammable or easily melted materials:
For thin wood sheets or delicate plastics, a single high-power pass may cause severe burning or melting. Using multiple low-power, high-speed passes, each removing only a small amount of material, minimizes heat buildup and prevents damage.
3)Kiss-Cutting:
This technique applies to layered materials like adhesive labels, where only the top layer (the sticker) is cut while the backing layer remains intact. It requires exceptionally precise control of power and speed, often achieved through repeated tests to find the exact settings that just penetrate the top layer.
V. Advanced Training Techniques
Advanced training techniques for laser cutting machine operators are designed to elevate proficiency levels and enable the handling of complex tasks with precision and efficiency.
This section will delve into high-level functionalities, optimization strategies, and continuous improvement methodologies, critical for experts in the field who seek to enhance their capabilities and stay ahead of industry advancements.
1. Mastering Multi-Axis Cutting
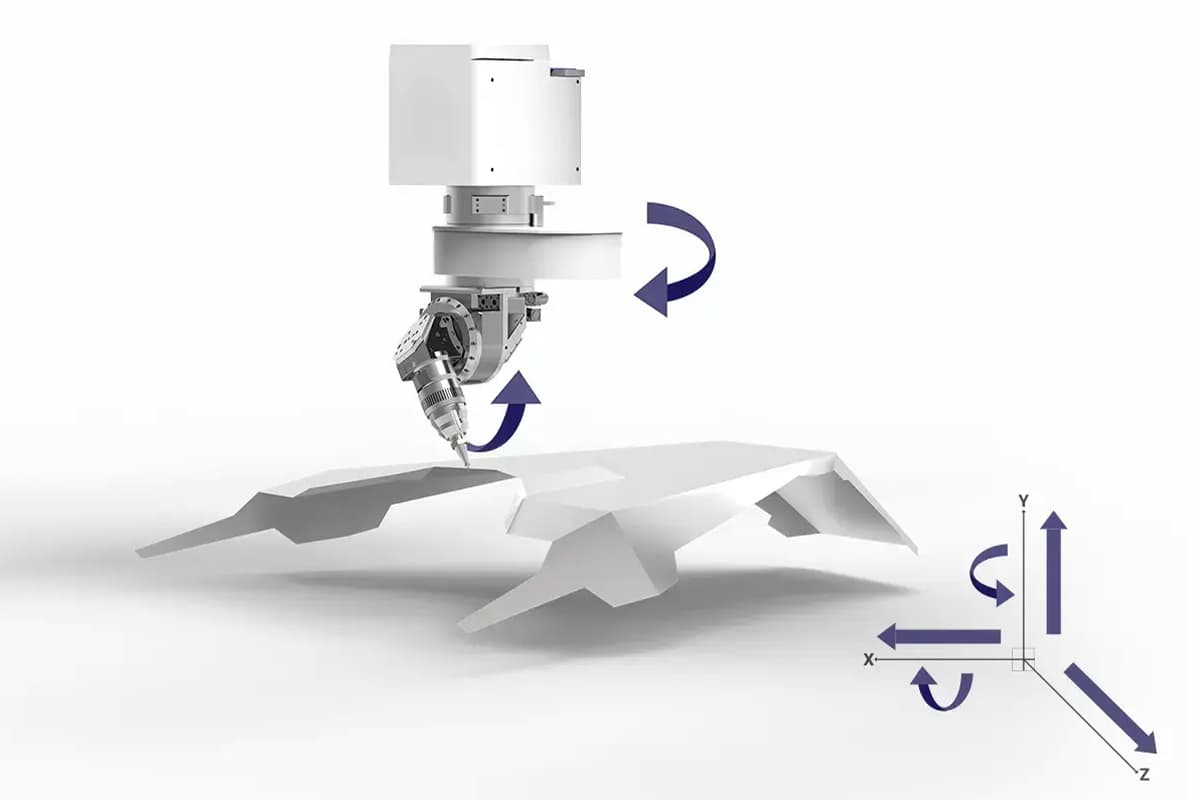
Multi-axis cutting expands the dimensional capabilities of laser cutting machines, allowing for more intricate and complex designs. This advanced technique requires a deep understanding of machine dynamics and software control.
- Understanding Multi-Axis Dynamics: Advanced training includes the study of the additional rotational and tilt axes, which enable the laser beam to approach the workpiece from multiple angles. Trainees must grasp the principles of 3D coordinate systems and the impact of multi-axis movement on cut quality and precision.
- Advanced Software Integration: Operators will learn to use sophisticated CAD/CAM software modules specifically designed for multi-axis operations. This includes setting up kinematic sequences, simulating multi-axis movements, and optimizing tool paths to minimize material wastage and enhance efficiency.
- Practical Applications and Techniques: Hands-on exercises in cutting complex geometries, such as curved surfaces and angled cuts, will be conducted. Operators will also be trained on specific techniques for managing material deformation and ensuring consistent focus throughout the cutting process.
2. Fine-Tuning for Precision and Quality
Achieving the highest levels of precision and quality in laser cutting necessitates the fine-tuning of machine parameters and a profound understanding of material interactions.
- Precision Parameter Optimization: In-depth training on adjusting laser power, pulse frequency, speed, and focus to achieve superior precision. Trainees will experiment with different settings to understand their effects on edge quality, kerf width, and heat-affected zones.
- Quality Control and Inspection: Advanced techniques for evaluating and ensuring cut quality involve using tools like optical microscopy and surface profilometry. Operators will learn to perform detailed inspections and implement feedback loops to continuously improve cutting processes.
- Adaptive Cutting Strategies: Implementing real-time monitoring and adaptive control systems to adjust parameters dynamically during the cutting process. This includes utilizing sensors and machine learning algorithms to predict and compensate for variations in material properties or environmental conditions.
3. Enhancing Cutting Efficiency
Efficiency in laser cutting operations is paramount for increasing productivity and reducing costs. Advanced training focuses on refining techniques to enhance overall operational efficiency.
- Nesting Optimization: Techniques for optimizing the layout of multiple parts on a single sheet of material to maximize material utilization. Software tools for automated nesting and strategies for reducing cutting paths and transition times between cuts are explored.
- Batch Processing and Automation: Training on setting up and managing batch processing routines, including the use of automated loading/unloading systems, conveyor belts, and robotic arms. Operators will learn to set parameters for unmanned operation, ensuring consistent performance over extended periods.
- Lean Manufacturing Principles: Applying lean manufacturing principles to laser cutting operations helps to eliminate waste and streamline processes. This involves value stream mapping, continuous improvement, and implementing Just-In-Time (JIT) production techniques.
4. Complex Material Processing
Advanced material processing techniques enable the cutting of challenging materials that require specialized knowledge and handling.
- Exotic and Composite Materials: Training includes the properties and cutting techniques for advanced materials such as titanium, carbon fiber composites, and high-strength alloys. Operators will learn to customize laser settings and cooling methods to handle these materials effectively.
- Microfabrication: Techniques for micro-scale laser cutting, essential for industries such as medical devices and electronics where precision at micron levels is critical. This involves understanding laser-matter interactions at small scales and using high-precision positioning systems.
- Multi-Material Stacking: Methods for cutting multiple layers of different materials simultaneously, optimizing the process for speed and consistency without compromising quality. This requires thorough knowledge of how different materials react to laser processing and how to balance power and speed settings accordingly.
5. Troubleshooting and Advanced Diagnostics
Expert-level troubleshooting and diagnostics are crucial for maintaining uninterrupted and high-quality operations.
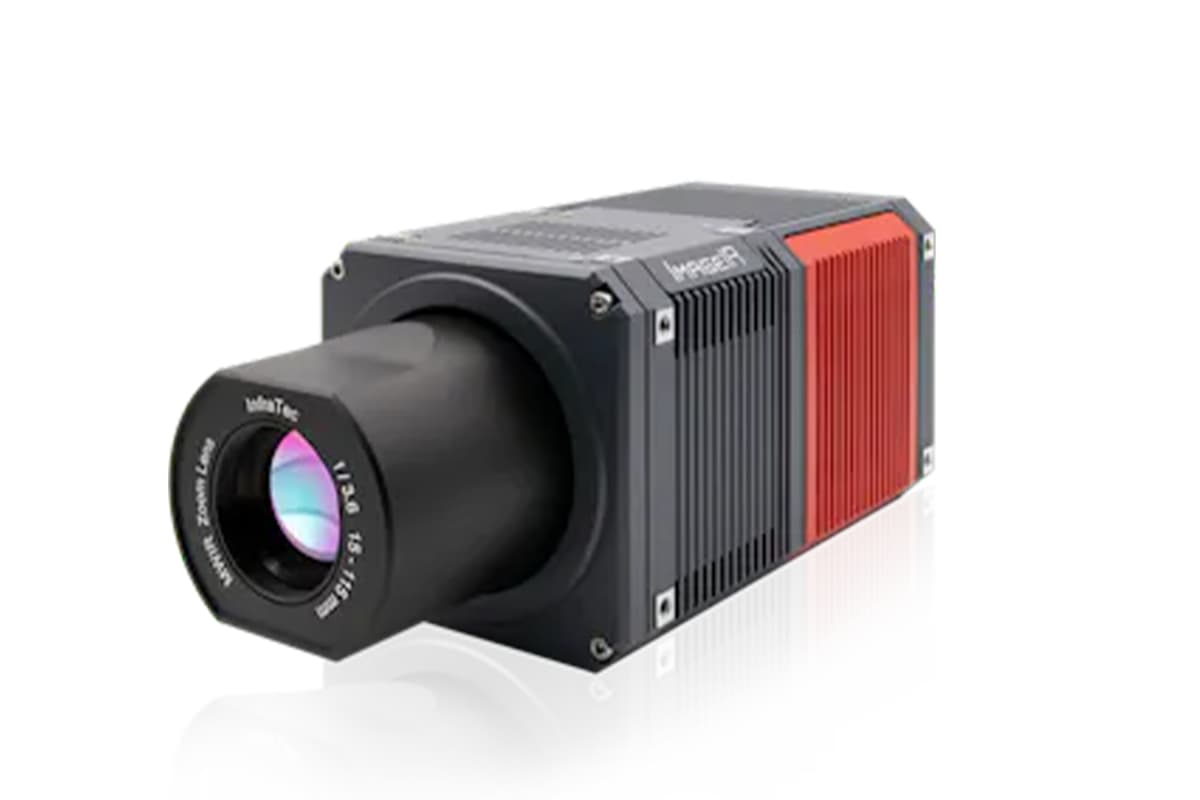
- Advanced Diagnostic Tools: Training on using advanced diagnostic tools like interferometers, beam profilers, and thermal imaging cameras to analyze and troubleshoot laser performance issues. These tools help in identifying problems with beam quality, alignment, and thermal effects.
- Predictive Maintenance Strategies: Implementing predictive maintenance techniques using data analytics and condition monitoring systems to anticipate and address potential machine failures before they occur. Understanding and applying these strategies help in maintaining high uptime and operational reliability.
- In-depth Case Studies: Studying real-world case studies of complex troubleshooting scenarios and the solutions implemented. This provides operators with practical insights and problem-solving approaches that can be applied in diverse situations.
6. Continuous Improvement and Certification
Continuous improvement is a fundamental aspect of advanced training, ensuring operators remain at the forefront of technological advancements and industry standards.
- Continuous Learning and Upgrading Skills: Encouraging participation in ongoing training programs, workshops, and industry seminars. Staying updated with the latest advancements in laser technology, software updates, and best practices through continuous education is emphasized.
- Pursuing Advanced Certifications: Guidance on obtaining advanced certifications from recognized industry bodies, which validate an operator’s expertise and can significantly enhance career progression. Topics covered include preparation for certification exams and understanding the criteria for various certification levels.
- Implementing Feedback and Innovation: Creating a culture that values feedback and innovation, where operators are encouraged to experiment with new techniques and share their findings. Collective brainstorming and collaborative initiatives are promoted to foster innovative solutions and continuous process enhancements.
VI. Certification and Continuous Learning
Certification and continuous learning are essential pillars for laser cutting machine operators aiming to achieve and maintain expertise in this technologically advanced field. These aspects ensure that operators remain proficient, adhere to industry standards, and are prepared for the evolving demands of laser technology.
1. The Importance of Certification
Obtaining certification in laser cutting operations validates an operator's skills and knowledge, enhances career prospects, and contributes to maintaining high industry standards.
- Recognition of Competency: Certification serves as an official acknowledgment of an operator's ability to handle laser cutting machines proficiently. It demonstrates to employers and peers that the operator has undergone rigorous training and met the industry criteria for skill and understanding.
- Enhancing Career Opportunities: Certified operators are often more attractive to employers due to their proven expertise. Certification can open doors to advanced positions, higher responsibilities, and potential salary increases within the manufacturing and technology sectors.
- Maintaining Industry Standards: Certification programs align with international standards, ensuring operators' practices comply with the latest safety, environmental, and operational protocols. This consistency across the industry enhances overall safety and quality.
- Types of Certification: Various certification levels exist, from basic operation to advanced specialty areas, each focusing on different aspects of machine operation, safety, and material handling. Operators can pursue certifications that match their level of expertise and areas of interest.
2. Pathways to Certification
Achieving certification involves different pathways, each tailored to the operator's level of experience and desired expertise.
- Foundational Certifications: These are designed for beginners and focus on the basic competencies needed to operate laser cutting machines safely and effectively. They cover fundamental skills in machine setup, basic material handling, and standard safety procedures.
- Advanced Certifications: Targeted towards experienced operators, these certifications cover complex operations, such as multi-axis cutting, exotic material processing, and advanced troubleshooting. Advanced certifications require a deeper understanding of both practical and theoretical knowledge.
- Specialty Certifications: These focus on niche areas within laser cutting, such as microfabrication, automation integration, or specific material applications. Specialty certifications help operators specialize in particular industry segments, enhancing their expertise and value.
3. The Role of Continuous Learning
As laser technology evolves, continuous learning ensures that operators remain at the forefront of industry developments, enabling them to leverage new advancements effectively.
- Staying Updated with Technology: Continuous learning involves regularly engaging with the latest technology trends, machine upgrades, and cutting-edge techniques in laser processing. This ongoing education helps operators anticipate and adapt to technological changes rather than react to them.
- Professional Development Workshops: Participating in workshops and seminars provides opportunities for hands-on experiences with new technologies and processes, facilitates networking with industry peers, and enhances problem-solving abilities through shared learning experiences.
- Online Platforms and Resources: E-learning platforms, webinars, and online courses offer flexible, up-to-date educational content that operators can access from anywhere. These resources are invaluable for learning new software, programming languages, and operational strategies.
4. Implementing a Learning Culture
Promoting a culture of continuous improvement and education benefits both individuals and organizations.
- Encouraging Innovation and Experimentation: A workplace culture that supports continuous learning fosters innovation. Operators are encouraged to experiment with new techniques and share their findings, leading to improved processes and products.
- Mentorship and Knowledge Sharing: Experienced operators can mentor less experienced colleagues, sharing knowledge and insights gained from years of practice. This mentorship accelerates learning and helps build a supportive professional community.
- Regular Feedback Mechanisms: Implementing a system for regular feedback and performance evaluations helps operators understand their strengths and areas for improvement. Feedback loops promote a cycle of continuous learning and development.
- Incentives for Continued Education: Organizations can encourage ongoing learning by offering incentives such as tuition reimbursement for courses, time off for professional development, or recognition programs for achieving certifications.
VII. FAQ
1. What are the most important safety measures to take when using a laser cutting machine?
Safety is a top priority in laser cutting operations. Essential measures include wearing appropriate personal protective equipment, such as laser safety goggles and heat-resistant gloves. Operators should establish clear controlled areas and ensure proper machine grounding to prevent electrical hazards.
Additionally, adherence to emergency shutdown protocols and routine maintenance to prevent mechanical failures is crucial. Educating all personnel on fire safety measures, such as the use of extinguishers and ensuring adequate ventilation, further fosters a safe working environment.
2. What are the common materials that can be cut using a laser cutter?
Laser cutters can process a broad range of materials, including metals like steel and aluminum, and non-metals such as plastics, wood, glass, and composite materials. The choice of laser type—CO2, fiber, or Nd:YAG—affects cutting capabilities and efficiency.
Understanding the unique properties of each material, such as thickness and reflectivity, is crucial for determining appropriate laser settings and achieving optimal results.
3. How often should I perform maintenance on my laser cutting machine?
Regular maintenance schedules are vital to prolonging machine lifespan and ensuring consistent performance. Daily checks should include cleaning lenses, inspecting the cutting bed, and removing debris.
Weekly or monthly tasks might involve monitoring coolant levels, verifying beam alignment, and tightening mechanical components. Operators should follow manufacturer-specific guidelines and log maintenance activities to anticipate potential issues and minimize downtime.


