I. Introduction
In today’s metal processing industry, laser-cutting machines have become indispensable equipment because of their high efficiency, precision and adaptability. They utilize high-power density laser beams to cut and engrave multiple materials, playing an essential role in automotive, aerospace and precise mechanical manufacturing.
Furthermore, laser cutters ensure efficiency, product quality, and consistency, serving as one of the core cutting technologies in modern manufacturing.
However, despite the ever-advanced laser cutting technology, there are problems arising from time to time during the real operation course. For example, inaccurate focusing lenses may cause unsmooth edges, and unsteady laser power may cause inconsistent cutting speed and incomplete cutting of materials.
During cutting, these issues not only waste materials but also increase costs, delay delivery time, and even impact market competitiveness. Therefore, timely recognition and resolution of common problems in laser cutting is pivotal in ensuring smooth production procedures and improving product quality. For operators who want a structured reference to quickly diagnose and resolve these issues, a dedicated Laser Cutting Machine Troubleshooting Guide can serve as a practical companion to daily operations.
In this comprehensive guide, we'll explore the most common laser cutting machine problems, their causes, and effective troubleshooting methods. We'll also delve into preventive maintenance strategies and best practices to help you keep your laser cutter operating at peak performance. By the end of this article, you'll be equipped with the knowledge to identify, resolve, and prevent a wide range of laser cutting machine issues, ensuring smoother operations and superior results in your projects.
II. Understanding Laser Cutting Machines
1. Basic Components
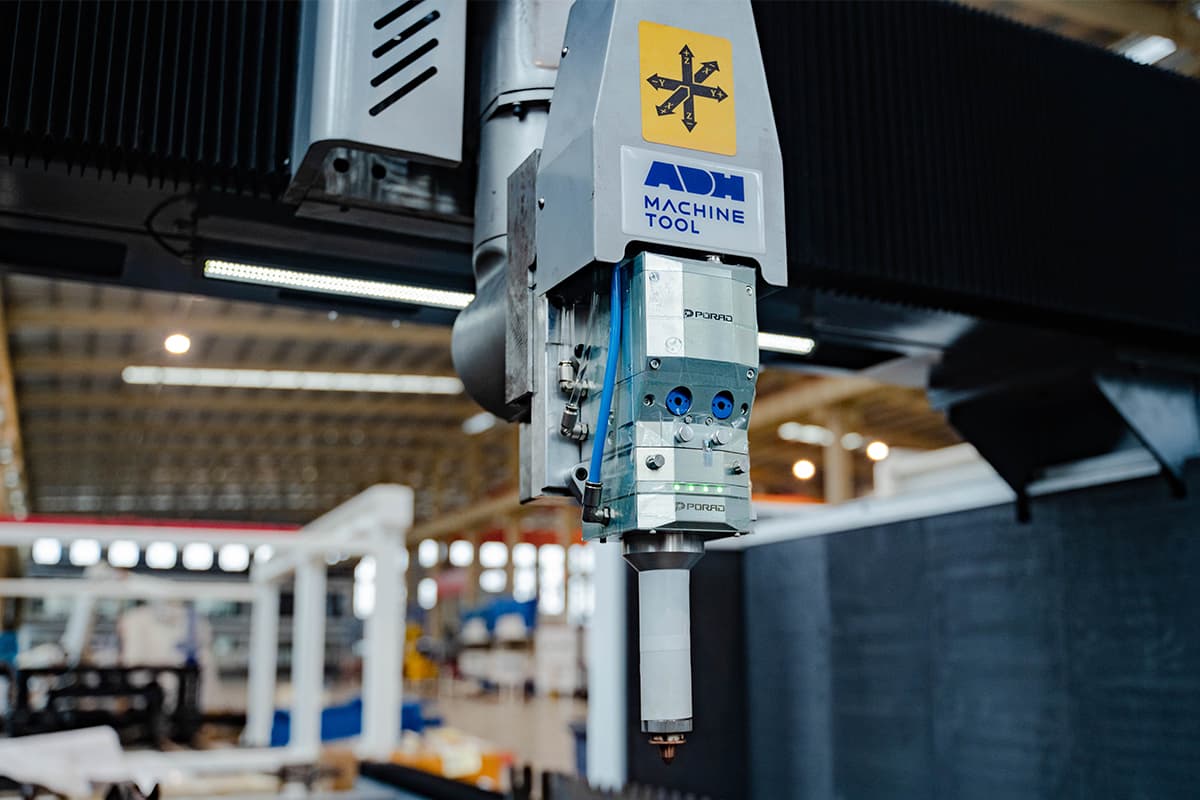
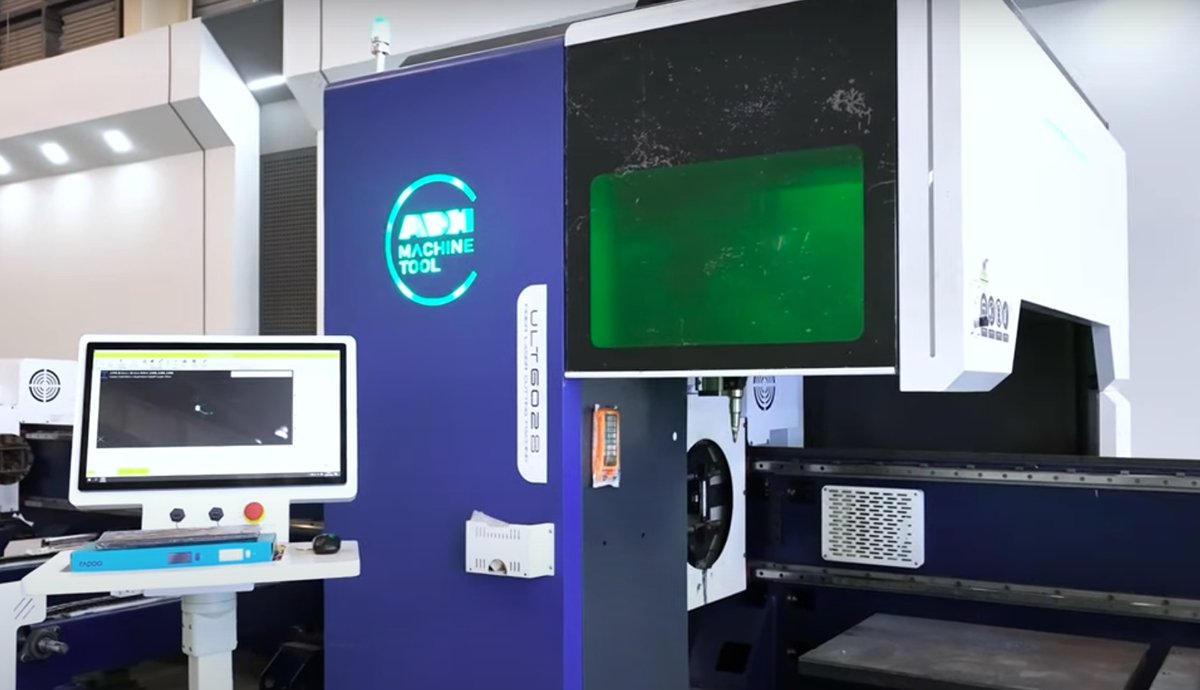
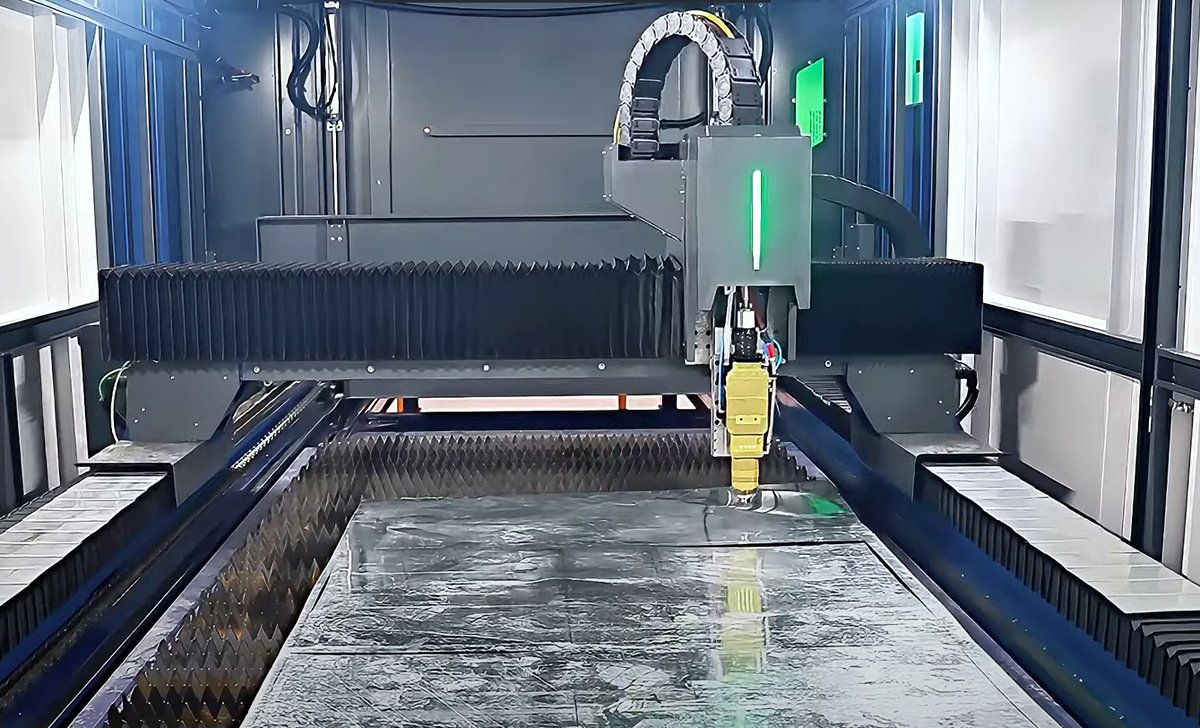
A laser cutter’s basic components incorporate a laser generator, a cutting head, a control system, a transmission system(optical system), an assist system and a cooling system. These components interact with each other to precisely control the position and movement of laser beams and then to finish the precise cutting of materials.
(1) Laser generator:
As the core component, the laser generator generates laser beams.
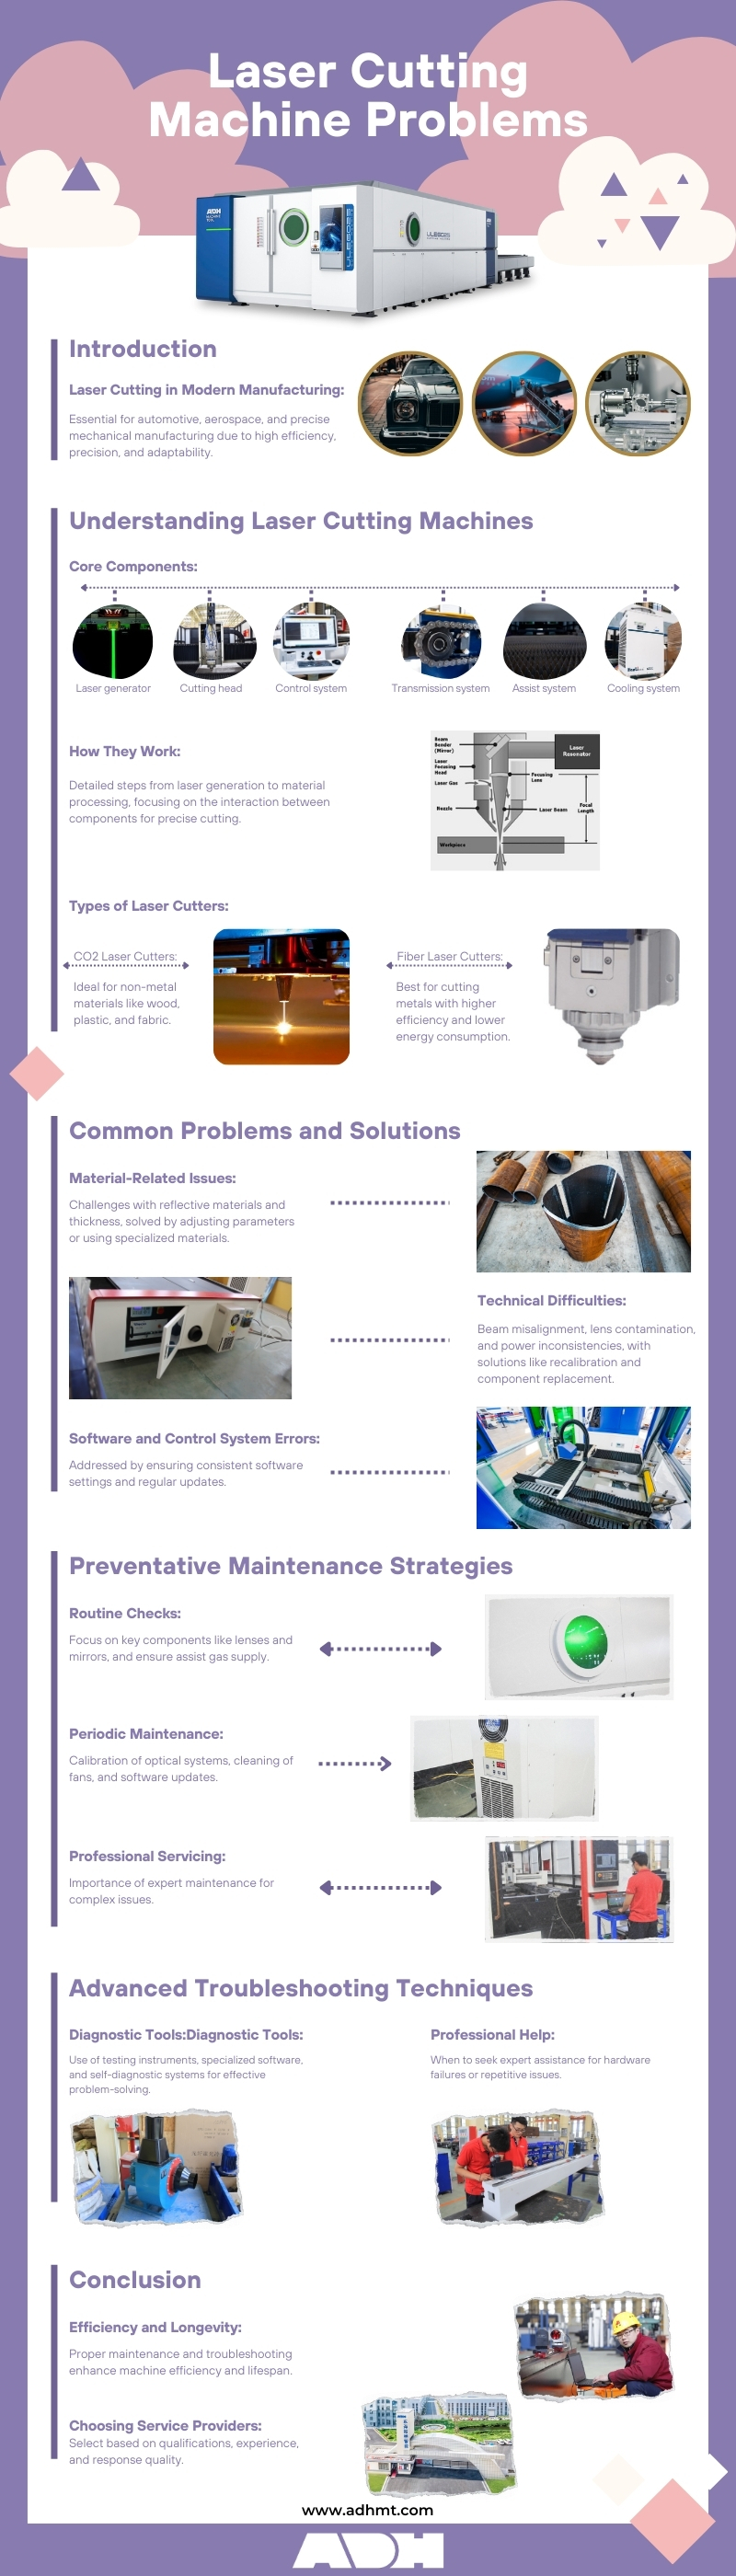
(2) Cutting head:
It contains focusing lenses and nozzles to concentrate laser beams and lead assist gases to cutting areas.
(3) Control system:
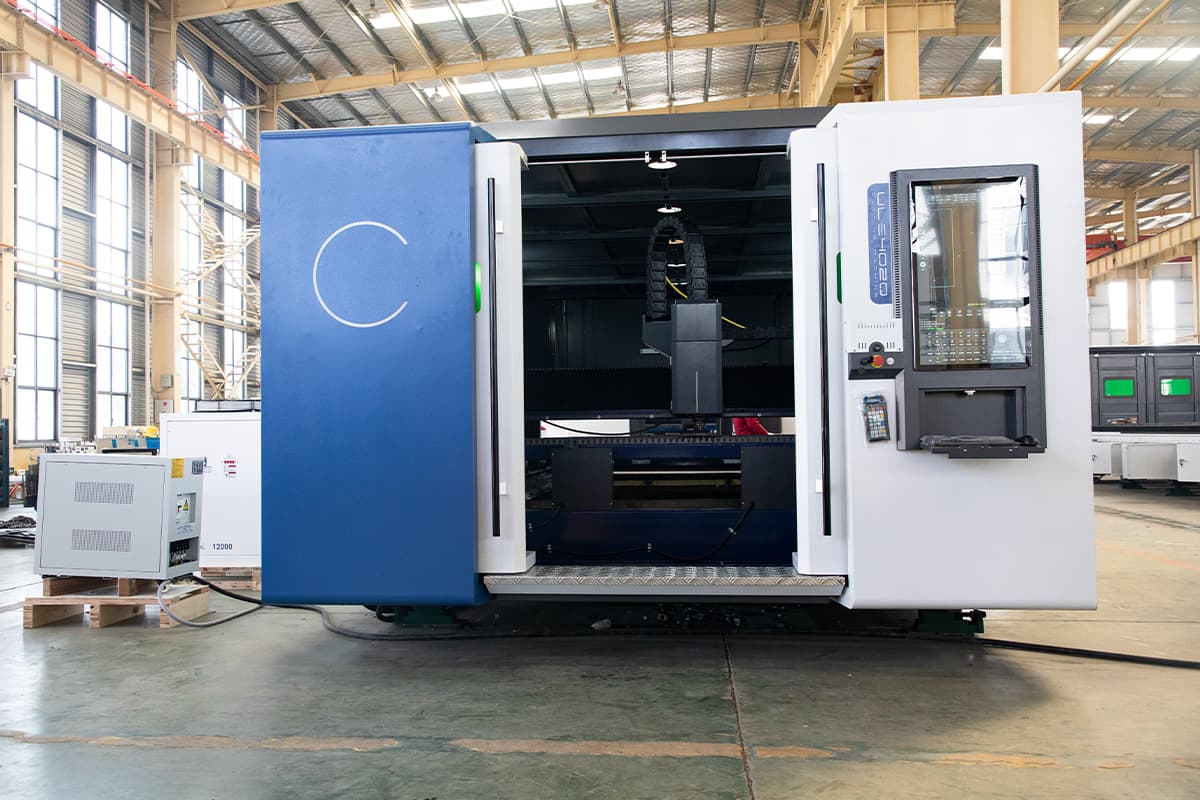
As the brain of a laser cutting machine, the control system controls the machine’s movement and laser emission and ensures accurate cutting.
(4) Transmission system(optical system):
For CO2 laser cutting machines, laser beams will be led to the cutting head through reflective mirrors and for fiber laser cutting machines, they will be transmitted by fiber optic cables.
(5) Assist gas:
Assist gases are used to blow the melt and clean the cutting areas so as to smooth the cutting course.
(6) Cooling system:
Usually, it’s the chiller unit to cool the laser generator and other components so as to keep the machine’s steady operation.
The interaction of these components finishes the precise cutting through the accurate adjustment of laser power, cutting speed, focusing, and pressure of assisting gases.
2. How They Interact with Each Other
Let‘s view a short video to learn its working processes first:
How they interact with each other? What’s the procedure of the laser cutting? Here is step by step introduction of a laser cutting machine’s working procedures.
(1) Step one: laser generation
As core components, lasers generate laser beams. Lasers excited by electricity or other light sources generate work substances, such as CO2 or fiber. Laser beams possess high levels of monochromaticity, directionality, and brightness.
(2) Step two: laser transmission
Generated laser beams will be concentrated into a small light spot through a series of optical systems, including reflective mirrors and focusing lenses. As for CO2 laser cutting machines, laser beams will be transmitted by reflective mirrors. While in fiber laser cutting machines, lasers will be transmitted on the cutting head directly through fiber cables.
(3) Step three: Focus and material processing
Laser beams will be concentrated in a small spot with extremely high-density laser power, which can heat the material into evaporation points. During the course, the material will be melted, evaporated or burned to the ignition point and form a small hole. With the relative movement of the cutting head, the small hole will be lined as a narrow silt according to the cutting direction of the cutting head.
(4) Step Four: Assist gas
During cutting, the cutting head will inject assist gases, such as oxygen, nitrogen and air, which can not only blow the melt off and keep the cut clean but also participate in a chemical reaction. In oxygen cutting, for instance, oxygen reacts with hot metal to generate more heat, accelerating the cutting process.
(5) Step Five: Control system
The CNC control system controls the whole cutting process. Users can design the moving path of the cutting head and parameters through the program, such as laser power, cutting speed and focal length, which enables laser cutters to cut intricate patterns with high accuracy.
All the components and working principles of a laser cutter ensure its high efficiency and accuracy in industrial production and make it a pivotal machine, no matter whether it is in metal and non-metal processing.
3. Mainstream Types of Laser Cutting Machines
There are two mainstream types of laser cutting machines: CO2 laser cutting machines and fiber laser cutting machines.
(1) CO2 laser cutters
CO2 laser cutting machines utilize gas as a laser which is produced in electrical discharges by mixing CO2 gas with other gases (such as nitrogen and helium). With a wavelength of 10.6 micrometres, they are suitable for non-metal cutting, such as wood, plastic, fabric and acrylic.
High-power CO2 laser cutting machines can also cut metals. Basically, CO2 laser cutters can produce smooth and clean cutting surfaces with high verticality, suiting materials with high requirements for cutting accuracy.
(2) Fiber laser cutters
Fiber laser cutting machines use solid lasers generated by mixing fiber cables. With a wavelength of 1.06 micrometers, fiber laser cutters possess higher electricity-light transformation rates, lower energy consumption and better laser beams.
With a compact structure and free from maintenance, they are suitable for cutting high-reflective and conductor-grade metal materials. Due to their high speed and efficiency and low absorption rate, fiber laser cutters are mainly used for metal processing.
(3) Typical applications and materials:
CO2 laser cutting machines are suitable for non-metal cutting, such as wood, plastic, fabric, acrylic, and other high-accuracy metal cutting.
Fibre laser cutting machines are mainly used for metal cutting, such as steel, copper, and aluminium, and are especially applied for metal sheet processing. For a detailed look at our range of CO2 and fiber laser cutters, you can download our Brochures.
4. Common Misconceptions About Laser Cutting
The industry is full of beliefs that may sound plausible but can actually be misleading. Dispelling these myths will help you make smarter decisions when setting parameters and troubleshooting problems.
(1) “The higher the wattage, the faster and better the cut”
Power density matters more than raw output. Power density refers to the laser energy concentrated on a specific area. A 60W laser with superior beam quality (capable of focusing into a smaller spot) can achieve a far higher power density at the focal point than a poorly focused 100W laser.
For fine engraving and cutting thin sheets, a low-wattage laser with high peak power and excellent beam quality will outperform a bulky, high-wattage unit. High power really shines when cutting thick materials.
(2) “Laser cutting is just ‘burning’ through material”
This is a major misconception. High-quality laser cutting is a process of vaporization or melt-and-blow, not combustion.
| Cutting Type | Working Principle | Suitable Materials / Examples | Assist Gas | Cut Characteristics / Pros & Cons |
|---|---|---|---|---|
| Vaporization Cutting | Laser energy instantly transforms the material from solid to gas, completing the cut. | Acrylic, wood, and other non-metals | Usually none required | Pros: Extremely smooth cut edges, minimal heat-affected zone. Cons: Typically limited to certain non-metal materials. |
| Melt Cutting | The laser melts the metal, then high-pressure inert gas (e.g., nitrogen) blows away the molten material. | Stainless steel, aluminum alloy | Nitrogen (N₂) | Pros: Bright, oxide-free cuts with high quality. Cons: Relatively slow speed, higher gas cost. |
| Oxidation Cutting | The laser acts as an ignition source, with oxygen’s exothermic reaction with hot metal providing most of the cutting energy. | Carbon steel | Oxygen (O₂) | Pros: Fast cutting speed, high efficiency, low cost. Cons: Leaves an oxide layer on the cut edges, less smooth finish. |
“Burning” produces charred edges, carbonization, and unpredictable results—clear signs that cutting parameters are incorrect.
(3) “Lasers are extremely dangerous and prone to fires”
When operated in accordance with safety standards, laser cutters are actually safer than many traditional mechanical tools. Modern machines feature fully enclosed covers, safety interlock doors, and emergency stop switches. Fire risk is minimal, and usually only occurs in specific scenarios:
1)Exhaust/ventilation failure leads to smoke accumulation which ignites;
2)Cutting flammable materials without assist gas enabled;
3)Extreme parameter misconfiguration. As for personal safety, the greatest hazard comes from invisible laser radiation—never run the laser with protective covers open, and always wear certified safety glasses.

(4) “Laser machines are complicated and require advanced programming skills”
That may have been true a decade ago.
Modern laser cutting control software is now highly user-friendly. The basic workflow is:
Create your design in familiar graphics software (e.g., AutoCAD, CorelDRAW, Illustrator) → Import into the laser control software → Choose from preset parameters based on material and thickness, or fine-tune as needed → Click “Start”.
The entire process is more akin to operating a high-end printer than doing any coding.
(5) “Lasers can cut any material, any thickness”
Laser cutting does have limitations.
1)Highly reflective materials such as copper, silver, gold, and pure aluminum reflect a significant portion of the laser beam, making cutting difficult and potentially damaging the laser source. While modern fiber lasers handle this better, caution is still required.
2)Certain plastics such as PVC (polyvinyl chloride) must never be cut, as they release toxic chlorine gas when heated, posing a deadly hazard and causing severe corrosion inside the machine.
3)Thickness limits: Every machine has an optimal economic cutting thickness. While it may be possible to cut thicker material, the process will be extremely slow, with increased taper and poor edge quality—making plasma or waterjet cutting more cost-effective.
(6) “Beam alignment is a one-time job”
The optical path can gradually shift due to vibration, thermal expansion and contraction, or even light knocks to the machine.
A professional approach involves regularly checking beam alignment, such as weekly or monthly, particularly after moving the machine or completing heavy cutting workloads.
A flawless initial alignment does not guarantee perfection three months later. Treat beam alignment like an oil change—regular maintenance rather than a major overhaul only when things stop working. For more in-depth advice on operation, maintenance, and advanced techniques, be sure to check out our complete Laser Cutting Machine Guide: Tips and Tricks.
III. Common Problems in Laser Cutting Machines
Although laser cutting machines are widely used in various sectors by virtue of high efficiency and precision, they may break down at times while running due to many factors such as materials, technology and software.
In the following chapter, common problems and solutions will be dicussed in detail interms of material-related issues, technical difficulties and software and control system errors.
1. Material Issues
Problems caused by using inappropriate materials (reflectivity, thickness). During the laser cutting, the selection of materials matters. Inappropriate materials will lead to over-high reflective rates and improper thickness, impacting cutting quality.
(1) Reflective Material Issue
High-reflective materials, such as copper and aluminum alloy, may cause laser reflection to damage the cutting machine or impact cutting quality. Therefore, the solution is to use specialized laser-absorbing materials or adjust the parameters, such as lowering laser power and increasing assist gas pressure.
(2) Material Thickness Issue
Laser-cutting machines have certain requirements for the material thickness. Too thin or too thick materials will impact the cutting effect. For example, materials that are too thin entail lower laser power so as to avoid burning through materials.
(3) Poor Material Compatibility
Using materials that are not compatible with laser cutting can lead to poor cut quality and potential damage to the machine. Some materials may produce excessive smoke, fumes, or residue that can contaminate the laser optics and other components. It is crucial to use materials that are specifically recommended for laser cutting and to follow any material-specific guidelines provided by the manufacturer.
(4) Contaminated Materials
Materials that are dirty, oily, or coated with residue can negatively impact the cutting process. Contaminated materials can produce inconsistent cuts and may cause the laser beam to scatter or weaken. Proper cleaning and preparation of materials before cutting are essential to ensure optimal performance. Cleaning methods can include using a soft brush, paper towels, and appropriate solvents like isopropyl alcohol or vinegar to remove any surface contaminants.
2. Alignment Problems
(1) Misaligned Laser Beam
A misaligned laser beam is another common issue that affects the precision and accuracy of cuts. Misalignment can occur due to physical impacts, vibrations, or gradual shifts over time. Symptoms of a misaligned beam include uneven cutting depths and inconsistent cut lines. Regular alignment checks and adjustments are essential to maintain the laser's accuracy.
(2) Beam Divergence
Beam divergence occurs when the laser beam spreads out over a distance, reducing its cutting power and precision. This problem is often due to issues with the laser optics or mirrors. Ensuring that all optical components are clean, properly aligned, and in good condition can help reduce beam divergence and improve cutting performance.
3. Software and Control System Errors
(1) Software Glitches
Software glitches can disrupt the operation of laser cutting machines, leading to errors in the cutting process. These glitches can be due to outdated software, bugs, or conflicts with other software. Regular updates and maintenance of the machine's software can help prevent these issues. For example, ensuring that the software settings are correct for the material being cut and updating the software to the latest version can mitigate many problems.
(2) Control Panel Failures
Failures in the control panel can make it difficult to operate the machine effectively. These failures may manifest as unresponsive buttons, incorrect settings, or complete system shutdowns. Regular inspection and maintenance of the control panel, along with prompt troubleshooting of any issues, are important to ensure smooth operation.
4. Power Issues
(1) Inconsistent Power Output
One of the most frequent problems encountered with laser cutting machines is inconsistent power output. This can lead to uneven cuts, which compromise the quality of the finished product. Inconsistent power output may be caused by several factors, including fluctuations in the power supply, issues with the laser tube, or problems with the power control system. Regular calibration and monitoring of the power output can help mitigate this issue.
(2) Sudden Power Drops
Sudden power drops during operation can be particularly disruptive, leading to incomplete cuts and potential damage to the material being processed. These power drops can stem from electrical supply issues, faulty wiring, or degraded components within the machine. Ensuring a stable power supply and regular inspection of electrical connections can help prevent this problem.
5. Inconsistent Cutting Quality
(1) Uneven edges: The cut edges may appear rough or jagged instead of smooth and clean.
(2) Incomplete cuts: The laser fails to cut entirely through the material, leaving partially cut sections.
(3) Burning or melting of materials: Excessive heat can cause unwanted charring or melting, especially on heat-sensitive materials.
6. Focus and Lens Issues
(1) Improper focal length: The distance between the lens and the material is incorrect, resulting in unfocused cuts.
(2) Dirty or damaged lenses: Accumulated debris or scratches on the lens can distort the laser beam, affecting cut quality.

7. Mechanical and Electrical Failures
(1) Inaccurate Positioning, Dimensional Errors, or Shape Distortion
This is a hallmark of motion control system failure. A square may be cut as a rhombus, a circle as an oval, or the dimensions may come out smaller than designed. The root cause lies in the mechanical system not executing the controller’s commands accurately and without loss.
Diagnosis sequence: Check timing belts/gears → Lubricate guide rails/lead screws → Test stepper/servo motors
This process follows a reverse-tracing logic, starting from the motion’s endpoint and working back to the drive source.
1)Check timing belts/gears: The most common failure point. Loose belts or pulleys slipping on motor shafts are leading culprits behind size inaccuracies and distorted shapes.
2)Check guide rails/slide blocks: Dirt buildup or lack of lubrication can create uneven resistance, causing the machine to “stick” in certain areas and resulting in lost steps and misalignment.
3)Diagnose motors/drivers: If all mechanical parts are in perfect condition, the problem may lie in the motor itself or its driver.
Suggested solutions:
1)Tighten: Inspect and tighten all set screws on the X and Y-axis motor pulleys (or couplings); these can be hidden causes of “lost steps.” Secure all mounting screws for the mirrors and laser head. Check and adjust the X/Y belt tension using the “thumb test.”
2)Clean: Wipe all linear rails with a lint-free cloth and alcohol to remove grease and dust. Use a soft brush to clear debris from gear teeth and racks.
3)Lubricate: After cleaning, add a small amount of lubricant (typically lithium-based grease or dedicated rail oil) into the grease fittings on the rail blocks. Manually move the beam and laser head several times to distribute lubrication evenly.
When suspecting a motor or driver problem, resist the urge to immediately buy replacements.
1)“Swap Test” Method:
For example, if the Y-axis is behaving abnormally, swap the control and motor cables between the X-axis and Y-axis drivers (these are usually identical modules). If the fault transfers to the X-axis, the Y-axis driver is at fault. If it stays on the Y-axis, the problem is in the Y-axis motor or wiring.
2)“Feel Diagnosis” Method:
Power off the machine and disconnect the motor from the driver (to avoid back EMF). Rotate the motor shaft by hand.
- Normal motor: You should feel slight cogging from the magnets but rotation should be smooth.
- Damaged bearing: A noticeable grinding sound or roughness when turning.
- Coil short circuit: Extreme resistance or inability to turn the shaft.

(2) Machine Alarms, Limit Switch Triggers, or Failure to Home
Diagnosis sequence: Clean sensors → Check wiring connections → Reset software configuration
1)Clean sensors: Limit switches—especially inductive types—can give constant “triggered” signals if metal dust or oil covers their surfaces, preventing homing.
2)Check wiring: Ensure the sensor cables are firmly connected and free of damage or loose contacts where they interface with the controller.
3)Reset software configuration: Incorrect homing direction or trigger level settings can also cause homing failures.
Suggested solutions:
1)Mechanical switches:
These have a physical plunger or actuator that can be pressed.
- Maintenance: Keep them clean and free of debris that could jam moving parts.
- Testing: Use the continuity (beep) mode on a multimeter to check between the normally open (NO) and common (COM) terminals. No beep when unpressed, beep when pressed means normal operation.
2)Inductive switches:
Usually cylindrical or square with a metal face, they can detect metal without physical contact.
- Maintenance: Keep the sensing face absolutely clean.
- Testing: Most inductive switches have a small LED that lights when triggered. Bring a metal object (like a wrench) close to the sensor face and check whether the LED reliably turns on and off.
(3) Problem: Unusual Noises, Vibrations, or Sticking During Movement
Any abnormal sound or vibration during machine movement is the equipment’s mechanical or electrical system sending out a “distress signal.” Learning to interpret these signals is key to preventing major failures.
Diagnosis sequence: Identify source by listening → Check mechanical connections → Adjust acceleration/deceleration parameters
1)Sound-based fault location: Different noises point to different issues. Switch off auxiliary systems, run the machine idle, and listen attentively.
2)Check mechanical connections: Around 90% of unusual noises and vibrations stem from loose screws. Manually shake each component that could have loosened.
3)Adjust acceleration and deceleration parameters: If the mechanical structure is fine but the machine still shakes violently at high speeds, it's almost certainly due to overly aggressive acceleration/deceleration settings.
The recommended solutions are as follows:
| Noise Type | Likely Cause | Solution |
|---|---|---|
| High-pitched whine | Motor bearings lacking lubrication or damaged Serious lack of lubrication in guide rail sliders | Replace the motor Apply grease to the guide rails |
| Rhythmic “clunk” | Foreign object or dent in guide rail Loose timing pulley/coupling causing free rotation and impact against the motor shaft | Clean or replace the guide rail Tighten the set screws of the timing pulley |
| Dull friction sound | Belt rubbing against shield or frame Drag chain jammed or rubbing against the frame | Adjust the belt or shield position Organize and secure the drag chain |
| Low drone/resonance | Uneven leveling of machine feet, machine not firmly grounded Excessive acceleration parameters causing machine resonance at specific speeds | Adjust leveling screws to stabilize the machine Moderately reduce acceleration values |
Ⅳ. Causes of Laser Cutter Malfunctions
1. Machine Maintenance Issues
- Lack of regular cleaning: Over time, dust, debris, and residue from cut materials can accumulate on various parts of the machine, including optics, mirrors, and the cutting bed. This buildup can interfere with the laser beam's path and affect cutting quality.
- Neglected component replacements: Laser cutting machines have several components that wear out over time, such as focus lenses, nozzles, and filters. Failing to replace these parts at recommended intervals can lead to decreased performance and various cutting problems.
2. Incorrect Machine Settings
- Improper speed and power settings: Each material and thickness requires specific laser power and cutting speed settings. Using incorrect settings can result in incomplete cuts, burning, or poor edge quality.
- Incorrect focal point: The focal point of the laser beam must be accurately set based on the material thickness. An incorrect focal point can lead to unfocused cuts and reduced cutting efficiency.
3. Environmental Factors
- Temperature fluctuations: Laser cutting machines are sensitive to temperature changes. Fluctuations can affect the laser's performance and the material's behavior during cutting.
- Dust and debris accumulation: A dusty or dirty environment can lead to rapid buildup on machine components, affecting cutting quality and potentially damaging sensitive parts.
4. Operator Error
- Lack of training or experience: Inexperienced operators may not recognize early signs of problems or may incorrectly set up the machine for different materials and projects.
- Incorrect material handling: Improper loading of materials, failure to secure them adequately, or using warped or damaged materials can all lead to cutting issues.
5. Interactive Fault Diagnosis Matrix
Think of this matrix as your “emergency triage desk.” Its core purpose is to quickly connect chaotic symptoms to their most likely root causes, guiding you to the first point of investigation.
It’s more than just a reference sheet—it’s a way of thinking. Learn to focus on the machine’s “core symptom,” disregard secondary signs, and zero in on the most probable faulty system.
For example, if a machine produces inaccurate dimensions when cutting (core symptom) while also making unusual noises (secondary sign), your first step should be to check the motion system—not the optical system.
Diagnostic Table:
| Core Symptom | Likely Fault System | Primary Checkpoints (and Potential Pitfalls) |
|---|---|---|
| Cuts not through / uneven depth | Optical system / laser source | Power, speed, focal length, optical path (Pitfall: Don’t forget to check the chiller! High water temperature can cause a steep drop in laser power even if settings are correct) |
| Edge burns / burrs / dross | Assist gas / process settings | Gas pressure/flow, power/frequency combination, nozzle condition (Hint: Dross isn’t always from too much power; sometimes it’s too much power relative to speed, causing excess melting. Try increasing speed or use pulse piercing) |
| Dimensional errors / warped paths | Motion system / control software | Belt tension, timing pulley/coupling tightness, software compensation settings (Pitfall: Check “backlash” compensation. Incorrect values can make circles not round and squares not square) |
| Machine not moving / unresponsive / alarms | Safety/control circuits | Limit switches, emergency stop, chiller/door interlocks (Pitfall: Look at the status LEDs on the control card—blinking or off LEDs can be a more direct hardware indicator than alarm codes) |
| No beam at all / weak laser output | Laser source / optical system | Laser tube, high-voltage supply, mirror contamination/damage (During “pulse” firing, observe the laser tube’s output end. Abnormal glow color—e.g., from normal pink-purple to pale or flickering—signals end of tube life or gas leakage) |
| Unusual noise / severe vibration | Mechanical structure / motion system | Guide rail lubrication, motor mount stability, loose structural screws (Pitfall: If resonance noise occurs at a specific speed, try adjusting “acceleration” in software—it can sometimes magically eliminate the shake) |
Ⅴ. Detailed Troubleshooting Steps
1. Power Supply Troubleshooting
(1) Checking and Calibrating Power Output
To address inconsistent power output, start by checking the power supply to ensure it is stable and within the required specifications for your laser cutting machine. Use a multimeter to measure the voltage and current at various points in the system. If discrepancies are found, recalibrate the power supply according to the manufacturer’s guidelines. Additionally, inspect the laser tube for signs of wear and tear, as a degraded tube can affect power output.
(2) Inspecting Electrical Connections
Electrical connections should be regularly inspected for any signs of wear, corrosion, or loose connections. Loose or corroded connections can cause power drops and inconsistent performance. Tighten any loose connections and clean any corrosion with a suitable cleaner. Replace any damaged wires or connectors to ensure a reliable electrical path.
2. Beam Alignment Techniques
(1) Step-by-Step Realignment Procedures
1)Turn off the machine and allow it to cool down if necessary.
2)Access the laser path and identify the mirrors and lenses.
3)Clean all optical components using a recommended lens cleaner and lint-free cloth.
4)Use an alignment tool or laser alignment card to check the laser path.
5)Adjust the mirrors incrementally to ensure the laser beam is centered and aligned at each mirror and lens.
6)Test the alignment by making a test cut on a piece of scrap material and check for uniformity.
(2) Using Alignment Tools
Using specialized alignment tools can make the process more precise and efficient. Tools like laser alignment kits, alignment cards, and beam combiners can help you achieve accurate alignment. Follow the tool manufacturer’s instructions for best results.
3. Material Handling and Preparation
(1) Ensuring Clean and Compatible Materials
Always use materials that are clean and free of contaminants. Wipe down the materials with a dry or slightly damp cloth to remove dust and debris. Ensure the materials are compatible with laser cutting by consulting the machine’s user manual or material compatibility charts provided by the manufacturer.
(2) Proper Material Loading Techniques
When loading materials onto the laser cutting bed, ensure they are properly secured and flat. Any warping or uneven surfaces can affect the cutting accuracy. Use clamps or weights if necessary to keep the material in place. Additionally, make sure the material is positioned correctly according to the cutting design.
4. Software and Control Solutions
(1) Updating and Reinstalling Software
Regular software updates are essential to keep your laser cutting machine running smoothly. Check for updates from the manufacturer and install them promptly. If the software is causing issues, consider reinstalling it to resolve any glitches. Always back up your settings and configurations before performing updates or reinstallations.
(2) Resetting and Configuring Control Panels
If the control panel is unresponsive or malfunctioning, try resetting it to the factory settings. Refer to the user manual for the reset procedure. After resetting, reconfigure the control panel settings according to your cutting requirements. If problems persist, it may be necessary to replace the control panel or consult the manufacturer for further assistance.
5. Addressing Cutting Quality Problems
(1) Adjusting speed and power settings
Experiment with different combinations of cutting speed and laser power. Start with the manufacturer's recommended settings for your specific material and adjust as needed.
(2) Cleaning and aligning optics
Carefully clean all mirrors and lenses using appropriate cleaning solutions and techniques. Check and adjust the alignment of mirrors to ensure the laser beam travels the correct path.
6. Dealing with Focus and Lens Issues
(1) Cleaning and replacing lenses
Regularly clean the focus lens using appropriate cleaning solutions and techniques. If a lens is damaged or heavily worn, replace it according to the manufacturer's recommendations.
(2) Adjusting focal length
Verify that the focal length is correctly set for the material thickness you're cutting. Most machines have a way to adjust the focal point, either manually or automatically.
Ⅵ. Preventative Measures
Preventive maintenance is crucial for the efficient operation of laser cutting machines. Preparing and implementing a maintenance plan can significantly reduce machine breakdowns and prolong machine lifespan. The following are some essential preventive strategies.
1. Regular Maintenance Schedules
Implementing a regular maintenance schedule is crucial for ensuring the longevity and optimal performance of your laser cutting machine. A well-maintained machine is less likely to experience unexpected breakdowns and will consistently produce high-quality cuts. Maintenance tasks should be performed on a daily, weekly, and monthly basis, depending on the machine's usage and the manufacturer's recommendations.
(1) Daily Maintenance Tasks:
- Clean the laser cutting bed and remove any debris.
- Check and clean the laser lens and mirrors.
- Inspect the cooling system and ensure it is functioning properly.
- Verify that all safety features are operational.
(2) Weekly Maintenance Tasks:
- Inspect and tighten any loose mechanical components.
- Check the alignment of the laser beam.
- Lubricate moving parts as recommended by the manufacturer.
- Perform a thorough inspection of the electrical connections.
(3) Monthly Maintenance Tasks:
- Conduct a detailed inspection of the laser tube for signs of wear.
- Test the machine's calibration and make necessary adjustments.
- Review and update the machine's software if needed.
- Clean and inspect the exhaust system to ensure proper ventilation.
2. Routine Inspections and Cleanings
Regular inspections and cleanings are essential for preventing issues before they become serious problems. Operators should develop a checklist to ensure that all critical components are inspected regularly. Key areas to focus on include:
- Laser Optics: Ensure lenses and mirrors are free from dust, smoke residue, and other contaminants.
- Cooling System: Check for leaks, ensure coolant levels are adequate, and inspect hoses for wear.
- Exhaust System: Clean filters and ducts to maintain proper airflow and remove any blockages.
- Mechanical Components: Inspect belts, pulleys, and gears for signs of wear and replace as necessary.
3. Training and Best Practices for Operators
Proper training and adherence to best practices are vital for the safe and efficient operation of laser cutting machines. Operators should receive comprehensive training on machine operation, safety protocols, and troubleshooting techniques. Regular refresher courses can help keep operators up-to-date with the latest advancements and best practices.
Best Practices:
- Always follow the manufacturer's guidelines for operation and maintenance.
- Use personal protective equipment (PPE) such as safety glasses and gloves.
- Keep the work area clean and free of flammable materials.
- Avoid unauthorized modifications to the machine.
- Document and report any issues or irregularities promptly.
By implementing these preventative measures, operators can significantly reduce the likelihood of machine failures and extend the operational life of their laser cutting equipment.
4. Building an Equipment Health Record and Spare Parts Management System
A machine can’t speak, but its “medical records” — its operation and maintenance logs — tell the full story. The purpose of keeping such records is to predict future needs.
(1) Critical Spare Parts List (ABC Analysis Method)
Classify spare parts into three levels for targeted management, balancing cost investment with the risk of downtime.
| Category | Stocking Strategy | Features/Notes | Spare Parts List |
|---|---|---|---|
| Class A | Must be stocked on-site | Failures cause catastrophic downtime and have long procurement lead times. | Focusing lens Protective lens Mirrors Belts Water flow sensor Common limit switches |
| Class B | Planned procurement | High-value consumables with predictable lifespan. | CO₂ laser tube Laser power supply Motor drivers |
| Class C | Purchase after failure | Non-critical or rarely damaged components. | Control panel buttons Air tube fittings Other low-value accessories |
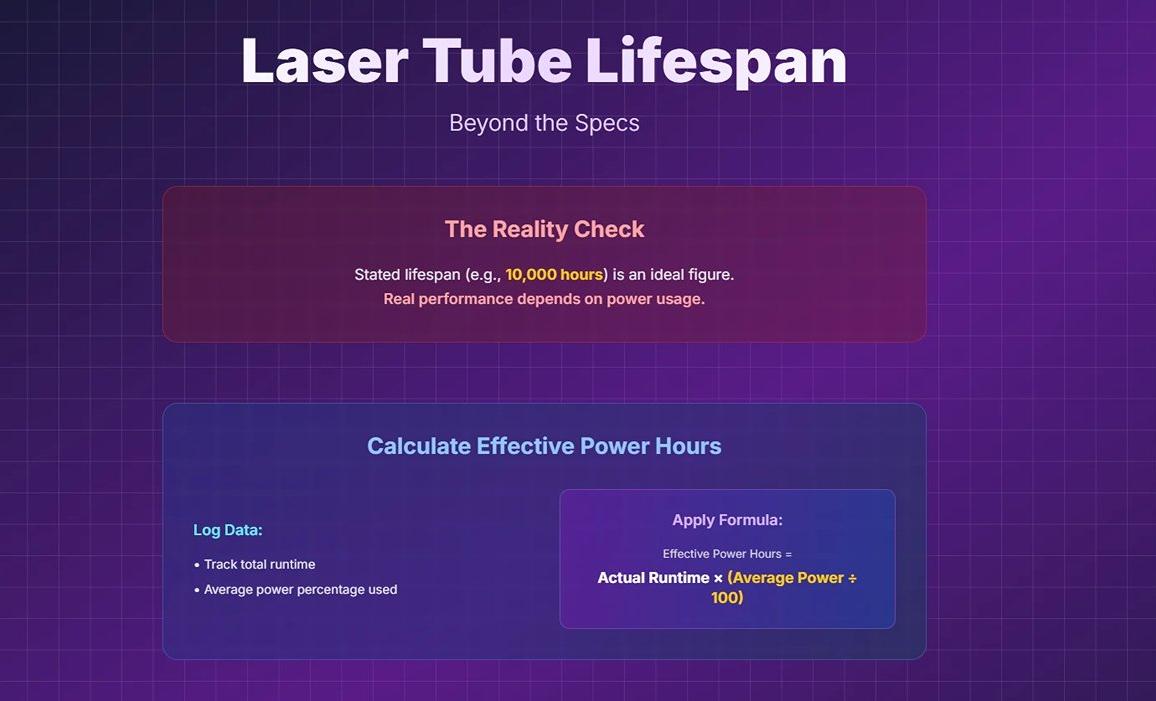
The manufacturer’s stated laser tube lifespan (e.g., 10,000 hours) is an ideal figure. Skilled operators instead calculate “effective power hours” to forecast performance.
1)Build the model: In your equipment health record, log both total runtime and the average power percentage used for each task.
2)Formula: Effective power hours = Actual runtime × (Average power ÷ 100)
3)Application: You may discover that a machine frequently cutting thick plates at 90% power has a real laser tube lifespan of only around 5,000 hours.
while another used mainly for low-power engraving can still perform well after 12,000 hours. This enables more accurate spare parts planning, avoiding the risk of sudden “blindness” during peak production periods.
5. Environmental Optimization: Six-Dimensional Workshop Control Standards
A skilled rider not only knows how to handle a horse but also how to build the best stable. The same applies to machinery — the environment is the hidden hand that shapes its stability and lifespan.
(1) Temperature
The optimal temperature range is 18°C to 25°C. Excessive heat can overwhelm the water-cooling system and cause a drop in laser output power, while temperatures that are too low risk coolant freezing and cracking the laser tube.
(2) Humidity
Relative humidity should remain below 70%. High humidity is the leading cause of high-voltage arcing, as moisture clings to dust particles, creating conductive paths across insulating surfaces. This is why summer failure rates spike dramatically in southern regions.
(3) Dust
Keep the environment as dust-free as possible. Metal dust is a prime culprit in electrical short circuits, while wood and plastic dust lead to optical contamination and fire hazards.
(4) Voltage
Voltage fluctuations should be kept under 5%. Unstable voltage can severely disrupt servo systems, causing positioning errors or even burning out drivers and power supplies. A dedicated voltage stabilizer is essential for laser equipment.
(5) Grounding
Ground resistance must be less than 4 ohms. Proper grounding is critical to suppress electromagnetic interference, prevent static buildup, and safeguard operators. Never attach the ground wire to building rebar or water pipes—install an independent, standard-compliant grounding electrode.
(6) Vibration
The laser machine should be positioned on a solid, level surface, well away from vibration sources such as punch presses or large fans.
Ⅶ. Advanced Troubleshooting Techniques
As machines for precise processing, they may have many problems in operation. Advanced troubleshooting techniques can help operators find out problems and reasons so as to take effective methods .
1. Diagnostic Tools
Diagnostic tools for laser cutting machines mainly incorporate multipurpose testing instruments, specialized software and built-in self-diagnostic systems, which can test the core paraments of laser powers, optical path alignment and electrical systems. I will introduce the three diagnostic tools in detail.
(1) Multipurpose testing instruments
Multipurpose testing instruments, such as Laser power meters and multifunctional electric meters, are mainly used to measure laser output power and electrical connection status.
(2) Specialized software
Many laser cutting machines are equipped with specialized diagnosis software that can test the machine comprehensively, including software errors and hardware failure through a computer connection.
(3) Built-in self-diagnostic systems
Modern laser cutting machines are normally equipped with a self-diagnostic system that can carry out self-diagnosis and report fault codes to locate problems rapidly.
2. How to Use Them
We should set basic settings for diagnostic tools according to the operation manual or manufacturers’ instructions. Then, choose proper diagnostic tools based on encountered problems to have a test. For instance, if a laser cutting machine doesn’t perform well, a laser power output meter should be used to test if the output power is fine.
(1) Case one:
The intermittent cutting phenomenon occurs as a laser cutter in the cutting process. Using multipurpose electric meters can detect loosened electricity source connections. So, after fastening the connections, the problem is solved.
(2) Case two:
The decreasing accuracy of a laser cutting machine can be analyzed by specialized software. After testing, the optical paths are adjusted according to software instructions. As a result, the cutting accuracy is restored.
3. When to Call a Professional
The decision to attempt repairs yourself or call in a specialist should be based on a dual assessment of risk and cost—not gut instinct.
(1) Risk Assessment — Avoid the “Three Red Lines”
If the fault involves any of the following, it’s beyond amateur repair and you should seek professional help immediately:
1)High-voltage systems: For example, dismantling the laser power supply (LPSU) or handling high-voltage laser circuitry. Instantaneous voltages in the tens of thousands can be fatal.
2)Core optical components: Internal damage to laser tubes or fiber sources. Mishandling can destroy expensive parts instantly.
3)Core firmware/mainboard: Firmware flashing or chip-level diagnostics carry risks akin to “performing brain surgery” for the untrained.
(2) Cost Analysis — Balancing Time and Money
Downtime cost per day = average daily production value OR cost of outsourcing equivalent work
DIY repair cost = parts cost + (diagnostic hours × your hourly rate) + potential risk of secondary damage
Professional repair cost = call-out fee + labor charges + parts cost
If DIY diagnostics are expected to take over 24 hours, or if one day of downtime costs more than a professional service call, contact an expert immediately. You’re not just paying for a fix—you’re buying back production time.

4. Making an Effective Service Request
Efficient repairs start with clear communication. A vague statement like “The machine is broken” only prompts repetitive questions and delays. A gold-standard service request includes three key elements:
(1) A Complete Equipment History
Provide your "Equipment Operation & Maintenance Log" in full, including run time, error records, repair history, and environmental conditions.
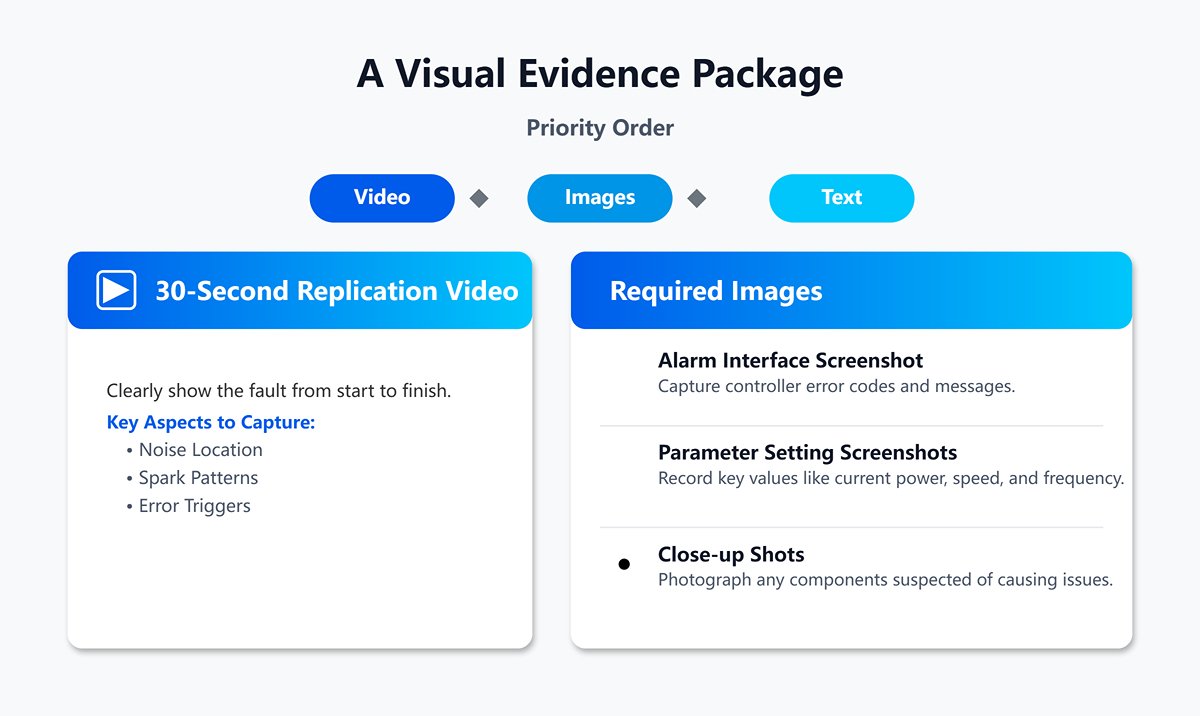
(2) A Visual Evidence Package
Priority order: Video > Images > Text
- A 30-second replication video: Clearly show the fault from start to finish, capturing aspects like noise location, spark patterns, or error triggers.
- Screenshot of the alarm interface: Capture controller error codes and messages directly.
- Parameter setting screenshots: Record key values such as current power, speed, and frequency.
- Close-up shots: Photograph any components suspected of causing issues.
(3) Structured Problem Description
Follow a three-part narrative—Background: “Model XX, 3,500 hours use, fault: Cutting 3mm acrylic results in a Y-axis dimension 2mm short.” Incident history: “Began on [date], occurs consistently, last normal operation was on…, during which materials were changed/files modified/parameters adjusted.” Troubleshooting done: “Followed the ‘Bible’ checklist—checked and tightened Y-axis drive, lubricated rails, swapped X/Y drivers; fault remains.”
Tip: Submitting such a clear report positions you as a capable partner rather than a customer needing basic explanations. It accelerates diagnosis and helps avoid repeat service charges.
5. Three Key Questions to Ask a Repair Service Provider
Choosing a reliable repair partner is often more critical than the repair itself. During a call or meeting, use these three questions to gauge their expertise:
(1) “Based on my description, what’s your initial diagnostic approach?” A competent response will outline possibilities and a logical test sequence, such as “Test A first, then confirm B,” rather than jumping straight to “Let’s replace the part.”
(2) “Have you worked on this specific machine model before, and what are its common issues?” An experienced pro will quickly pinpoint the model’s weak points and typical failures, often suggesting preventative improvements.
(3) “What’s your pricing and warranty policy?” Trustworthy engineers will state call-out fees, labor charges, parts prices, and warranty terms upfront, and commit to free or parts-only repairs within the warranty period.
Additionally, consider these factors when evaluating service providers:
- Professional credentials: Choose providers with official certifications and strong reputations.
- Service experience: Review their track record and case studies in laser cutter maintenance.
- Response time and service quality: Opt for those who can respond promptly and deliver high-quality results.
In long-term equipment management, technical capability is vital—but knowing when to set down the wrench and pick up the phone often determines the scale of downtime losses and the success of repairs. True expertise lies not just in fixing machines, but in making the right call at the right moment.
Ⅷ. FAQs
1. What causes inconsistent laser power output?
Inconsistent laser power output can be caused by several factors, including fluctuations in the power supply, issues with the laser tube, and problems with the power control system. Regular calibration and monitoring of the power supply, along with inspecting and maintaining the laser tube, can help mitigate these issues.
2. What materials should you avoid using with laser cutters?
Avoid using highly reflective materials, produce toxic fumes when cut, or are not compatible with laser cutting. Examples include PVC, ABS plastic, and certain metals. Always consult the machine’s user manual or material compatibility charts the manufacturer provides.
3. How often should you perform maintenance on your laser cutter?
Maintenance frequency depends on the machine's usage and the manufacturer's recommendations. Generally, daily, weekly, and monthly maintenance tasks should be performed to ensure optimal performance. Daily tasks include cleaning the cutting bed and optics, while weekly and monthly tasks involve more thorough inspections and calibrations.
IX. Conclusion
In the article, the common failures and issues of laser cutting machines are explained in detail so as to serve as a reference for enterprises and individual hobbyists. In addition, an important factor you should notice is the selection of the right service providers. A service provider can reduce the repair and maintenance costs of a laser cutting machine and prolong its lifespan which can maximize the benefits for your companies or businesses.
Customized fiber laser cutting solutions at affordable prices provided by ADH Machine Tool, from entry-level to high-end machines. For more specific configurations check our laser cutting machines for sale.