How to remove press brake pit metal is not just a maintenance task but a critical discipline for protecting die geometry, surface finish, and bending accuracy over thousands of cycles. Done poorly, it accelerates galling, creates unpredictable springback, and quietly destroys expensive tooling long before its time.
This guide reframes pit metal removal as a closed-loop process—from root-cause diagnosis and graded cleaning strategies to surface engineering and “no-clean” prevention—so you can eliminate buildup without sacrificing a single micron more steel than necessary.
— A Systematic Solution from Root-Cause Diagnosis to Zero-Damage Maintenance
In the world of sheet metal bending, dies are more than just tools—they are the soul of precision. Yet every operator has faced that frustrating moment when an expensive aluminum or stainless-steel sheet emerges from the press covered with periodic dents and scratches.
These are not merely cosmetic flaws; they are silent killers of production profit. The phenomenon, known as “pit metal residue” (Pit Metal) or “galling”, can not only render workpieces unusable but, if mishandled, permanently damage costly precision dies.
The market is flooded with crude advice—ranging from aggressive angle grinding to random acid spraying. As a professional striving for perfection, you must recognize this truth: a bending die is a hardened, precision-ground steel component with tolerances controlled down to microns. Any destructive attempt to remove buildup will inevitably compromise the die’s geometry—especially the R-corner profile—sacrificing accuracy for a quick fix.
This guide overturns the outdated “just grind it off” mentality and introduces a world-class Systematic Die Maintenance Framework. Rather than merely discussing how to scrape off metal debris, we’ll approach the problem from a metallurgical and microscopic perspective. Through a closed-loop logic of Diagnosis–Grading–Restoration–Prevention, you’ll gain access to a proven, standardized methodology used by top-tier manufacturers worldwide. You can also explore detailed technical resources at ADH Machine Tool for further insights into industrial-grade press brake care:
- Root Cause Analysis: Understand that metal adhesion is not simple residue accumulation but a high-pressure solid-state cold welding process—so the solution must address the true cause.
- Graded Response: Match the cleaning method—ranging from chemical dissolution to micron-level polishing—according to the severity of buildup. Avoid over-maintenance that could degrade the die.
- Zero-Damage Protocol: Apply surgical-grade cleaning tools and techniques to remove contaminants without inflicting any wear on the die substrate.
For a step-by-step technical procedure, see how to remove press brake pit metal for reference and further implementation details.
Prepare your toolkit and notebook—this is where your die maintenance expertise takes a leap into the Industry 4.0 era. This isn’t just a cleaning tutorial; it’s a precision defense campaign.
I. Deep Diagnosis: Redefining Pit Metal and the Mechanism of Galling
Many experienced operators tend to treat buildup on the die surface as mere dirt, something to wipe off casually during downtime. But under a metallurgical microscope, “pit metal residue” (Pit Metal) is actually a micro-scale welding event. Without understanding this essence, all cleaning efforts remain superficial and ineffective.
1.1 Phenomenon Explained: What Is Pit Metal Residue (Pit Metal / Galling)?
Technically, “pit metal” is better defined as galling or solid-state cold welding. When the press brake applies several tons of pressure per square centimeter, the sheet metal doesn’t merely slide across the die—it is forcibly embedded into microscopic pits on the die’s surface. In this high-pressure, unlubricated friction environment, metal atoms from the sheet (especially aluminum) bond with the die steel atoms, forming microscopic weld joints.

To accurately assess the cleaning difficulty, we categorize the buildup evolution into three levels:
| Level / Phase | Appearance | Nature | Impact / Notes |
|---|---|---|---|
| Level 1 – Mist Phase | Black or gray mist-like specks appear on the shoulder of the die’s V-groove (the R-corner stress zone). | A mix of oxide film, anti-rust oil, and fine metal dust. The buildup hasn’t yet “taken root.” | This is the ideal time for cleaning. |
| Level 2 – Granular Phase | When sliding a fingertip across the contact surface, distinct granularity or drag is felt (like touching sandpaper). | Solid metal nodules have formed. | These nodules act like miniature grinding wheels, leaving fine scratches on every passing sheet. |
| Level 3 – Hardening Phase | The buildup darkens and becomes extremely difficult to remove, sometimes causing visible chipping at the die’s R-corner. | Severe work hardening occurs. Aluminum oxide hardness approaches corundum (Mohs 9), effectively becoming a file that abrades the sheet and die steel (42CrMo4). | Once buildup thickness exceeds 0.05 mm, bending angle deviations can reach 0.5°–1°, causing periodic pitting on workpieces and irreversible quality issues. For a visual explanation of these levels and cleaning approaches, you can review how to remove press brake pit metal on ADH’s technical resource page. |
1.2 Root Cause Analysis (RCA): Why Does Adhesion Occur?
Understanding why buildup forms is more important than knowing how to clean it. Three primary physical mechanisms drive the process:
1. Tribo-Thermodynamics
Although the overall temperature rise during bending is modest, at microscopic contact points (asperities), intense plastic deformation generates localized heat sufficient to destroy the sheet’s natural oxide film. The newly exposed metal atoms—especially aluminum ions—are highly reactive, bonding instantly with the iron atoms in the die steel and creating adhesion.
2. Material Compatibility Traps
Different sheet materials exhibit distinct adhesion mechanisms:
- Aluminum: Known as the “stickiest” metal—it’s soft, low-melting, and highly active, making galling virtually inevitable during bending.
- Galvanized Steel: The brittle zinc layer flakes under pressure and gets compacted into dense, layered shells. Buildup often accumulates progressively in strata.
- Stainless Steel: Primarily causes abrasive wear. Hard particles on its surface act like sandpaper, increasing the die’s surface roughness (Ra), which in turn creates countless physical “anchor points” for subsequent buildup.
3. Surface Roughness Threshold
There is a critical threshold: when die surface roughness exceeds Ra > 0.4 µm, the risk of buildup increases exponentially. A rough surface acts like a field of microscopic hooks that grab onto the passing sheet metal. This is precisely why using an angle grinder on a die is disastrous—while it may look smoother macroscopically, it creates countless new hooks microscopically. For further metallurgical insight into die hardness and surface properties, explore how to remove press brake pit metal.
1.3 Maintenance Decisions: The Golden Window and ROI Evaluation
In die maintenance, timing dictates cost.
- Golden Window: Buildup must be removed before work hardening occurs. Once it darkens and hardens (Level 3), cleaning difficulty increases tenfold, and forced removal risks damaging the die substrate.
- ROI (Return on Investment) Analysis:
- Preventive Cost: Investing just 10 minutes per week in chemical soaking or light polishing costs almost nothing.
- Failure Cost: 100 precision workpieces scrapped due to surface scratches + 2 hours of downtime for intensive grinding labor + the reset cost from permanent loss of mold accuracy (worth several thousand yuan).
- Conclusion: The ROI of preventive maintenance typically exceeds 1:50. It’s far better to establish scientific cleaning habits now than to wait until the mold is beyond repair.
For more detailed maintenance ROI data and downloadable brochures, visit ADH’s technical documentation center.
II. Preparation Phase: Safety Assurance and Precision Tool Configuration
Before touching the mold with a blade, it’s crucial to establish a “surgical-grade” preparation procedure. Many irreversible mold damages occur not on the production line, but at the moment the wrong tool is used for cleaning. The goal of this stage is crystal clear: ensure absolute personnel safety (LOTO is non-negotiable) while configuring a precision tool system capable of removing buildup without compromising micron-level mold accuracy.
2.1 On-Site Safety and Environmental Control (EHS)
Cleaning a mold may seem like simple manual work, but because it involves high-energy equipment and exposure to chemicals, strict EHS (Environment, Health, and Safety) protocols must be followed. Ignoring these details can lead not only to personal injury but also to costly damage to precision machine components from flying metal debris.
- Energy Isolation (LOTO) — Absolute Red Line
- Zero Energy State: This means more than pressing the emergency stop button. The main power supply must be cut off, and proper lockout/tagout procedures applied.
- Physical Support Against Falling: In hydraulic press brakes, the ram carries significant gravitational potential energy. When cleaning the lower die or changing molds, always use Safety Blocks to physically support the ram. This is the only safeguard against accidental hydraulic pressure loss that could cause the ram to drop and crush fingers.
- Residual Energy Release: Ensure hydraulic accumulators are completely depressurized and electrical capacitors fully discharged.
- PPE Protection Upgrade
- Respiratory Defense: Cleaning dry metal buildup (especially when using an oil stone) generates micron-level zinc or aluminum oxide dust. Always wear an N95/P2-grade dust mask to prevent inhalation of metallic fumes that could damage the respiratory system.
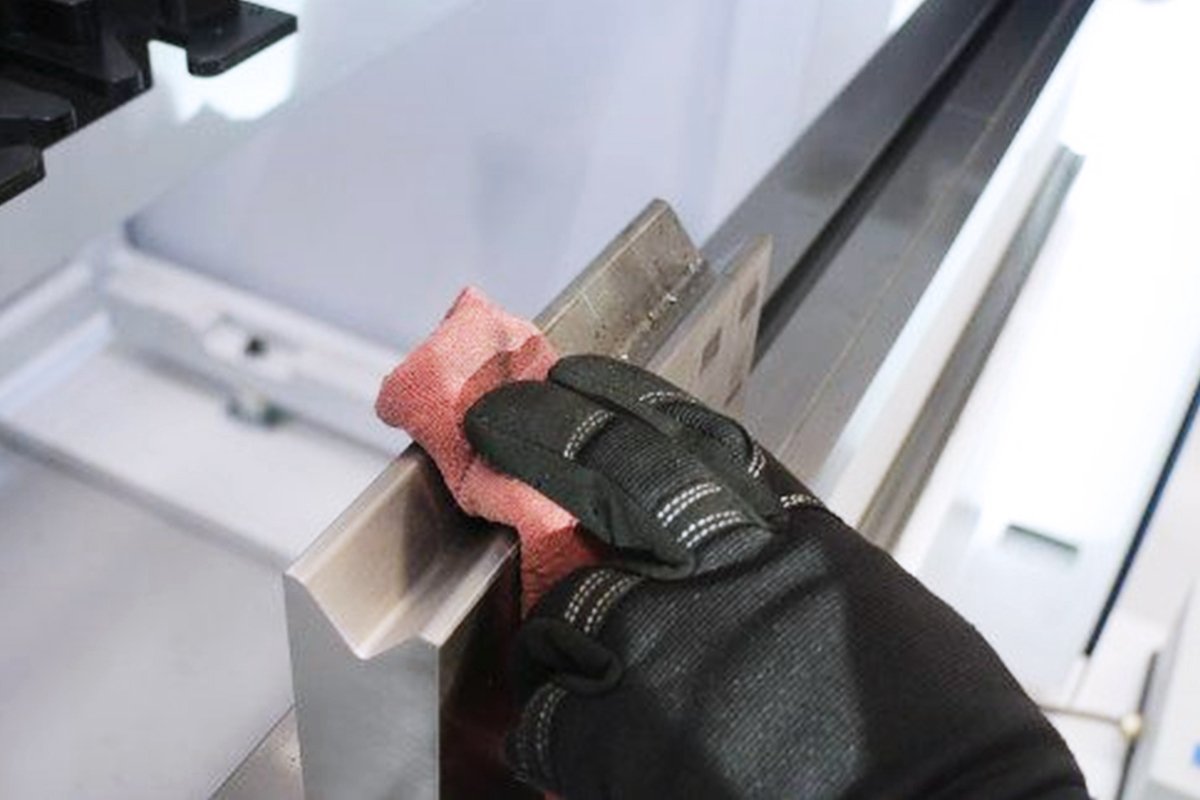
- Chemical Barrier: When using solvents (like degreasers or zinc-removal agents), ordinary cotton gloves offer no protection. Wear nitrile gloves to prevent chemical penetration and skin burns.
- Precision Component Masking
- Protect Linear Scales and Backgauges: During cleaning, oil-stone slurry or metal debris can splash into the linear scale reader head or adhere to the screw rods of the backgauge fingers, leading to costly repairs. Always wrap these sensitive parts securely with industrial cling film or lint-free cloths.
- Lower Die Rail Protection: Before cleaning, cover the clamping slots on the lower die base with magnetic rubber strips or strong adhesive tape. This prevents metal chips from falling into the guide grooves, which could cause uneven mold seating and compromise bending angle consistency.
If you need help setting up your maintenance safety workflow, feel free to contact us for expert guidance.
2.2 Expert Tool Kit Strategy

Say goodbye to angle grinders, steel files, and wire brushes—your toolkit should resemble a dentist’s, not a blacksmith’s. Our guiding principle: use hardness differences for physical separation, chemical properties for softening binders, and never cut into the mold body itself.
A. Mechanical Cleaning (Precision Micro-Cutting)
- Precision Oil Stone — The Core Weapon
- 400# (Coarse Grinding / Buildup Removal): Used only for removing visible metal buildup (Pickup) with protrusion >0.1 mm. Operate with extreme care, targeting only the buildup surface, and never touch the mold steel substrate.
- 800# (Fine Refinement / Restoration): The main workhorse. Ideal for removing buildup roots and restoring surface smoothness of the V-groove. Choose aluminum oxide (red stone) or silicon carbide (green stone) materials.
- 1200# (Mirror Polishing): Used for finishing. Provides ultra-fine surface smoothing, reducing surface roughness (Ra), and thus delaying future buildup formation.
- Working Medium: Always use grinding oil or kerosene with oil stones—never dry grind.
- Industrial Abrasive Pad (Scotch-Brite™) — Flexible Polishing
- Maroon (7447): Moderate cutting power (equivalent to 0-grade steel wool). Excellent for removing oxide film and light aluminum residue; conforms to mold geometry without altering R-angle precision.
- Grey (7448/64660): Ultra-fine polishing grade (equivalent to 00-grade steel wool). Used for final surface densification treatment.
- Caution: Avoid using the green heavy-duty pad. Its cutting power is too aggressive and can easily scratch the mold surface, leaving deep marks.
- Soft Scrapers — Hardness Differential Principle
- Brass Scraper: Exploits the much lower hardness of brass compared to mold steel (42CrMo4), allowing vigorous removal of buildup without risk of scratching the substrate.
- Hard Plastic / Acrylic Scraper: Designed for cleaning zinc powder layers—completely risk-free and ideal for rapid large-area decontamination.
B. Chemical Aids
- Penetrating Degreaser: Products like WD-40 or industrial degreasing sprays not only clean but also soften. They dissolve aged oils and carbides binding metal particles together, making buildup more porous and easier to remove mechanically.
- Specialized Zinc Layer Stripper: Essential if your plant frequently processes galvanized sheets. Inhibitor-containing zinc removers chemically dissolve zinc buildup like melting sugar—an effective complement to physical methods, with no harm to the steel substrate.
C. Inspection Tools
- High-Intensity Flashlight + 10× Magnifier: Microscopic crystal nuclei invisible to the naked eye are the seeds of future buildup. Conduct thorough side lighting inspections to ensure zero residue.
- Radius Gauge + Straightedge: These are your post-cleaning auditors. After cleaning, check for deformation of R-angles and loss of V-groove straightness. This is the definitive standard for verifying cleaning quality.
III. Practical Exercise: Graded Response Cleaning Procedure

Cleaning a mold is far more than a simple wipe-down—it’s a precision restoration of micro-surfaces. Treating all buildup with a one-size-fits-all approach is a crime against fine tooling. A wrong cleaning method can be more destructive than the buildup itself—it can distort the V-groove geometry and collapse the entire tolerance system of the mold.
What we need is a standardized cleaning procedure based on a Graded Response system. Much like a doctor’s treatment plan, the cleaning method should vary according to the severity of the buildup—choosing the least invasive yet most effective approach for each case.
3.1 Level 1: Routine Maintenance (for oil stains and light dust)
Scenario: The mold surface shows dark smudges but feels smooth to the touch, with no noticeable roughness—this is the buildup’s “latent stage.” Primary objective: Before the residue bonds firmly with the base metal, use chemical softening and gentle physical removal to detach contaminants, restore friction properties, and achieve absolute zero abrasion.
Chemical Solvent Softening (Solvent Soak)
- Procedure: Evenly spray an industrial-grade degreaser (or WD-40) along the inner wall of the V-groove and let it sit for 3–5 minutes—no shortcuts.
- Underlying principle: Many operators make the mistake of spraying and immediately wiping, which renders the process ineffective. The solvent needs time to penetrate and dissolve the carbonized oils and binders that glue metal particles together. Once that structure breaks down, the metallic dust loses its adhesive grip.
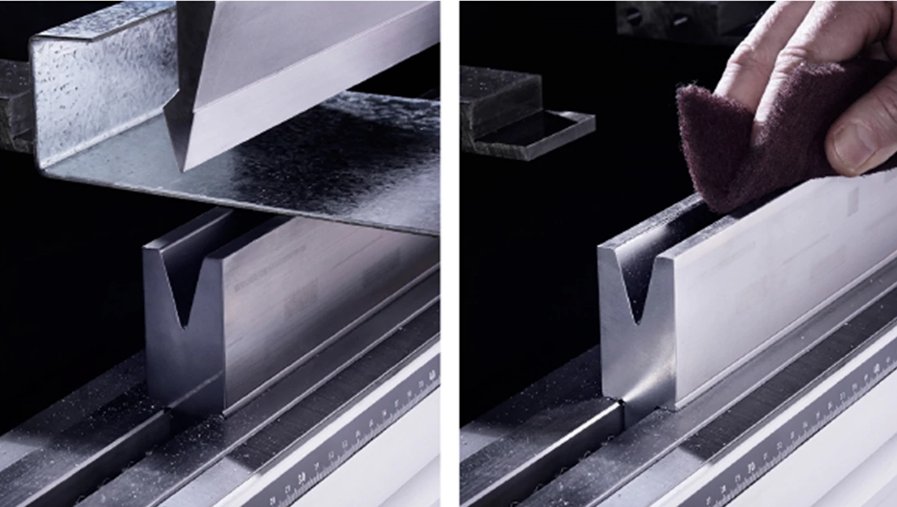
Longitudinal Wiping
- Tool selection: Use only Maroon Scotch-Brite™ 7447 industrial pads, whose cutting action is comparable to grade 0 steel wool—effective at removing oxidation without damaging the hardened layer.
- Technique: Strictly wipe along the V-groove length (longitudinal direction) with back-and-forth strokes.
- Critical warning: Never wipe crosswise (perpendicular to groove length). Factory grinding marks are typically longitudinal; following the grain preserves surface smoothness. Crosswise wiping creates countless microscopic “washboard” scratches that act like serrations during bending, accelerating secondary buildup instead of preventing it.
Safe Air Purging
- Technique: Position the air gun nozzle at a 30°–45° angle and blow toward one end of the mold to lift and eject debris from the groove.
- Safety details: Never blow directly downward into the groove—this can force fine metal particles into microcracks on the steel surface. Also, aim away from the backgauge and optical scale to prevent contamination of precision components.
3.2 Level 2: Removal of Stubborn Metallic Buildup
Scenario: Running a finger across the mold shoulder reveals roughness or resistance, sometimes with visible silver-white metallic lumps—this is a cold weld. Primary objective: Use precision micro-cutting techniques to surgically excise the “parasitic” metallic deposits while preserving the mold’s steel substrate with zero material removal.
Subtractive Principle
- The guiding rule is simple: remove the buildup, not the steel. Any abrasion of the mold body will alter the R-radius accuracy by microns.
Precision Stoning Strategy
- Preparation: Pre-soak 800# precision oilstones in honing oil or kerosene for at least 10 minutes. This saturates the pores with lubricant and prevents dry grinding scratches.
- Technique: Hold the stone perfectly parallel to the V-groove’s working surface. For spot buildups, use short strokes (<50mm) with very light pressure in a back-and-forth motion.
- Tactile feedback (expert-level skill): This is the sole indicator of when to stop. As the stone passes over the buildup, you’ll feel distinct roughness and resistance. With continued strokes, that resistance fades—once the surface feels silky smooth, stop immediately. Any further action begins cutting into the mold steel itself.
Low-Speed Fiber Wheel Polishing
- Application: For larger areas with light sheet-like adhesion, manual cleaning may be inefficient—use pneumatic tools equipped with nylon fiber wheels.
- Speed control: Maintain low rotational speed (<2000 RPM).
- Mechanism: Excessive speed generates instant heat (>300°C), causing brittle aluminum or zinc residues to soften and smear across the mold surface—creating a tougher secondary contamination instead of cleaning it.
3.3 Level 3: Extreme Condition Restoration (for hardened layers and corrosion)
Scenario: The buildup has undergone work hardening (darkened and hardened) or is accompanied by rust and pitting. Conventional physical cleaning becomes ineffective or inefficient. Primary objective: Deploy heavy-duty methods for deep restoration while exercising strict process control to prevent over-corrosion or dimensional distortion.
Chemical Pickling/Passivation
- Formula upgrade: Abandon highly corrosive hydrochloric acid. Use a citric acid-based solution instead. Citric acid’s strong chelating ability allows it to react preferentially with free iron and oxides, while its corrosion rate on sound steel is minimal.
- Closed-loop procedure: Apply or soak for 5–10 minutes → neutralize with alkaline water → rinse with pure water → displace moisture using WD-40.
- Warning: Never skip the neutralization step. Residual acid can cause severe intergranular corrosion and trigger hydrogen embrittlement, leading to sudden mold fracture under heavy load.
Micro-Blasting Process
- Media restriction: Never use aluminum oxide or silicon carbide. These abrasives are extremely aggressive and can alter the V-groove’s R-radius and width within seconds—effectively destroying the mold.
- Proper media: Use glass beads (#100–#120). Their spherical shape delivers a peening and flaking effect on brittle buildup rather than cutting into the substrate.
- Parameter control: Operate at low air pressure (<3 bar), keep nozzle distance >150mm, and use sweeping motions—never hold the jet stationary at one point.
Advanced Technology: Dry Ice Blasting
- Principle: Dry ice pellets at −78°C are propelled at supersonic speed to strike built-up deposits. The extreme difference in thermal expansion between the two materials triggers a “thermal shock,” causing the brittle buildup to contract and crack instantly. As the pellets sublimate—expanding nearly 800 times in volume—the gas blast lifts contaminants away from the surface.
- Advantages: Currently the most efficient in-line cleaning solution available. It is non-abrasive (won’t damage corner radii), leaves no secondary residue (dry ice sublimates), and requires no mold disassembly. For high-end workshops that demand peak productivity, this is the ultimate maintenance technology.
IV. Quality Verification and Restoration: A Closed-Loop System
Finishing the cleaning process does not mean maintenance is complete. Many operators assume that as long as the V-groove “looks clean,” the job is done—but that misconception often leads to disaster.
Without proper passivation and verification, the mold surface remains in a highly unstable, “energized” state and may fail again within three days, sometimes accumulating buildup even faster than before. True expert-level maintenance requires a complete closed loop—from sensory inspection to physical restoration.
4.1 Evaluation System for Cleaning Effectiveness

Don’t trust your eyes alone—interrogate your mold with the sensitivity of your fingertips and the objectivity of data.
- Forensic Visual Inspection
- Operating Method: Overhead lighting cannot reveal microscopic residues. Use a high-lumen flashlight at a low 15°–30° angle to illuminate the inner walls of the V-groove.
- Evaluation Criteria: Under side lighting, the load-bearing surface of the V-groove should appear uniformly matte in its natural metallic tone. Any slight shadow, dark spot, or variation in reflectivity usually indicates that the root of the buildup has not been fully removed and the mold must be reprocessed. Also check for transverse scratches perpendicular to the bending direction—these are breeding grounds for future buildups.
- The “Catch Test” — The Gold Standard
- Core Logic: The human fingernail is far more sensitive to micron-level surface irregularities than most instruments. It’s the fastest and most reliable inspection method on the shop floor.
- Execution: Press your fingernail vertically against the V-groove surface (in the same direction as the sheet metal slides during bending) and slowly draw it across the load-bearing shoulder with gentle pressure.
- Interpretation:
- Resistance or Catch: Any feeling of drag, vibration, or snagging means microscopic hardened particles or burrs remain. Production must not resume—return to Level 2 finishing for precision honing with an oilstone.
- Smooth Glide: If the nail glides effortlessly, like over glass, the surface passes inspection.
- Sacrificial Test Bend
- Purpose: To verify that the cleaning process hasn’t altered the mold’s geometry (e.g., rounded corners flattened or groove widened).
- Method: Use scrap material of the same type and thickness to perform a 90° test bend.
- Data Verification: Measure the bend angle at three points—left, center, and right—along the bend line. If the deviation exceeds 0.5° (typically the center being larger), it indicates that aggressive cleaning—especially blasting or over-grinding—has caused localized mold wear. At this stage, cleaning alone won’t suffice; CNC compensation or precision regrinding is required.
4.2 Surface Reconditioning and Reset
A freshly cleaned metal surface is like an “open wound”—highly reactive and prone to oxidation or contamination. It must be immediately “sealed” to prevent deterioration.
- Demagnetization
- The Invisible Killer: Mechanical polishing—especially with powered tools—and high-frequency friction can induce residual magnetism on the mold’s steel surface. This magnetism attracts fine ferrous dust from the air, which under high bending pressure becomes the seed for new buildup formation.
- Solution: A veteran technician’s secret—run a handheld demagnetizer along the entire mold until the Gauss meter reads zero. Skipping this step will drastically reduce the durability of your cleaning results.
- Dry Film Lubrication
- Proper Application: Never use the mold bare after cleaning. Immediately apply a layer of molybdenum disulfide (MoS₂) dry-film lubricant. MoS₂ particles embed into the microscopic pores of the metal surface, forming a solid lubricating layer that withstands over 10,000 psi. It prevents oxidation and rust while providing excellent anti-adhesion protection during the initial break-in period.
- Critical Warning: Avoid grease, motor oil, or petroleum jelly. These viscous lubricants quickly trap dust and oxide particles, forming an abrasive paste that accelerates mold wear.
- Alignment Reset and Calibration
- The Final Safeguard: Cleaning often involves disassembling the mold. Before reinstalling, thoroughly clean the die holder and guide rails with WD-40 and a lint-free cloth. Even tiny metal chips trapped underneath can cause micron-level angular deviation.
- Alignment Check: Slowly close the mold to verify that the upper punch tip aligns precisely with the center of the lower V-groove. Cleaning may reveal pre-existing wear misalignment—recalibrate the centerline to ensure uniform force distribution.
V. Advanced Prevention: From Cleaning to Clean-Free Operation
No matter how thorough, cleaning is still a reactive measure—a form of damage control. For modern workshops that pursue maximum efficiency, it’s far better to engineer a metallurgical and physical “immune system” than to repeatedly remove buildups. Expert-level maintenance aims to eliminate adhesion risk through proactive engineering design.
5.1 Physical Isolation: Eliminating Adhesion at the Source
If the sheet metal never makes atomic-level contact with the die steel, micro cold welding cannot occur. This is the essence of physical isolation—creating an impenetrable barrier between the two surfaces.
- Urethane Die Film: A Low-Cost Strategic Barrier
- Working Principle: A high-strength polyurethane film is laid over the lower V-die as a sacrificial layer. Under bending pressure, the film blocks metal ion migration, completely eliminating the conditions that cause buildup.
- Practical Selection Guide:
- 0.4mm (0.015") thickness: For aluminum sheets. Ideal for aluminum or precision sheet metal up to 1.5mm thick. Its excellent flexibility ensures that the bending radius remains virtually unaffected—making it the most cost-effective solution for preventing aluminum adhesion.
- 0.8mm (0.030") Specification: Heavy-Duty Protection. Designed for stainless steel or sheets thicker than 2mm, this film withstands extremely high shear forces without tearing, effectively preventing hard particles on stainless surfaces from scratching or wearing down the die.
- ROI Analysis: Although the non-marking film is a consumable (costing about $2–5 per meter), its return on investment (ROI) often exceeds 300%. This is because it dramatically reduces downtime, labor costs for die polishing every two weeks, and scrap losses from dented mirror-finish aluminum panels.
- Composite Die Strategy
- Full Urethane Dies (Urethane Pads): For large-radius bends, replace traditional steel dies with solid urethane blocks. Acting like an incompressible fluid—similar to hydraulic oil—the urethane envelops the sheet and forms it through hydrostatic pressure. Its completely non-metallic surface eliminates the possibility of galling at the physical level.
- Heterogeneous Metal Inserts: Exploit the metallurgical property that dissimilar metals are less prone to adhesion. Embed Ampco Bronze or hard alloy inserts in high-wear zones such as the V-groove shoulders. Copper alloys have natural self-lubricating properties, allowing them to resist adhesion from steel or aluminum sheets even under dry friction.
5.2 Surface Engineering Upgrades
If steel dies are unavoidable, give them a microscopic “bulletproof vest.” By modifying the chemical and physical properties of the die surface, you can make aluminum chips slide off instead of sticking.
- Advanced Coating Technologies
- DLC (Diamond-Like Carbon Coating): The current champion of anti-adhesion. With an exceptionally low friction coefficient (0.05–0.1, compared to ~0.5 for untreated tool steel), aluminum particles behave like water droplets on a lotus leaf—they simply cannot adhere. Though the initial cost is higher, DLC-coated dies typically last 5–10 times longer than standard ones.
- TiCN (Titanium Carbonitride): Known for its extreme hardness (up to 3000 HV), TiCN coatings are excellent against abrasive wear—for example, when forming stainless steel. However, their anti-adhesion performance with aluminum is somewhat inferior to DLC.
- Cautionary Note: Avoid Chrome Plating. Although chrome layers are hard and smooth, they are relatively thick and bond less tightly than PVD coatings. Under the high shear stresses of bending, chrome layers can flake off; once that happens, the detached chromium shards can instantly scratch the workpiece, leading to catastrophic defects.
- Nitreg-ONC® Post-Oxidation Nitriding Treatment
- A cost-effective, all-purpose solution. Unlike conventional gas nitriding, the ONC process includes a critical post-oxidation step that forms a black Fe₃O₄ (magnetite) film on the die surface. This microporous oxide layer acts like a sponge, absorbing lubricant molecules to create a long-lasting self-lubricating surface—ideal for workshops that need versatility across different materials but have limited budgets.
5.3 Establishing Standard Operating Procedures (SOPs)
Technology is the hardware; management is the software. Don’t wait until the die is dirty to think about maintenance—make preventive care an integral part of every bending cycle. Maintenance should become as natural as breathing.
- Maintenance Scheduling: From “Gut Feeling” to “Data-Driven”
- Cycle-Based Maintenance: Abandon vague time-based rules like “clean once a week.” Modern press brakes come with built-in counters—use them. Set a maintenance interval of every 2,000–5,000 strokes (depending on sheet cleanliness) for a Level 1 chemical wipe-down.
- The 3-Minute Quick-Check Protocol
- A must-do during shift changes or die swaps—just three simple steps:
- Light: Use side lighting to inspect the V-groove for visible dark spots.
- Touch: Run a fingernail along the shoulder to feel for any micro-level resistance.
- Air: Blow off the lower die base and guide rails to ensure the mounting surface is clean and debris-free.
- Lubrication Standards: Eliminate Both “Dry Friction” and “Grease Sludge”
- Micro-Lubrication Strategy: Even so-called “dry bending” of galvanized or aluminum sheets benefits greatly from vanishing oil lubrication. It forms a crucial protective film under extreme pressure during bending and then evaporates quickly, leaving the part surface clean and residue-free.
- Strict Prohibitions: Never use engine oil, grease, or petroleum jelly. These sticky substances attract dust and mill scale, forming a powerful abrasive paste that accelerates tool wear and galling instead of preventing it.
VI. Pitfall Prevention: Common Mistakes and Troubleshooting
More often than not, dies aren’t ruined by use—they’re ruined by misguided repairs. When dealing with stubborn metal buildup, impatience often drives operators to take drastic measures.
To avoid turning a multi-thousand-dollar precision die into scrap metal, it’s essential to maintain a strict “Do Not” list and develop strong diagnostic discipline.
6.1 Fatal Mistakes to Avoid (The “Don’t Do This” List)
The following practices are still common in poorly managed workshops—but for operations requiring micron-level precision, they are absolutely destructive:
- Tool Blacklist: Absolutely Forbidden Cutting Tools
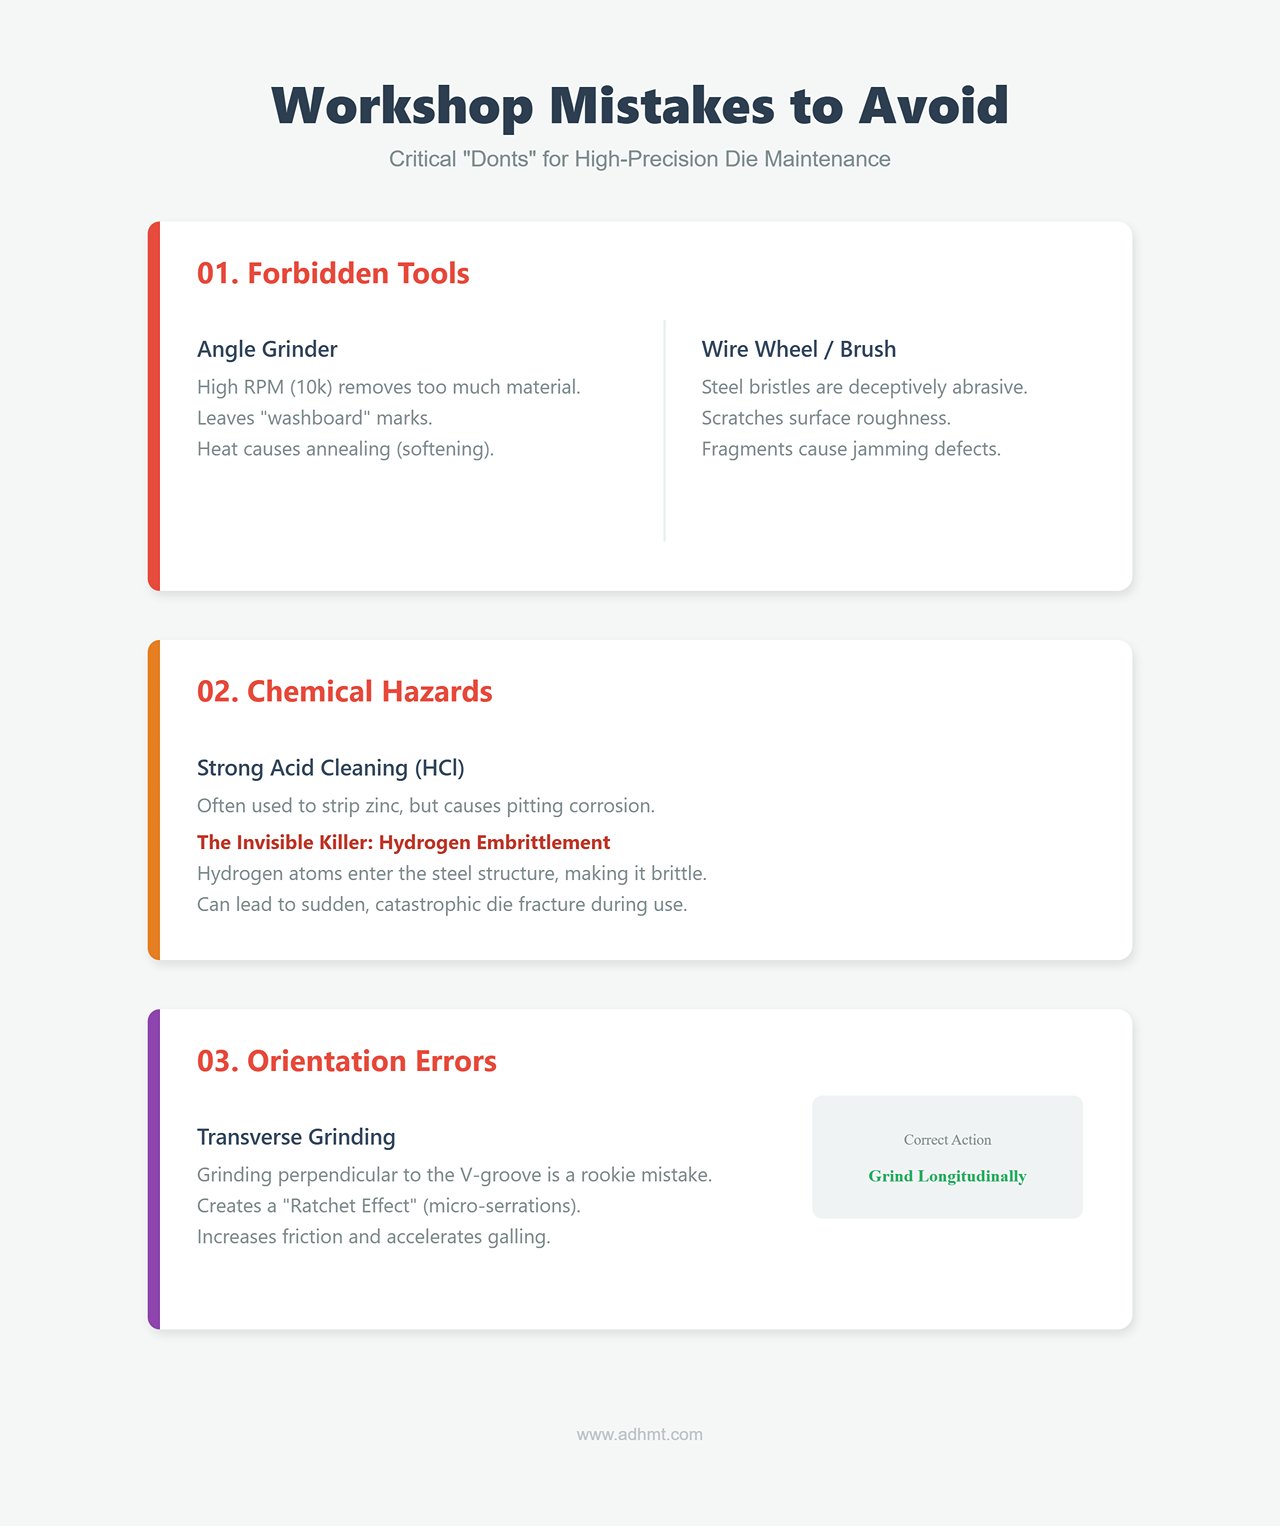
- Angle Grinder: The number one enemy of die maintenance. Operating at up to 10,000 RPM, its material removal is massive and uncontrollable. It leaves microscopic “washboard” marks that destroy flatness, and the frictional heat can cause surface annealing or “blue brittleness,” permanently degrading the die’s hardened layer and drastically shortening its lifespan.
- Wire Wheel/Brush: Deceptively gentle but dangerously abrasive. High-speed steel bristles scratch the die surface, increasing roughness. Worse, broken wire fragments can lodge in guideways or embed in the workpiece, causing jamming or surface defects. For soft or unhardened dies, they are strictly off-limits.
- Chemical Misuse: The Invisible Corrosion Trap
- Strong Acid Cleaning (e.g., Hydrochloric Acid): Some operators use toilet cleaner (which contains HCl) to strip zinc residue. While it dissolves zinc quickly, it also causes severe pitting and intergranular corrosion. Even worse is hydrogen embrittlement—hydrogen atoms from the acid penetrate the steel lattice, reducing toughness. Under high-tonnage bending impact, an acid-attacked die can fracture suddenly and catastrophically.
- Process Errors: Orientation Determines Survival
- Transverse Grinding: This is a classic mistake often made by beginners. When you use a sharpening stone or sandpaper perpendicular to the length of the V-groove, the microscopic scratches you create run across the material’s flow direction. This texture produces what physicists call a “ratchet effect” — during bending, these micro-serrations scrape against the sheet like tiny saw teeth. The result? Increased friction and an ideal environment for rapid galling recurrence. Remember: always grind along the V-groove’s longitudinal direction.
6.2 Troubleshooting Q&A
When standard cleaning procedures (Levels 1–3) fail to solve the problem or the issue keeps coming back, you need to perform a deeper diagnostic analysis—just like a doctor investigating the root cause of an illness.
Q: I’ve cleaned off all the galling thoroughly, so why do I still see indentations on the back of my workpiece?
- A: The die has suffered geometric failure.
- Diagnosis: At this point, the issue isn’t contamination but deformation. Long-term galling may have eroded portions of the steel, or excessive grinding may have distorted the V-groove shoulder’s radius (R) from its original smooth curve into an irregular polygon. In other cases, the radius may have flattened due to wear, concentrating contact stress abnormally.
- Countermeasure: Use a radius gauge to compare with standard clearance profiles. If the radius deviates beyond tolerance, on-site cleaning will no longer help—the die must be sent to a professional manufacturer for precision regrinding.
Q: The die surface has deep pits from corrosion caused by galling. Can I repair it with welding?
- A: Extremely risky and not recommended.
- Diagnosis: Bending dies are typically made from high-strength alloy steel such as 42CrMo4. Welding introduces intense heat that creates a heat-affected zone (HAZ) in the base material, resulting in highly inconsistent hardness and invisible internal stress cracks.
- Countermeasure: For precision bending dies, deep pitting generally means the tool is beyond repair. If repair is unavoidable due to cost constraints, limit it strictly to non-critical areas and ensure thorough post-weld heat treatment and stress-relief annealing. A better option is to downgrade the die for rough forming operations where surface quality is not important.
Q: When bending aluminum sheets, galling reappears within hours of cleaning. What can I do?
- A: Your process and material are fundamentally incompatible.
- Diagnosis: This indicates that the current die surface finish or coating cannot handle the friction characteristics of that particular aluminum alloy—especially soft, adhesive types like 5052 or 3003. Repeated cleaning traps you in an endless “stop-clean-stick” cycle.
- Ultimate Countermeasure: Stop fighting the symptom—prevent it physically. Introduce a urethane protective film as a barrier layer. Although it slightly increases the per-meter bending cost, it eliminates the root cause of adhesion. Overall, by reducing downtime and scrap rates, the ROI far exceeds the cost of repeated manual cleaning.
Q: How can I tell whether a die needs cleaning or professional regrinding?
- A: Assess the shoulder’s touch and angular consistency.
- Diagnosis: Run your finger along the V-groove shoulder—if you feel not just roughness but distinct depressions or steps, or if a full-length test bend shows accurate angles at both ends but deviations in the middle (a clear sign of central wear), the die has experienced macroscopic wear.
- Countermeasure: At this stage, no cleaning can restore precision. The die must be taken offline for professional regrinding. Continuing to use it will only prompt the press brake to apply higher pressure to compensate for angle deviation, accelerating machine wear.


